
I played a couple more games of 'Simplicity in Practice' over the past three days, trying out the setup variations in THIS POST.
The first game saw the Swedes allowed to place two of their units behind field defences. I reasoned that this is quite a strong advantage, so I required them to lose a unit to compensate; the field defences count as a lost unit if captured.
The Russians had to deploy two units 12" from their baseline (normal deployment is up to 6"). I felt this was a neutral variant since it can be both an advantage or disadvantage. They deployed two units of artillery in a position to bombard the defences.
The Russians had to deploy two units 12" from their baseline (normal deployment is up to 6"). I felt this was a neutral variant since it can be both an advantage or disadvantage. They deployed two units of artillery in a position to bombard the defences.


The Swedes had an edge in cavalry, with two units of heavy cavalry and some supporting lights, to the Russians' single unit of heavy cavalry supported by dragoons. The Russian cavalry had moved forward to cover the flanks of the artillery. The Swedes went straight into the attack.

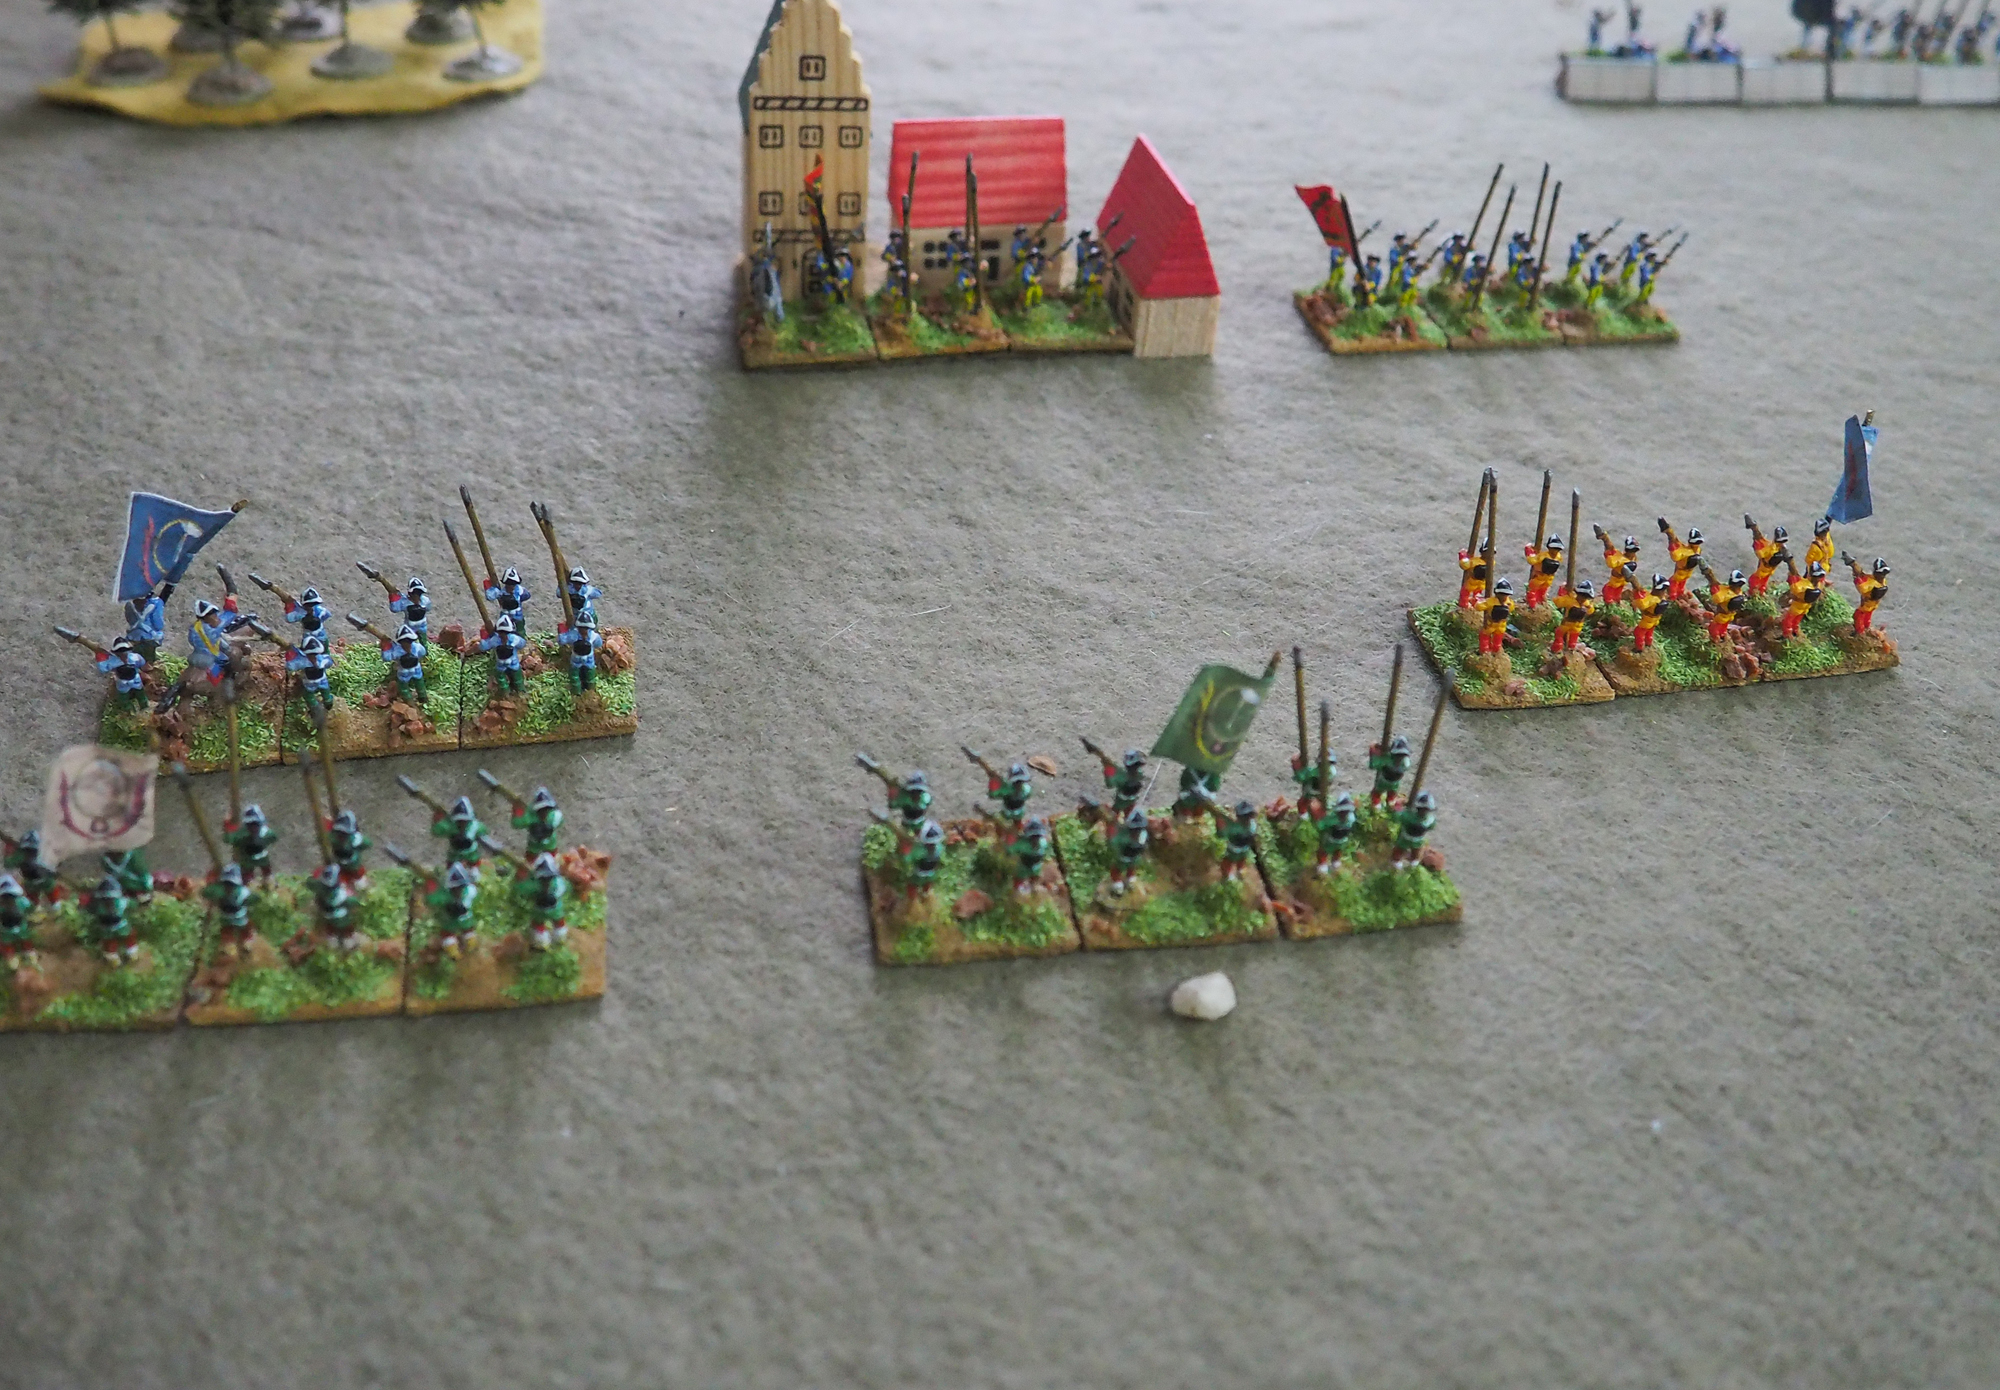
The Swedes also advanced to occupy a village in their half of the table, which would also count as a lost unit if the Russians could take it. The Russians had massed their infantry for an attack on the village.
The Swedes gained the upper-hand in the cavalry action on the Russian right, and quickly turned on the vulnerable artillery.

The Russian artillery was rolled up.

And the cavalry attack hit the flanks of the infantry attacking the village.


The Russians tried to turn to meet the multiple threats, but this left their units unable to retreat and prone to instant rout.

Soon it was all over. The Swedes hadn't lost a unit, whilst the Russians were pretty much wiped out.
To be honest posting the artillery in front of the defences in the open like that was a bad plan, since the Russians were then totally unable to defend it. And it would have taken ages to batter its way through the Swedish defences anyway; it would have been better deployed in front of the village to support a major attack there, whilst ignoring the Swedish field defences.
To be honest posting the artillery in front of the defences in the open like that was a bad plan, since the Russians were then totally unable to defend it. And it would have taken ages to batter its way through the Swedish defences anyway; it would have been better deployed in front of the village to support a major attack there, whilst ignoring the Swedish field defences.

The second game saw a denser terrain, including a fordable stream running across the battlefield. The Russians were forced to deploy in multiple lines in one half of the battlefield, caught on the march. The Swedes rolled two variants - they had to leave two units off-table at the start, which would appear as part of the random events process, and they also had to deploy two units in advance of the rest of the army. The bridge and village in their half of the field would both count as objectives for the Russians, so the Swedes deployed two infantry to defend them.

Massed Russian infantry. It would take them a couple of turns to get organised. Their cavalry was on their right, ready to turn and cross the stream.

The Swedish reinforcements turned up on their first turn. For those variant I was going to allow the side to also bring back a lost unit - representing the rallying of troops behind the lines - but have it already having suffered two hits. This would kind of offset the disadvantage of fighting two units down for part of the battle. The flank march already offsets this by allowing the units to come on in an advantageous position.

The Russian advanced, shaking their foot out into a line as they did.

Once again the cavalry met on the Russian right flank. This time the fight was fairly even with both sides having one heavy cavalry and some dragoons. The Swedes did have a second heavy cavalry unit, but it was deployed in support of the other flank.

The Swedish reinforcements had come on on their left flank, and would have to be moved over to help defend the village on the right. The Russians formed up quickly and efficiently and began their attack on the troops supporting the village.

The cavalry action became a stalemate, with neither side willing to risk commitment. The two units of dragoons shot at each other inconclusively.

The Russians wore down the Swedes, and attacked, routing the units supporting the village.

The Swedes brought up reinforcements to defend the bridge.

On the Russian right the cavalry stalemate continued.

But on their left their guard unit (for I gave both sides one unit of elite infantry) charged and took the village.


A bold attack also saw them take the bridge.

In theory I would require the Russians to be holding the two objectives at the end of the game (I play for 15 turns), but the Swedes were so depleted that it was unlikely they could have recaptured either one by the end of the game. So I declared a Russian victory.

The setup variations worked very nicely, creating some minor challenges and opportunities for both sides. Combined with random terrain and force composition, plus in-game random events it made for a satisfying series of games.
In these games I switched to the 1D6 method of shooting. This is slightly different to the original four D6 method, in that it means that cover is all or nothing, rather than something which reduces fire effect (kind of). However the change is negligible and it's a more streamlined way to play. COI hits on a 3+, DG, LI, ART hit on a 4+ and LC hits on a 5+. A hit scores 1DP. If the target is in cover then the DP is ignored on a 4+. The only downside to this method is that it doesn't factor into the rules for small units, which use reduced numbers of dice, but I will cross that bridge when I come to it.
In these games I switched to the 1D6 method of shooting. This is slightly different to the original four D6 method, in that it means that cover is all or nothing, rather than something which reduces fire effect (kind of). However the change is negligible and it's a more streamlined way to play. COI hits on a 3+, DG, LI, ART hit on a 4+ and LC hits on a 5+. A hit scores 1DP. If the target is in cover then the DP is ignored on a 4+. The only downside to this method is that it doesn't factor into the rules for small units, which use reduced numbers of dice, but I will cross that bridge when I come to it.

Those set up variations and the new random events seem to add a great deal to the solo game. Must give them a try...
ReplyDeleteHow is SIP by comparison to OHW? Does it up the workload for the solo player much?
To be honest they aren't that much more complicated - definately worth a look. No real effort to play at all.
DeleteThanks. When time permits I’ll gibe them a whirl.
ReplyDeleteI bought the Battlegames mag issues when they were recommended somewhere, and they look good for sure.... Love the way NT explains his rationale so well.