Monday 28 July 2014

Proclamations

In yesterday's post on The Campaign For Alto Peru I said that I was looking for a different way to determine victory in the campaign. At the moment it is based on your opponent having no Political Tokens left, which is OK in principle, but can, with certain strategies, lead to a potentially long campaign.

What I'd like is a system which still makes use of the Political Tokens, but uses them as part of the route to victory, rather than them being the direct cause.The idea I am looking at at the moment is Proclamations.

Firstly, a summary of two mechanisms in use in the campaign - Demoralisation Points and Political Tokens.

Political Tokens

Each player starts with two Political Tokens. Two more Political Tokens are placed in the centre of the table as Uncontrolled.

After a battle, the winner can make one political action.

An action can be:

  • Pick up a single uncontrolled Political Token from the centre of the table, adding it to their own collection. No roll is required for this.
  • Force their opponent to put one of their tokens into the centre of the table. This succeeds on a D6 roll of 4 or less.
  • Seize one of their opponents’ political tokens and add it to their own pile. This succeeds on a die roll of 2 or less.
The current victory conditions are that you win if your opponent has no tokens. Obviously if they win a battle and take an uncontrolled token, you would then have to win at least three battles against them to strip them of their controlled tokens.

Demoralisation Points

Both armies are always fielded with 12 elements - losses may be replaced after the battle and new units recruited, but both sides will always field a 12 element army.

After a battle, one or both sides may gain or lose Demoralisation Points. The lowest score you can have is 0. After a battle, check the element loss differential:

1-2 Winner -1 DP, Loser +1DP
3-4 Winner -2DP, Loser +1DP 
5+ Winner -2DP, Loser +2DP

At the start of each battle both players roll a D6. On a score equal to or less than your current DP you have a break-point of only 4 elements (8AP). Otherwise your breakpoint is 6 elements (12AP). Not that both armies could have a break-point of 4 elements.

With those two rules in mind, this is how I now see victory working in a campaign:

Proclamations

At the end of the Political phase of the turn, the side that won the battle may choose to make a Proclamation in order to win the campaign. At least two battle must have been fought - no Proclamation can be made after the first battle, regardless of the result.

The side making the Proclamation adds the number of Political Tokens they control to their opponent's Demoralisation Points. From this total they subtract the number of Political Tokens their opponent controls and the number of Proclamations they have already made. This gives the side's Political Capital.

For a Proclamation to succeed, roll equal to or less than the Political Capital on a D6. A roll of '6' is always a failure. If the Proclamation succeeds, then you have won the campaign, otherwise proceed to the next battle.

Example: In the campaign I played yesterday the situation after the second battle was:
Royalists - 2 Political Tokens, 0 Demoralisation Points
Patriots - 0 Political Tokens, 3 Demoralisation Points 

The Royalists won the second battle, so could make a Proclamation. Their Capital is 2 (Own Political Tokens) + 3 (Opponent's Demoralisation) - 0 (Opponent's Political Tokens) = 5. To succeed they would have had to roll a 5 or less on a D6.

By my reckoning this system should run a campaign to about 3-5 battles, which is enough for anyone.
Thoughts and comments are welcome.


Sunday 27 July 2014

The Campaign For Alto Peru - Revisited

Whilst preparing my paper armies for Liberated Hordes, I have been looking at possible tweaks to the rules, and these have extended to the simple campaign system I designed a couple of years ago - The Campaign for Alto Peru.

I have had a few ideas for things I wanted to change in it for a while, and came up with one or two new ideas during the week, so this afternoon I thought I'd give it a whirl and try some of the changes as I went along.

Both sides generate a 12 element army - I decided to give each four infantry, one cavalry and one artillery, all at militia grade, then dice on a table to see what the other troops were. I then rolled to see if any elements were upgraded to regular or elite. This generated the following armies:

Royalist - 6 x Militia Infantry, 2 x Regular Infantry, 1 x Militia Cavalry, 1 x Regular Cavalry, 2 x Regular Artillery

Patriot - 5 x Militia Infantry, 3 x Regular Infantry, 1 x Militia Cavalry, 2 x Regular Cavalry, 1 x Militia Artillery

I dice for generals. The Patriots ended up with an Average commander, whilst the Royalists' was Good and also had the Organiser ability, which meant that he could choose replacements to his army instead of dicing for them.

I am looking at adding some random setup events to each game, and threw together a quick table of possible alternatives - surprise attacks, flank marches, allies and temporary unit upgrades. Before a battle both sides roll, and on a 5 or 6 they get a roll on the table.

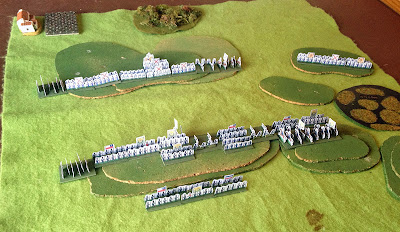
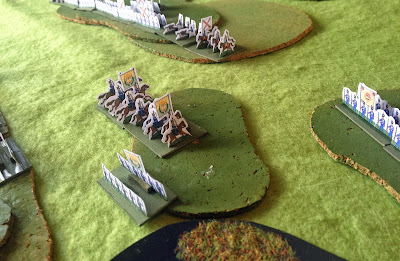
In the first battle the Patriots defended. They also got the Surprise random event, which meant that their Royalist opponents had to set up in at least three widely separated groups, and suffered a command penalty on the first bound. In this picture the Patriots are in the foreground, whilst the three groups of Royalists are in the background.


The setup led to an interesting battle, with the Royalists advancing a column of infantry through the rocky ground, whilst holding on the other flank with a force of infantry and artillery on a small hill. The Patriots launched an aggressive attack on the hill, leaving militia to screen the flank march.


It was a close game; both side inflicted considerable casualties on each other, and by the end were on five elements lost each. But the Royalists got the next kill to win a pyrrhic victory.


The Patriots lost 4 x Militia Infantry, 1 x Militia Cavalry and 1 x Regular Cavalry. The Royalists lost 3 x Militia Infantry and 2 x Regular Artillery.

Surviving elements could possibly be upgraded, subject to a few restrictions. The Patriots upgraded their Artillery to Regular, whilst the Royalists upgraded a Militia Infantry to Regular. The Patriots got back a lost Militia Infantry element, and rolled for replacements to bring their army back up to 12 elements - 2 x Militia Infantry, 2 x Militia Cavalry and 1 x Militia Artillery. The Royalists got back both of their Regular Artillery, and their army was brought back up to strength with 3 x Militia Infantry.

In the campaign armies are always 12 elements strong. But losing a battle gives you demoralisation points, whilst winning one reduces them. Before each battle you roll against you score; if you roll equal to or less than it then your break-point for that battle is 4 elements instead of 6. It's possible for both armies to fail this check, of course, if they both have demoralisation points.

The final step was the politics. Firstly I rolled to see if either general was replaced. Neither were. The roll for the Patriot general was modified because he lost the previous battle, but the junta decided that he deserved at least one more chance. Then the Royalists, as the victors, could roll to adjust the supply of political tokens in play, which are the actual means of campaign victory. They elected to take one from the Patriots and move it to the uncontrolled pile. This requires a die roll to succeed, and it did. This left the Royalists with 2 political tokens, the Patriots with 1 and 3 in the uncontrolled pile. If a side has no political tokens left, it loses.

Into the second battle. The Patriots defended again, and there were no random events. Because the first battle was so close, the Patriots only picked up 1 demoralisation point, so had an easy roll to ensure that their break point was 6 elements.

The armies were (in case you've lost track):

Royalist - 5 x Militia Infantry, 3 x Regular Infantry, 1 x Regular Cavalry, 1 x Militia Cavalry, 2 x Regular Artillery

Patriots - 4 x Militia Infantry, 3 x Regular Infantry, 3 x Militia Cavalry, 1 x Regular Artillery, 1 x Militia Cavalry

The Royalists made a strong attack with their right, looking to overwhelm the Patriot left with a massed infantry assault.


The Patriots responded by advancing their right, hoping to overwhelm the cavalry on the Royalist left with musketry.


Fierce fighting saw both lines broken up, and a desperate Royalist commander had to divert most of his efforts to this part of the battlefield, stalling the attack on the other flank.


Deadly Royalist musketry prevailed, however, and the Patriots began to lose unit after unit.


A final cavalry charge swept away an element of Patriot militia to give the Royalists a 6-0 victory.


The main attack by the right flank was ready to go in, but was never needed.


I rolled for recovered losses and upgrades as before, but the political phase ended the game. Whilst the Royalist commander was replaced (winning two battles in a row makes this more likely - victorious commanders either move on to political careers or get replaced by jealous superiors), they were able to roll against, and take, the second Patriot political token, leaving the Patriots with none. If there had been another battle the Patriots would still be looking at an uphill struggle, with an army of newly-recruited militia against a now experienced and enthusiastic Royalist opponent. And the replacement Royalist general was a Good one too.

Although I only played two games, the tweaks and changes I'd made to the campaign system seemed to be OK. What I do need to look at is how final victory works. The political token system works after a fashion, but I might not have it as the direct cause of victory or defeat. I'm juggling an idea in my head where the tokens and accumulated victories add to a side's political clout. A side can choose to use their clout to make a Proclamation - either of independence or of loyalty to the Crown - which gives them a roll to win the campaign. The more clout you have, the more chance the roll has of success. The caveat is that your clout is reduced for each Proclamation you make, so you need to make it when the time is best, or future ones have less chance of success. I'm still juggling the numbers on this idea though.

Saturday 26 July 2014

Paper Figures In Action - The Battle of Maipo

With my Royalist and Patriot armies now all edged and finished, I gave them a debut outing this afternoon. I decided on another refight of the 1818 Battle of Maipo, because the figures are pretty much geared up for that, and it always gives an entertaining game. The rules were, of course, my 'Liberated Hordes' HOTT variant.

I played on a 2' x 2' board, set out as follows:


I went for a mostly historical deployment, rather than a free-form one. So although each side only had one general, I grouped the elements into the commands they were in on the day, and deployed those commands together. The armies were 600p apart - the artillery on both sides could shoot from the beginning.

Here's San Martin leading the Patriot army. In Liberated Hordes generals are part of an element, as in HOTT, but can move around from element to element rather than being limited to a particular one. hence they are represented by a small marker. San Martin was a Good general. This meant that once per game he could opt to roll two dice for PIPs, and keep the best score.


On the other side of the valley, General Osorio lurked at the back of his army, attached to the elite Burgos Battalion. Osorio was a Poor Coward. 'Poor' meant that his second PIP roll of '6' would be converted to a '1', whilst 'Coward' meant that he gave no combat modifier to the element he was with, plus if his element recoiled, or an element within one base-width was destroyed he had to roll a dice and on a score of '1' he would quit the field in panic. In Liberated Hordes the loss of a general doesn't cause an army to lose the battle, but obviously the effect it has on your command and control isn't good.


The Patriots started off the battle, sending their elite Horse Grenadiers to attack the flank of the main Royalist body. True to their historical deployment, The Royalists had a quarter of their force on a small hill detached from the main body. The Patriot plan was to screen them with a couple of elements of infantry, and use the Horse Grenadiers to hit the main body, bringing up the bulk of the army in support once the Royalists were in confusion.


The Royalists responded by advancing their left flank off the hill. Musketry drove back one lot of Horse Grenadiers.


The Horse Grenadiers switched their attack onto the Royalist left, but failed to make an impression.


The Royalists swung some of their dragoons in to support the infantry.


However attacking elite cavalry uphill with poor-quality militia is not a good plan, and they quickly routed.


This allowed the Horse Grenadiers to charger the Royalist artillery.


The Royalists responded by bringing up infantry support, whilst the artillery held off the cavalry attacks against all expectations.


The Royalist left pressed forward, with steady volleys driving back the Patriot cavalry and infantry.


With his right threatened, and the Horse Grenadiers making heavy weather of the enemy artillery, San Martin ordered a general advance. The column is the reserve, mostly of Chilean units of a lower quality than the Argentinians who make up the bulk of the army.


The Horse Grenadiers finally swept away the artillery, but an advance onto the flank of the enemy line was prevented by the supporting infantry.


The Royalist left continued to advance through the marshy ground and over the small hill.


The Patriots responded by organising a line.


San Martin pauses to get his line in order, feeding in some reserves and closing up the gaps. Now unable to support the advance of their army, some of the artillery was sent to the right.


The Patriot advance continues. Osorio had rolled a '6' for PIPs by this stage, so a possible '1' was on the cards. Pushing into his army was a good way to exploit the issues this would cause, especially as San Martin still had his Good general bonus in hand as well.


Osorio, the Royalist commander, chose this moment to have a run of bad PIPs (not even caused by his Poor rating), so the advance on the Patriot right stalled.


An overview of the battle.


With their advance in one easy to manage block, there were still spare PIPs on the Patriot side to organise a proper defence on their right. But the Royalists continued to hold.


San Martin's line advanced into musketry range ...


 ... and the first volleys saw the Royalist line disrupted. The Royalist infantry was in fact fairly good - all regulars, with a couple of elites as well. That of the Patriots was a mix of regulars and more brittle militia, so bad rolls could see their line broken up badly; not good if you are the one launching the attack.


Another volley saw the loss of a Royalist element.


Having driven back the Royalist infantry opposing them, the Horse Grenadiers moved over to support their right flank. The Royalists here were in a tricky position now.


The Patriots charge! All along the line they advanced rapidly with fixed bayonets, whilst on the flank their cavalry charged the remaining Royalist element.


The element to which San Martin was attached found itself fighting that to which his opponent was part of.


The cavalry melee on the Patriot left.


Disaster! Argentinian infantry overwhelm an element of elite Royalist infantry. Osorio fails to rally them - in Liberated Hordes an attached general gives you a +1 to a losing combat score (instead of a straight 1 in combat) but as a Coward Osorio doesn't have this advantage. He, and his element, are swept away.


The other element of elite infantry falls to some deadly concentrated musketry.


With their elite core, and their general, gone, it's all over bar the shouting for the Royalists. Another element falls to musketry ...


... and whilst the Horse Grenadiers fail to make an impression on the Royalist left, the Royalist losses are enough for them to lose the battle.


The Royalist losses - one cavalry, one artillery, four infantry and their general. The Patriots lost nothing; the battle was a total whitewash.


The final position.


I thought that the figures looked really nice in action, and look forward to trying some more games with them. The scenario went well too. Historically the Patriots won as well, but in the last couple of refights the Royalists have won, mostly by breaking up the Patriot attack as it went in, the picking on the weaker militia infantry to keep the line disrupted.

Friday 25 July 2014

Special Project Night

Vows of secrecy that are the strongest a man can take bind me and prevent me from telling you what Caesar and I played last night. All you get is a photo of the terrain, because it came out particularly well.


This town is made up of 1/300th buildings from Hovels and Steve Barber.


I can say that we played an interesting, asymmetrical scenario which turned out to be a closer game than it first appeared.

We played until well gone 11pm, so it was midnight by the time we'd packed up and left the University. I got a right telling-off for getting in so late without telling Mrs Kobold why I was late.

Meanwhile others were playing Blitzkrieg Commander - a rerun of the Narew scenario we played a few months ago.


I think the Russians won it. As ever there were lots of burning tanks.


Thursday 24 July 2014

Paper Royalists And Patriots

I put together my South American Liberation artillery elements this afternoon - three for each side.

Here they are:


And here are two forces lined up to show roughly how they'd look in a game. These are the elements you'd use to refight the Battle of Maipo using Liberated Hordes - an obvious choice since most of the units on Junior General as based on those from either Maipo or Chacabuco.


Related Posts Plugin for WordPress, Blogger...