Tuesday 29 January 2019

Squids And The Knights Of Simba

I played another game of HOTT yesterday, with my Squidmen (figures by Evil Gong) taking on The Knights of Simba. The latter army is one I put together for a tournament many years ago and is made up of figures from Tabletop Games. The 'Knights' were actually run as beasts, and are lion-centaurs. They have warband allies in the form of ape-men. It was an interesting army, but flawed, having no counter to aerials and being very vulnerable to enemy mounted.

For this game, though, I ran the Knights as knights.

The Squidmen defended, and laid plenty of bad going to break up the knights and give their warband something to hide in. It didn't really work - the knights got into action quite quickly, slicing through the Squidmen. The ape-men attacked en masse on one flank, whilst the Knights refused the other against an attack by the Squidmen's shark-riders and monster.


The Knights of Simba lost their general after he was drawn into bad going in pursuit of an enemy.


However the Squidmen general was also isolated ...


... and killed, to give The Knights of Simba a win.


Sunday 27 January 2019

New Mishkin

This car has been sat half-finished for years. I started it with a particular paint-scheme about three of four years ago, and six months ago redid it to match the blue and gold Mishkin look I was aiming for in a themed team for Gaslands. Even then, I juts put the base coat on and it's sat incomplete until this afternoon. But here it is.

I'm seeing it as a pickup-sized vehicle, with a ram and an experimental nuclear reactor. Not sure what else I'll give it. Guns seem vulgar on such a beautiful application of Science!


Here it is with the other two cars. Since they are Have A Cigar and Shine On You Crazy Diamond, I guess that this one will be Wish You Were Here. For now.


Saturday 26 January 2019

First Fleet

A couple of weeks ago I went to Sydney to see a couple of photographic exhibitions, one of works by the South-African photographer David Goldblatt, and the other looking at commercial street-photography in Sydney in the mid-20th century. The second exhibition was at the Museum of Sydney, and of course it has permanent exhibits as well as temporary exhibitions. One of this is a set of models of the First Fleet, the eleven ships that delivered the first penal settlement to Australia. The day they stopped arsing around trying to find an anchorage and actually landed properly is, for reasons that are not very clear,  celebrated by some here as Australia Day, and we have an end of January public holiday which fortuitously coincides with it.

Anyway, I got a some pictures of the models, which I thought might be of interest. The fleet was made up of eleven vessels - nine transport and two warships. I got a few pictures of the two warships, and the labels for them, and then a few of the transports. The biggest difference appears to be in the bows, with the warships having sleeker lines. I didn't get as far as finding out if the models were all to the same scale. Sorry.

Anyway, here's the pictures. Enjoy them, and Happy End Of January Public Holiday to my fellow-Australians.


Wednesday 23 January 2019

A Package

There was a package waiting for me when I got home from work. I knew it was exciting because someone had tried to take a peek at what was inside.


And inside? This.


This book follows on from The Portable Wargame and Developing The Portable Wargame, but covers (as you might have guessed from the title) that wargamers' favourite - Napoleonics. Packed into the 160 pages, which I confess I've only skimmed at the moment, are four sets of rules, three of which are accompanied by a full battle report showing them in use. There are also extra rules to be added to any of the sets covering more details commander and unit quality, as well as activation systems, and finally some indications on how to extend the rules beyond 1815 to as far as 1865 (where really the late 19th century set from The Portable Wargame picks up).

The book starts with a revised version of Joseph Morschauser's rules from the early 1960s, upon which The Portable Wargame is based. The other three sets of rules cover Brigade (each unit is a regiment) Division (units are essentially half-brigades) and Corps (each unit is a division) actions. The core mechanisms for each set are the same, but they book is very much about how the basic Portable Wargame can be modified to cover each scale of action. Three battle reports illustrate the three sets.

Napoleonics is not really my thing, but the brigade set will be OK for the South American Wars of Liberation. It will also cover The Mexican Adventure with a few modifications. The other sets look adaptable to the American Civil War; my variant is pitched rather nebulously at brigade or division scale, but it will be interesting to apply some of the ideas from this book to them.

Sunday 20 January 2019

Classic HOTT

I got out a couple of my more conventional HOTT armies this afternoon - my Dwarves and some Elves. Here they are. The Elves fielded four Spears (including the general), four Riders, two Shooters and  Hero. The Dwarves had five Blades (including the general), one Shooter, one Artillery, one Flyer, one Sneaker and a Behemoth.


The Dwarves defended, and the Elves found themselves attacking a pass between two rocky hills, with the possibility of a flanking move. The Dwarves deployed some Blades and the Artillery to counter a move around the flank, and the rest of their troops in the pass and on the adjoining hills. The Elves massed their Spears, supported by the Hero to attack the pass, the Shooters to clear the hill on one flank and the Riders to try and turn the flank of the Dwaves position.


The Elven cavalry advanced quickly, but their formation was disrupted by the Dwarves' gyrocopter. The Artillery added to their discomfort.


Most of the Riders reached the Dwarves, but their initial attack was driven back.


Meanwhile the main part of the Elven army advanced towards the pass. The Shooters swung ut into line, ready to take on the Dwarves defending the hill on that flank.


The Elven cavalry pressed forward again, and destroyed the Dwarves' Artillery. Unfortunately they then failed to get the PIPs to exploit their position; stuck behind the hill they were out of sight of their general.


Whilst the Elves stopped to reorganise the Dwarves slowly hauled their steam-tank Behemoth over the hill. The Elves' Shooters edged over to engage it.


Elven Spears advanced along the other hill, but ran into heavy fire from the Dwarven musketeers.


The steam-tank engaged the archers, who drove it off. meanwhile the Dwarves on the hill were fighting the other element of archers.


The Elves' cavalry had tried to exploit their advantage across from the pass, but the Dwarven gyrocopter was quickly redeployed and stabilised the position, destroying an element of Riders.


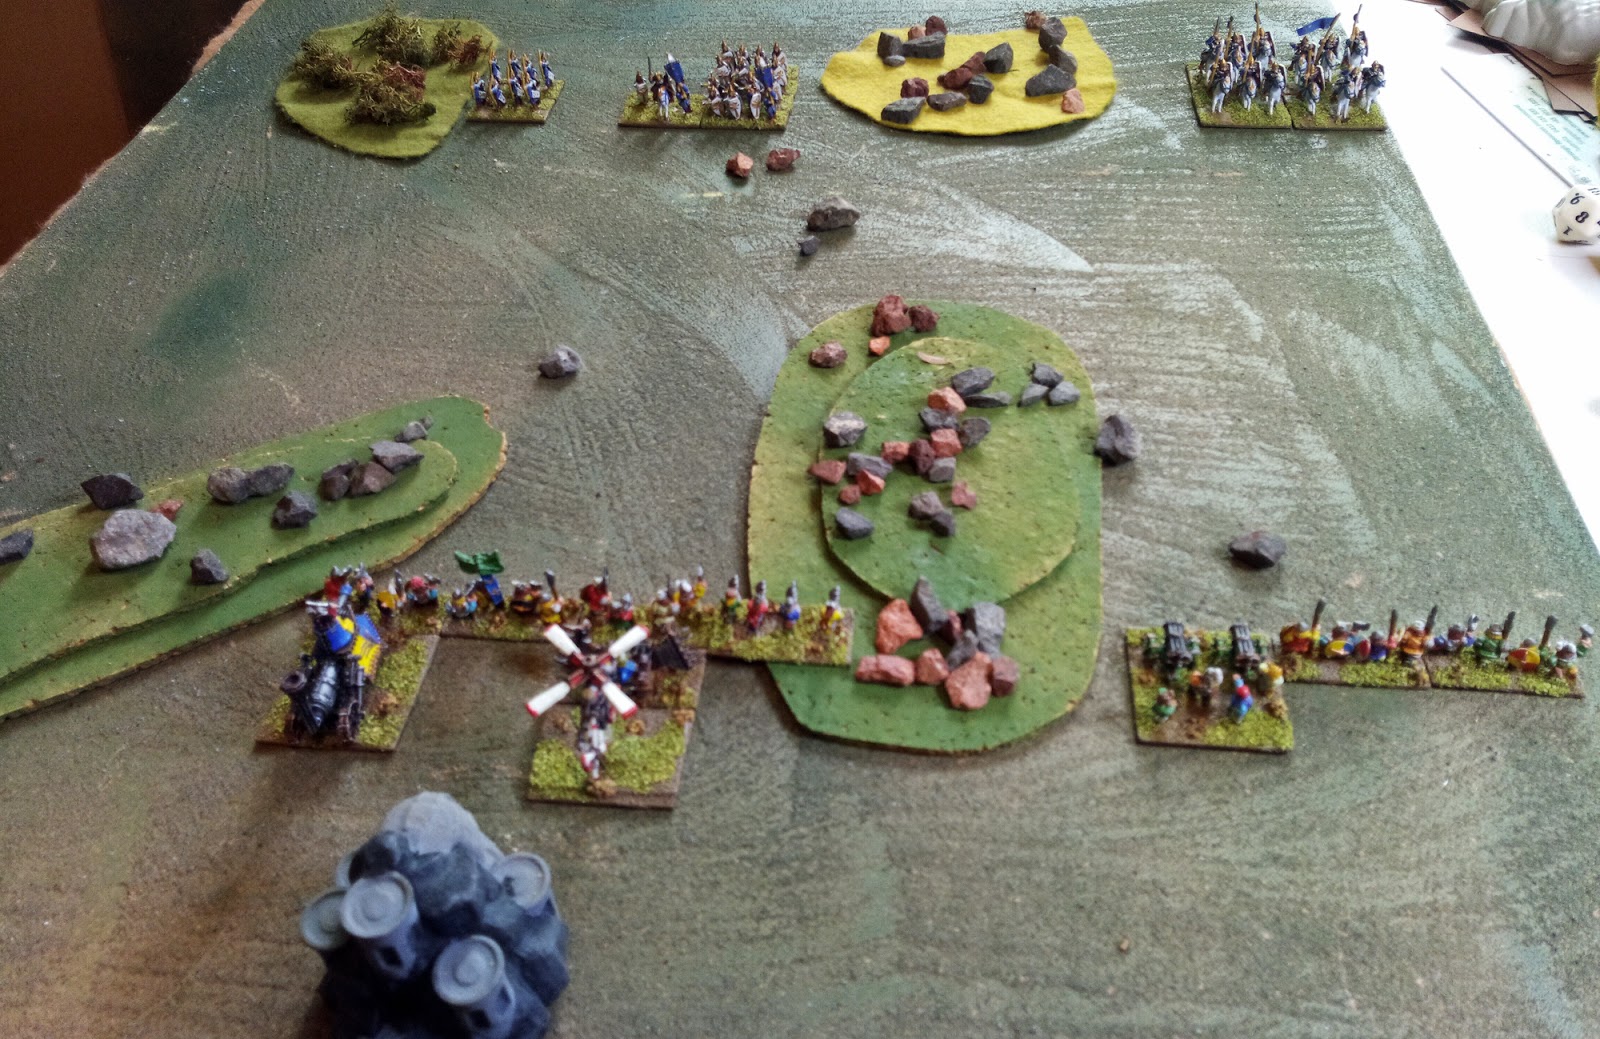
An overview of the battle.


The Elves pushed in their main attack, their Hero engaging the Dwarven general.


The archers drive off the steam-tank, forcing off the battlefield.


As the two battle-lines were locked in stalemate in the pass, the Dwarves got into the Elven rear with their tunnelling-machine Sneaker.


This broke up the Elven general's spear-phalanx, depriving the general of support. Overlapped and outclassed he was quickly cut down


Reeling from the loss of their general, the Elven army collapsed when the musketeers, supported by the gyrocopter, destroyed another of their Spear elements. The Dwarves had won, albeit by a narrow margin.


The Elves had a tricky position to assault, although their initial success with their Riders offered some hope. Their attack on the pass wasn't all bad either; they had the power to drive back the Dwarves, and with a Hero engaging the Dwarves' general a chance of a game-winning kill. Buy it was the Dwarves' gadgets - the Sneaker and the Flyer - which gave them the edge they needed for the victory.

The Daleks Return

I ran through two more Squad Hammer Core games yesterday, using the Daleks vs UNIT setup from this post.

I dropped one Dalek squad for the first game, as the first seemed a bit of a walkover for them.


UNIT wiped out the Special Weapons Dalek in one turn, albeit by concentrating every squad that could fire on it.


The other Daleks pushed confidently against the ruined chapel, and were shot to pieces.


And that was really it for the first game. The mercenaries did the same thing as the other day - try to work around the flank through the woods. But the mortar dealt with them fairly effectively and the squads on that flank finished them off.

I set it up again, and put the removed Dalek squad back in.


Again, concentrated fire took out one squad of Daleks.


This time the mercenaries attacked the chapel, and took it with an assault. whilst one squad consolidated their position, the other provided covering fire for the Daleks, and they took out The Brigadier.


The Daleks pressed forward, but eventually ran out of time, despite putting UNIT under a reasonable amount of pressure.


The attack is a difficult one for the Daleks as the rules I have in place to make them tough to kill still don't stop concentrated fire taking them out. I guess they really do have to give any individual UNIT squad too many targets to deal with, and hope to roll good To Hit rolls with return fire of their own shooting. With the UNIT troops tucked away in cover, though, their hit probabilities aren't brilliant, and they don't have unlimited time. So there's still some work to do in balancing this one.
Related Posts Plugin for WordPress, Blogger...