Friday 28 June 2024

Action In The Pacific

Last night we played 'Broadside: Empires of Steel'. It was a fictional game set in the 1920, with an aggressive Japan throwing its weight around in the Pacific and a Royal Navy looking to justify its existence and budget by showing them who's boss.

Naturally two flying squadrons ended up fighting.

Thanks to Ralph for these pictures of the cards and models for each side, as I'd forgotten all of the names.

Here's the IJN - one battlecruiser, two armoured cruisers, four light cruisers and a trio of destroyers.


And the Royal Navy - a battlecruiser, and armoured cruiser, three light cruisers and six destroyers.


Initial moves - Japanese on the right and the Royal Navy on the left. We pretty much matched up by type of ship pushing our destroyers forward against each other, followed by the battlecruisers and armoured cruisers. The light cruisers faced each other on the other side of the table.  


The Japanese force. That's the mighty Kongo taking centre-stage there.


The destroyers quickly encountered each other, and HMS Marksman was teh first casualty, sunk by gunfire.


But a Japanese destroyer was sunk in turn, and the superior numbers of teh Royal Navy small ships told as they surged forward towards the Japanese capital ships. Kongo fired everything it had at the approaching vessels.

In fact the gunnery at this stage on both sides was terrible. Hits were being scored, but with 'anything but a one' scoring actual damage we rolled a prodigious quantity of ones. Ralph rolled five in a row.


The Japanese armoured cruisers move up to support Kongo. But even their fire couldn't slow the British.


Two Japanese destroyers survived the fight long enough to launch torpedoes. The first scored a hit on HMS Invincible, but didn't sink it.


The British show how it's done - a single spread of torpedoes sank Kongo,


The second Japanese destroyer finished off Invincible.


But the British got one of the Japanese armoured cruisers too.


Now a peculiar feature of Broadsides is that ships don't sink until the end of the turn, so if they haven't taken their action yet then they can continue to do so. Kongo was lost, but hadn't acted, so got to blaze away one last time. A single salvo sank HMS Warrior, whilst its light guns polished off a British destroyer. Then it sank.


At that point we called an end to the proceedings. Both sides had lost two capital ships (the Japanese had one rather oddly armed armoured cruiser left), and all of the destroyers were out of torpedoes. The remaining battle would be between the light cruisers, which had hardly engaged so far and, unsupported, would probably retire.

So, all in all, a bloody draw.

Thanks to Darren for putting together a great little game.

Saturday 22 June 2024

Galleys & Galleons - House Rules (Version 2)


Five years ago I posted the various house rules I use in my games of Galleys & Galleons (for, as you know I do love to tinker with a game). When playing games recently I realised that my rules had a lot of pencil scribbles on them adjusting the rules and adding in a few new ideas, so I thought it would be a good idea to write them all up properly and share the update version.

They are in three main sections. The first is a change to the Weather Change rules. In G&G, a change in the wind is based on failed activation rolls which means that, to some extent, a player can influence it by their choice of dice. I felt it was easier to have it as a separate roll, even if it adds an additional roll into the turn. Elements of it are based on the weather change rules in the classic 'Hearts of Oak' game. The second section covers Criticals, basing them on a single D6 roll, and clarifying (for my purposes at least) how they are applied to various different vessel types. They also add in the possibility of a crew abandoning or surrendering a vessel if it becomes immobilised. Finally there are a few random changes to Traits, which are purely personal or which I felt helped clarify things, plus some clarification on Sinking, an adjustment to Collisions and two brand new Rules.

I have added a few comments in italics to clarify why I have made some of the changes.

Weather Change

At the beginning of each player’s turn they throw a dice. If there are more than two players (or groups of ships) in a game only the first two to activate that turn throw a wind change dice. On a score of 6 the wind may change direction.

Throw a dice for how much:

1-3 – Wind changes by one point
4-6 – Wind changes by two points

Roll another dice for wind direction:

1 - The wind changes anticlockwise and is backing. -1 to the next wind direction dice throw (down to a minimum score of 1).
2 - The wind changes anticlockwise.
3 - The wind changes anticlockwise and is steady. Ignore the next weather change roll.
4 - The wind changes clockwise and is steady. Ignore the next weather change roll.
5 - The wind changes clockwise.
6 - The wind changes clockwise and is veering. +1 to the next wind direction dice throw (up to a maximum score of 6).

“Veer +1”, “Back -1” and “Steady” markers can be used as reminders by placing them on the wind gauge and removing them after they have affected the next wind direction dice throw.

Critical Hits

Roll a red dice for the effect, and a white dice in case of secondary rolls.

1 – Quarterdeck (1-3: Captain killed, 4-6: Rudder hit)
2 – Hull (Surface, Submersible or Airship only: 5-6 Holed)
3 – Hull (Surface, Submersible or Airship only: 5-6 Holed)
4 – Rigging
5 – Rigging
6 – Fire (6: Explodes)

Captain killed – The first time this happens the vessel operates at +1Q for the rest of the game. If the vessel had Flagship or Dread Pirate then these abilities are lost. Any subsequent rolls are treated as 1 Hit, but if this is excess damage then the crew strike.

Rudder hit – The vessel must expend two actions in order to turn. The second time this critical occurs the vessel must expend three actions to turn. If it occurs a third time the vessel can no longer turn. Any subsequent occurrences are treated as a Hull hit.

Hull – The vessel takes a point of damage. If this is excess damage then the vessel sinks if it has a hole or the ship’s modified roll was doubled. Otherwise the ship strikes..

Holed – This replaces a Hull critical if it occurs. A surface vessel or submersible is holed, and is treated as if it has the Sluggish special ability for the rest of the game. If the vessel is already Sluggish then it is treated as a Hull critical but the hole is still recorded. A submersible which receives this critical can no longer submerge. An airship which receives this critical can no longer ascend to high altitude. If it is at high altitude it immediately drops to sea-level. Any further occurrences of this critical are treated as a Hull critical. Ornithopters and Gyrocopters never test for this critical; they always take a Hull critical.

Rigging – Sail: The first occurrence of this critical causes the vessel to reduce all movement in all directions by one step – Long becomes Medium, Medium becomes Short and Short becomes 0. The second occurrence reduces all movement by two steps. Any after the second means the vessel cannot move at all, and the crew will strike if it is excess damage. A vessel which has taken two or more rigging hits may no longer use Razee or Sweeps. Razee may be used in a direction which is not In Irons but which has been reduced to zero.

Rigging - Galley: The first occurrence of this critical causes the vessel to reduce all movement from Medium to Short. The second occurrence means that the vessel cannot move. Third and subsequent hits have no effect unless they are excess damage in which case the crew strike.

Rigging - Steam Engine: The first occurrence of this hit causes the vessel’s speed to remain fixed at the current setting. The second means that the vessel may no longer move. Third and subsequent hits have no effect unless they are excess damage in which case the crew strike.

Rigging - Unorthodox: The first occurrence means that a -2 is applied to all movement die rolls. A second means that a -4 modifier is applied. Third and subsequent hits mean that the vessel cannot move, and the crew will strike if it is excess damage.

Rigging - Ornithopter: The first occurrence means that the vessel cannot go to high altitude, and drops one level if it is at that altitude. A second occurrence means that the vessel crashes.

Rigging - Gyrocopter: The first occurrence means that the vessel can only move once per turn. A second occurrence means that the vessel crashes.

Fire – If the vessel does not immediately explode, then it catches fire, or receives another fire if it already has at least one. At the start of the player’s turn, before any ships activate, roll a dice for each fire on the vessel. If any of them score a 6, the vessel explodes. If the vessel does not explode, then roll for a critical hit, with a +1 to the roll do not test for holes or (work with me here) immediate explosions from a fire. Only one critical is rolled for, regardless of how many fires are on the ship. The vessel rolls activations as normal, but all actions for that turn must be expended fighting one fire. Extinguish one fire on a 1-2 if the ship rolled one action, 1-4 if it rolled two actions and automatically if it rolled three actions. When a ship fights a fire, it may also automatically cut grapples to one opposing ship if it rolls 2 actions or more. This is a free action, and does not reduce the ability to fight the fire.

At the start of a player’s turn, test for any ship not currently on fire which is in contact with a ship which is on fire. If it is simply in contact, then it catches fire on a 1-3. If it is grappled to the ship then it catches fire automatically.

Explode – The vessel is removed. Roll for each vessel within Short distance of the explosion; on a 6 the vessel receives a Fire critical. (Any vessels grappled to the exploding vessel receive 1 hull hit if they roll equal to or less than the exploding vessel’s C value on a D6).

Note: Excess damage scores one critical regardless of how many hits should be applied.

Sinking

Ships may either sink or strike when they take excess Hull hits depending on the following chart:

Gunnery: Strike unless ship is holed or their total was Doubled in which case it Sinks
Small Arms: Strike
Ramming: Sink
Collision: Roll a D6. On a 2 or less the ship sinks (-1 if C value is lower than that of the ship collided with), otherwise Strike.
Run Aground: Sink
Boarding: Strike

(As the rules stand it's too easy to sink ships. These rules make a simple surrender more likely)

Collisions

Adjust the table as follows:

1 - Significant (2) damage
2-4 - Hull (1) damage
5+ - Superficial (no) damage

Subject Vessel …
… has Reinforced Hull +1
… collided with Boats +2
… collided with non-Boats with lower C value +1

(Collisions really are quite dangerous in the rules as written and a viable, if unscrupulous, tactic is to hit a large ship with deliberate collisions from smaller vessels as they were more likely to score damage than any gunnery might. This reduces the effects of collisions, especially from smaller ships against larger.)

Traits

Chasers - Cost is only 2 points if they fire to just one of bow or stern

Razee - A ship with this ability loses it if it has taken at least two rigging criticals.

Sweeps - A ship with this ability loses it if it has taken at least two rigging criticals.

Ornithopter - Allowed to use Reduce Sails move to move Medium instead of Long.

Lucky - When rolling two dice for which critical applies, if both dice score the same, then the critical is ignored.

Unorthodox - A ship can use Reduce Sails to move one step slower than that rolled.

Marksmen - I do not have the target ship lose traits on a critical. This trait simply allows you a free Small Arms shot; nothing more.

Mutiny - If a ship takes hits from a Mutiny then roll a D6. On a 1-2 they take a Captain Hit critical instead (unless they have already done so in which case they take normal damage)

New Rules

Knot and Splice (Action) - For 1 action a vessel with any method of propulsion may make temporary repairs, allowing it to ignore the effects of one Rigging critical for the rest of the vessel’s activation. It may only ignore one critical in this way.

(Rigging criticals are easy to score but can be a total show-stopper. This rule allows a ship to manage the hits without being able to repair them. I tried the latter but it made getting rid of rigging criticals far too easy.)

Superficial Damage - The second change deals with a small niggle I have with the gunnery rules. If a ship fires and beats the opposing vessel's roll, but their dice score was odd, then they score no damage. Whilst I can see the purpose behind this - if it scored damage then it actually makes gunnery overly effective - it does feel like the player is being cheated out of a winning score. They ought to get something for it. So if you beat the target's score, but your die roll is an odd number, then you place a superficial damage marker on the target. The next time any ship fires at a ship with a superficial damage marker, the marker is removed, but the firing ship gets a +1 to their roll.

(Basically an odd roll doesn't score any damage, but makes it slightly easier for the next shot to score damage. Note that this could still result in a superficial damage marker being placed, but that's the fortune of war for you. A ship can never have more than one superficial damage marker, because each time it is shot at the marker it has is removed to give the +1.)

Assurance vs Constant Reformation

Continuing my occasional ECW games for Galleys & Galleons, here's a quick ship duel. This is lifted from another of Barry Hilton's scenario books.

This is, once more, a hypothetical engagement. In 1649 Prince Rupert's Royalist squadron was assembling in Kinsale on the south coast of Ireland. His flag, Constant Reformation was separated from the other ships and working its way towards the port when it encountered the flag of the Commonwealth's Irish Sea squadron, Assurance. Historically both ships left each other alone; Assurance was a smaller ship then Constant Reformation, so was reluctant to engage, whilst Constant Reformation was essentially a privateer, so engaging an enemy warship wasn't worthwhile. In this scenario they fight.

I did a few test runs with various designs for the ships and they were less than satisfactory, but eventually I hit on designs and a setup that seemed to work, and played it through one lunchtime.

I assumed that it was Assurance that went in for the fight, with Constant Reformation making a run for Kinsale. So the action was a simple run of the Pursuit scenario from the rules. Constant Reformation had to get from one corner to the other and Assurance had to stop it.

What of the ships? Assurance was smaller than its opponent, but with soldiers on board. Constant Reformation was a decent ship but was undermanned and in poor repair. The guns seemed to have been well-served through, even by the depleted crew. In previous versions of the scenario I gave Constant Reformation an edge in size but a lower quality than Assurance, representing the weaker state of the ship. However Constant Reformation was always able to bring it's greater combat value to bear and hold off Assurance. So instead I opted to actually run both ships with the same combat value, and still run Constant Reformation with a lower quality. The lower quality covers it being both undermanned and the poor state of the hull. Assurance was a better sailor, so gets a superior quality. 

On to the game stats:

Assurance - Q3 C3 - Square Rigged, Drilled Soldiers - 36pts

Constant Reformation - Q4 C3 - Square Rig, Trained Gun Crews, Charismatic - 36pts

The 'Charismatic' trait on Constant Reformation represents the leadership and morale effect of Prince Rupert.

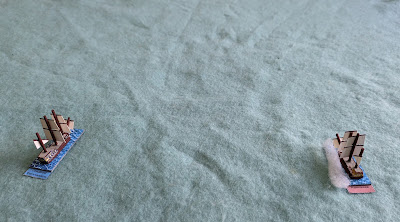
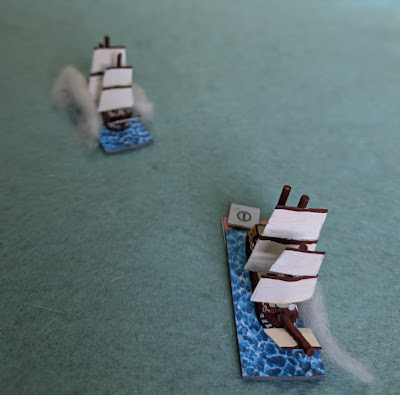
Here's the two ships approaching each other. The wind is from the bottom of the picture and Constant Reformation (left) is trying to get to the top right corner.


The wind shifted a lot in the game, ending up on Constant Reformation's stern, slowing it down. Assurance fired a shot at extreme range, but it caused no damage.


Constant Reformation turned to get a better speed, and also tried a long-range shot. Even with its better gunnery it also missed.


Assurance sped forward looking to get a rake, but couldn't get the actions. Still, its short-range broadside ...


... was enough to damage and hole the Royalist ship. 

(In G&G a hole makes the ship harder to turn and - in my version of the game - more likely to sink if defeated)


Constant Reformation tried to cut across Assurance's stern in reply, but could only manage a ragged broadside. It did cause some damage though.


Both ships were rolling one damaged activation dice now, and with the action hotting up were looking to roll all three. This risked rolls on the dreaded All At Sea table. Constant Reformation got the first failure, but ended up making an enforced turn in the direction it wanted to go. Both ships were still heading for the exit point, but Constant Reformation was going to have to spend more actions turning in order to make a proper escape.


Assurance fired a full broadside and smashed Constant Reformation; it was now holed and crippled. It looked like defeat for the Royalists was on the card. One more decent shot would finish their ship.


But Assurance misjudged its move and edged ahead of the Royalist vessel (another All At Sea roll). Constant Reformation now just had to turn behind Assurance and leave the other ship in a futile pursuit.


But unable to turn as sharply it ended up running close alongside Assurance. Surprised by Prince Rupert's audacity Assurance struggled to get its broadside ready to fire. Constant Reformation was ready though, and scored a powerful hit. Assurance caught fire!


With a fire raging below decks the Commonwealth crew struggled to extinguish it. They gave up and abandoned ship.


And that left Constant Reformation to escape to safety.

Assurance was burned to the waterline, but the Royalist ship was badly damaged and would require extensive repairs, if such were even possible in Kinsale. So something of a bloody draw, all things considered.

This was a satisfying game, even with just two ships, and fortune swung from one side to the other. Constant Reformation struggled to get enough actions to do everything it wanted, whilst Assurance got unlucky with its two All At Sea rolls; the first saw it unable to take advantage of a battle-winning position, whilst the second saw it strike.


Friday 21 June 2024

The Circuit

Bailey is moving up north at the end of next month, so this was possibly a last chance for a few of us to get together with him for a game of Gaslands. 

We had four players:

Caesar - Running the General Lee (car) and Jeb Stuart (buggy) - A Verney-sponsored team with the bold move of no dropped weapons.
Bailey - Keeping the beaches safe with his surfer-dude Highway Patrol team, featuring the truck Tribal Thunder and the buggy Surf n Destroy.
June - Using the first team she designed and painted herself; two Miyazaki sponsored performance cars.
Me - Using the Last Of The V8 Interceptors, sponsored (because it has the right perks) by The Warden. I'll post the design below.

Once again we rolled a race, but we'd agreed that the next time we got one we'd try the circuit set-up we tried a couple of years ago. In this you have four equally-spaced gates and each team starts at a different one. To win you must go clockwise and pass through the gates in order as you do so, with the first gate you pass after your start activating weapons. Because of the size of the circuit (with hindsight we made it a bit big) a team would win when one of their vehicles passed their original starting-gate.

So essentially the race is a pursuit. Everyone gets a simple uncluttered start, but unless every team runs at exactly the same speed you will eventually have to pass through another team. And, as you'll see, other tactics were a possibility ...

Anyway here's the setup. In the distance is June's Miyazaki team, to the right is my mad Warden driver, in the foreground is Bailey's surf patrol and finally Caesar's team to the left.


Early on we got a taste of things to come when Caesar managed to roll this (a product of dice with rounded corners on a neoprene mat).


Bailey sliding close to the edge. It's hard to tell from the vehicles, but the green one is the truck and the blue one the buggy.


My mad guy got of to a staggeringly bad start with this roll. And it was a reroll so I had to live with it. There was an early wipe-out in my future for sure and, sadly, no-one to ram whilst I had all those useful hazards for my Battlehammer perk. My car was very much built around using nearby vehicles to dump hazards, so this circuit start wasn't good for me.


And here we are! The inevitable wipeout. Fortunately I managed to pass the gate as I did it, but that was me done for the rest of the turn. In the top-left you can see June's lead car.


Casar's buggy, Jeb Stuart, was doing well, and was catching up to June's team. Caesar got to fire the first shot of the game, raking June's orange car with a heavy machine-gun.


June's lead car shot up Mr Mad as she went past.


But it was now a new turn. I got my vehicle running again, and chased June, looking for revenge. Powered up with hazards and firing a shotgun as I closed I destroyed her blue car in a single ram.


Bailey was adopting an alternative approach to the race - be last survivor. To that end he'd run to his first gate to activate weapons, and had now turned around, intending to run the other way around the track, destroying everything in his path.


His buggy chased after me. It had some nasty cop abilities. I managed to not take pictures of what happened next.


Bailey rammed me, using a special ability that forced me to make an evasive move that put me in a very bad position with regard to a wall. On the plus side I was running a performance car; the ram meant that I could take a bonus action, so I used it to collide with the wall, and wipe out. Wiping out gives me an Audience Vote, which I then used to accelerate back into action, as the wipeout had spun me to face roughly in the direction I needed to go. Avoiding Bailey's truck I roared towards my second gate, travelling at an insane speed.


There I am, heading off into the distance at Gear 6! But Here comes Caesar's Jeb Stuart, also travelling fast. If he could reach that gate he would win the race. All that stood in his way was the surf-cops in Tribal Thunder.


Bailey went for a head-on collision. No buggy could survive that.


That is unless your opponent rolls eleven dice and only has two score a four or more, for a total of three hits. And then you evade two of them. Caesar escaped with barely a scratch. And on his next move could move through Bailey's vehicle, ignoring it, since the two were in contact.


But wait! What's this? As a result of the collision Tribal Thunder wiped out. and that caused it to pivot out of contact with Caesar's buggy. Now when Caesar moved he had to collide with the truck again and, once again it was a dangerous head-one (yes, even with that orientation - Caesar's front still hit the front corner of Bailey's truck. We really must put our vehicles on bases to make these things easier to see).

This time Caesar didn't survive the collision, and even the short wreck move wasn't enough for him to cross the line.


June's orange car now had to run past Bailey's cops.


Caesar now adopted Bailey's strategy. He spun General Lee around, and ran through a wall (this is Gaslands - it happens), since the next vehicle likely to win was ... me. I'm out of shot to the left.

(Ignore the car on the wall - we decorated the arena with spare vehicles)


Not sure what happened here but I know that the end result was the demise of June's second car at the hands of Bailey's cops.


Meanwhile I was making my final run for the finish line. Skidding wildly I cut through some soft sand, and was raked by the mini-gun of General Lee, taking me down to my last hit. But I had a desperate plan.


I had two templates worth of movement required to get through the gate. And with Caesar's car bearing down on me I'd only get one turn before he shot me up. So I cranked my car up to full speed and piled on every hazard I could get. My initial move left me almost at the gate, but not quite. However I had so many hazards that I wiped out - and was going so fast that I was almost certain to flip. And did. The flip got me over the line, took off my last hull hit and the mad Warden man was destroyed in a spectacular fireball in his moment of victory.


It was a spectacular Gaslands finish to a great race. I do like this format for races, even if we made the circuit a little large. It makes for a different style of play, and therefore changes the dynamics of what kinds of builds do well; you can't really get out in front with a fast vehicle since you will always be forced to interact with the opposition as you go round.

Thanks to all involved for a fun evening.

Anyway, here's the info for my car

The Last Of The V8 Interceptors - Warden Performance Car - 50 cans

Weapons and Equipment: Shotgun, Front Ram, Molotov Cocktails, Armour Plating
Perks: Battlehammer, Boarding Party, Terrifying Lunatic, Madman, Road Warrior, Grinderman, Crowd Pleaser

(If I ran this vehicle again I might swap Grinderman for Murder Tractor).

But otherwise I used all of the traits. Crowd Pleaser gets me Audience Votes without me having to have my vehicle destroyed. And the perks allow me to combine dumping hazards on other people whilst getting rid of some of my own so long as I shoot ram or generally stay close to the opposition. The ram is my primary weapon; I know it's not canonical, but it's basically plot armour (as is the actual armour on the vehicle). The Shotgun was the best weapon I could come up with that doesn't take any slots.

Sunday 16 June 2024

Scilly Privateers

During the ECW the Isles of Scilly, off the tip of Cornwall, were a hotbed of Royalist privateer activity. It was only in 1651 that a naval expedition extirpated them. It had secluded harbours and anchorages, and was well-garrisoned and fortified. Irish privateers also used it as a base.

This scenario sees a trio of Dutch ships carrying good from the West Indies who have, via a navigational error, strayed too close to this hotbed of privateers. A couple of small Irish vessels, backed up by a local ketch set out to intercept the rich prize that has landed on their doorstep.

Dutch

St. Barnabas, Curacao, Gouda - Q3 C2 - Galleon Rig, Merchantman, Razee, Shallow Draft, Yare

Privateers

Clontarf, Liffey - Q3 C1 - Lateen Rig, Razee, Shallow Draft, Swashbucklers, Yare
St Peter - Q3 C2 - Square Rig, Shallow Draft, Swashbucklers, Yare

The Dutch were sailing from bottom right to top left, with the privateers intercepting from the bottom left. This trapped the Dutch against the land.


An early shift of wind disadvantaged the privateers, though, and they had to use all of their tricks to close on an intercept course with teh swift Dutch merchant vessels.

(The Dutch have Galleon Rig and Razee which makes them very fast in most wind attitudes). 


Clontarf tried a long range shot, hoping to knock away some Dutch spars.


The lead Dutch ship, Curacao, returned fire and Clontarf was not only damaged but saw her captain felled. An inauspicious start for the predators.


Gouda also fired on Clontarf and damaged it some more. The Dutch were looking good not only to make their escape but to drive off the privateers as well.


St Peter closed up. Slower than the other ships on the table it did have well-manned guns and (relatively speaking) plenty of them.


Liffey fired a broadside into the stern of St Barnabas. To their consternation the Irish privateers saw their target catch fire!


Despite the loss of their captain reducing their chance of activating, Clontarf managed to run aboard Curacao, grapple and board.


St Barnabas blew up, and some of the wreckage set Liffey on fire.


Gouda attempted to slip past the privateers, shaving close to some rocks as it did so. But St Peter closed with it and boarded.


There were now two boarding actions on the go. The badly damaged Clontarf was, surprisingly, holding its own against Curacao, whilst St Peter was slowly whittling down the resistance of Gouda.


Gouda struck.


St Peter was able to cut grapples and quickly turn to the aid of Clontarf.


Outnumbered the crew of Curacao surrendered. To the right of the picture you can see Liffey, returning to the fray after extinguishing the fire on board.


The privateers had done fairly well, capturing two Dutch vessels whilst only suffering one damaged vessel themselves. And the game only took about 20 minutes to play, so I set it up again.

This time the Dutch had to pass through the narrow straits between two islands. The privateers were heading straight for them. As you can see, the faster sailing Irish privateers were well ahead of the slower St Peter.


Clontarf and Liffey approach the Dutch. There was no preliminary firing this time.


Clontarf took the initiative, grappling Curacao. It got the best of the initial attack, but a Dutch counterattack saw the action start to swing the Dutch crew's way.


Liffey tried to come to the aid of Clontarf, but didn't quite make it. It did manage to rake Gouda, killing the vessel's captain.


The crew of Clontarf rallied and with renewed vigour took the fight to the Dutch, pushing Curacao to the edge of surrender.


Gouda turned and raked St Peter, badly damaging it.


Liffey misjudged its attack on Curacao and collided with the Dutch ship. But the damage it did was enough to cause the Dutch crew to give up. Liffey was fortunate to escape with no damage.


St Peter also collided with Gouda. Both ships were damaged, but St Peter was now in a bad way.


A raking broadside from St Barnabas finished off St Peter, shattering it so badly that it sank


St Barnabas and Gouda were heading away from the fight. They would have a tricky turn through the wind to make it to their exit point, but they were in a position to escape.


But the Irish privateers were fast and nimble. Clontarf extricated itself from the captured Curacao and piling on sail, headed after the Dutch ships


Gouda damaged Clontarf with a ragged broadside, but Clontarf grappled, boarded and quickly captured the Dutch vessel.


Liffey had to make more of a turn to get back into the fight, and shaved some of the rocks very closely indeed.


St Barnabas engaged Clontarf, with both sides inflicting slight damage on each other.


But it was Liffey which swept in and grappled St Barnabas, its crew swarming on board the Dutch vessel like a tidal wave, sweeping all before them.


Clontarf also engaged, and St Barnabas struck.

So in this second game the privateers took all three Dutch ships, although they did lose St Peter. And Clontarf was the one to administer the finishing blow on all three ships.

I really enjoyed these two actions. It was fun using very fast manueverable ships with low combat factors. It does make the die rolls a lot more important, since a wide disparity is much more likely to see doubling or tripling of a target's score, but the unpredictability added to the game. The Dutch ships are tricky targets too; the merchantman trait makes them weak in boarding, but they are fast ships and can pull off a few surprises.

Related Posts Plugin for WordPress, Blogger...