Showing posts with label GNW. Show all posts

Sunday, 3 August 2025

The Battle Of Pruth River - A Scenario For 'Dominion Of Marlborough and Peter The Great'

This is a scenario for 'Dominion of Marlborough and Peter The Great from a side-conflict of the Great Northern War. It's an excuse to get Ottomans on the table (and for me to use my Nottomans).

The 1711 battle of the Pruth River was a pivotal confrontation during the Russo-Turkish War of 1710–1711, which saw Tsar Peter the Great of Russia take on the Ottoman Empire under Grand Vizier Baltacı Mehmet Pasha. The battle was more a diplomatic and logistical crisis culminating in a negotiated escape for Russia, but I have set it up as a conventional battle. It represents a couple of days fighting, with the cavalry forces of both sides clashing before the Ottomans besiege the Russian camp.

The Battle of Pruth River (July 18-21 1711)


In the early 18th century, Russia was expanding its influence southward, especially following its victory at Poltava (1709) over Sweden. The defeated Swedish king, Charles XII, took refuge in Ottoman territory, encouraging the Sultan to declare war on Russia. Eager to establish Russian access to the Black Sea and check Ottoman influence, Peter launched a campaign into the Danubian Principalities (modern-day Romania and Moldova) in 1711 hoping to strike a decisive blow.

The Russian army was a large one of over 38,000 troops, supported by the Moldavian prince Dimitrie Cantemir, who had defected to the Russian side. However Peter underestimated the logistical difficulties and overestimated the support he would receive from local populations and allies like Wallachia. Meanwhile the Ottomans quickly mobilized a larger arm - some 120,000 men - comprising Janissaries, Sipahis, and provincial levies, and they were also joined by Crimean Tatars.

By July, Peter’s army had advanced as far as the Pruth River, but became dangerously overextended, cut off from resupply, and trapped between the river and a superior Ottoman force. The Ottomans used their numerical advantage and superior knowledge of the terrain to surround the Russians near Stănilești.

Ottomans: 1 x Elite Line Infantry (Janissaries) , 1 x Elite Artillery, 1 x Pistoliers, 2 x Dragoons

Russians: 2 x Fortified Line Infantry, 1 x Line Infantry (Moldavians), 1 x Dragoons , 2 x Unreliable Dragoons

Ottomans (Attackers)

Line Infantry (E), Artillery (E)

Dragoons

Pistoliers

Dragoons

Dragoons (UR)

Dragoons

Dragoons (UR)

2 x Line Infantry (D), Line Infantry

Russians (Defenders)


Fighting took place from July 18–21, primarily as a series of skirmishes and defensive actions. The Russian infantry entrenched themselves in a fortified camp after becoming separated from their cavalry. Ottoman forces launched repeated assaults and maintained pressure through cavalry harassment and the deployment of around 300 pieces of artillery. Despite being surrounded and outnumbered, the Russian troops held firm in a desperate defense.

Russian supplies dwindled rapidly and disease and starvation set in. Sensing the vulnerability of Peter's position the Ottomans pressed negotiations. Despite having the upper hand militarily Mehmet Pasha was cautious, possibly fearing a drawn-out campaign, or having been bribed by Russian envoys.

The resulting Treaty of the Pruth allowed the Russian army to withdraw in exchange for territorial and diplomatic concessions, including the return of Azov to the Ottomans and the destruction of Russian forts. While a humiliation for Peter diplomatically, he avoided disaster. The Ottomans, despite their advantage, failed to exploit their victory decisively.

As with anything I post here, feedback is more than welcome, especially alternative views on the setup or  army compositions.

Design Notes: I gave the Ottomans elite infantry and artillery to represent the furious assaults on the Russian camp as well as the sheer weight of artillery they were able to bring to bear. Another option would be to make the artillery disciplined instead, which would increase its longevity against the Russian infantry. The Ottoman pistoliers represent some decent cavalry, using missile to weaken an enemy before charging. All other cavalry, on both sides, is represented by dragoons, and these could also represent Cossack foot units as well. The Russian cavalry went off looking to attack the Ottoman's supplies and camp, and became detached from the main army. Hence the unreliable rating. The initial setup means that the battle should flow from an initial series of cavalry actions to an assault on the Russian infantry in their fortified camp.

Saturday, 2 August 2025

Ten Years Ago - August 2015

This blog has been around for over 13 years now and has, I think, seen a fair amount of activity compared to many. The other day I was idly looking through old posts and sometimes came across things that I didn't even remember posting.

So I thought that it would be fun to resurrect an old post each month, and I have decided to go back ten years to do it. Hopefully it will allow me to revisit forgotten projects and maybe introduce you to things you haven't seen before.

So as we begin August 2025, let's have a look at something I was up to ten years ago.

Oddly enough I was playing a lot of games with my Risk-figure Great Northern War armies, mostly using a variant of the rules in One Hour Wargames. I was also working through my horribly stalled project to play all of the One Hour Wargames scenarios in order. And I was coming to the point where I was going to play the Fortified Defence scenario, which needed some forts.

So I built a couple of redoubts. 

This is the final post, that shows the finished products. There's three posts in August 2015 that show the build process, step by step.


So hop in your time machine and read In Which I Make A Redoubt - Part 4

I've barely used the redoubts since I made them. That needs to change, I reckon.

And here's the whole of August 2015

Friday, 1 August 2025

Dominion Night

Last night I ran some games of 'Dominion of Marlborough and Peter The Great' at the Wollongong Wargamers. Caesar and Daniel played most of them, whilst I sorted out troops and explained the rules.

Since I knew we'd fit in multiple games, I decided to use the evening as an excuse to try out my simple WSS campaign mechanism. Rather than use random armies, though, I simply picked eight scenarios from the book, mostly covering the battles on  the Low Countries, but with a couple of Italian ones thrown in for fans of Eugene of Savoy.

Caesar bravely took the French and their allies, whilst Daniel commanded the Grand Alliance.

I don't have detailed reports of each battle, but I at least photographed the setup of each. We used my Great Northern War armies, with Swedes playing the French and the Russians playing the Alliance.

The first battle we played was a learning game - Chiari (September 1701). The French were assaulting Eugene, who was in a prepared position.


The French right turned into a cavalry battle


The French lost it, and Eugene rolled up the French line for a win.


With the basic game mechanisms under their belts, Daniel and Caesar were ready for the first campaign battle. We opened with the Storming Of The Schellenberg (July 1704). In all of the French and allies are on the left and the Grand Alliance on the right. Terrain is mostly garnish, but does sometimes indicate troops with defensive bonuses.


The fortress of Donauworth held off the initial Alliance assault.


But it all went horribly wrong for Caesar in the centre, Donauworth fell and the Bavarians were defeated.


The second battle of the campaign was Blenheim (August 1704). The playing cards are the campaign. Basically each player has a hand of cards, one of which is randomly placed in front of them as a stake. There are also four pool cards available. The winner of the battle gets to take one card. If they win decisively then they get to take two. At the end of the campaign - which will be after 3-8 battles, randomly determined - the player who can make the best five-card poker hand from their cards wins campaign. I'll write it all up properly soon, though.


The fighting around Blenheim descended into a slog so teh battle really became about cavalry smashing into each other in the centre.


Both sides saw units lost and then rallied, and the fighting continued.


But, once again, Marlborough was victorious, this time decisively.


Two games in and the French had yet to win a battle. How would they do at Elixheim (July 1705)?


This starts with a big cavalry fight along the line, with the French infantry at the rear defending a sunken road. Naturally the French lost the cavalry action and Marlborough's horseman rode down the infantry as well. Another decisive win.


On to Ramillies  (May 1706) and things were not looking good for the French. Daniel had a nice fat hand of cards, and Caesar ... didn't. Would the French dice finally come good?


The battle was hard-fought ...


... and the French cavalry was victorious on their right.


... and then it all went horribly wrong, and Marlborough won again.

On to battle number five and a return to Italy and the exploits of Eugene of Savoy. The battles was Turin (September 1706). The French were defending earthworks against an Allied assault. Their morale was not high.


And what ensued was another French rout!


The dice spoke at that point, ending the campaign and putting Caesar out of his misery. Comparing hands, Caesar could only manage a pair of threes, whilst Daniel had a nice six/ace full house. So the Grand Alliance very much dominated the negotiations of the Treaty of Utrecht.


To be fair Caesar's die-rolling was abysmal all evening; he barely rolled above a 3 in any combat. A couple f times he actually had a decent position and could have turned the battle in his favour, but a run of rubbish rolls threw it all away.

With plenty of evening left I thought we'd switch to the Great Northern War, and try out that old classic, Poltava (August 1709). In this picture the attacking Swedes (Caesar) are on the  left and the Russians (Daniel) on the right).


Initial Swedish successes were stymied by some stubborn resistance from the redoubts and a solid Russian infantry performance beyond them. History repeated itself and the Swedes lost.


Daniel and Caesar swapped sides. 


The Russians won again - Caesar's only victory of the evening.


Caesar decided to rest on his laurels and we decided to fit in just one more wafer-tin game. I'd scribbled some notes for a new scenario, and we tried it out - the Battle of Pruth River (1711). This was really an excuse to get my Nottomans out, as this battle saw Peter the Great's Russians attacked by an Ottoman army in modern-day Romania.

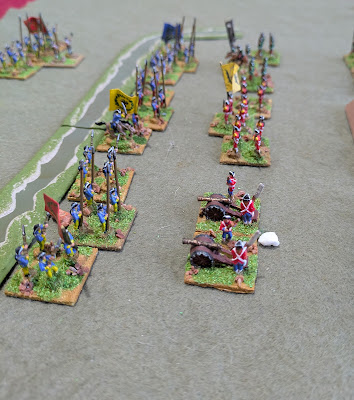
The Russians are in a fortified camp, and the Ottomans had a lot of guns.


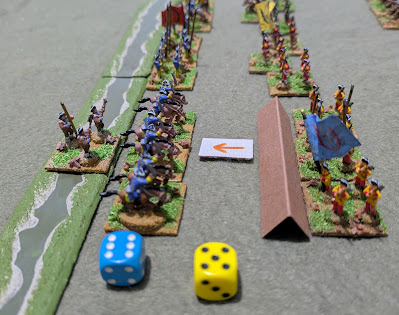
Ottoman cavalry in action with the janissaries being rallied in the foreground.


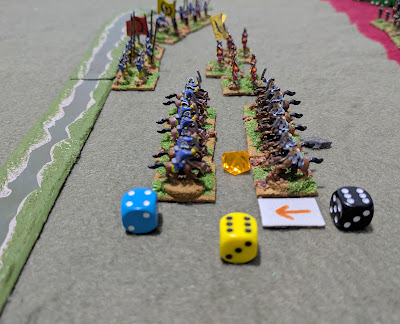
Janissaries assault the camp and are repulsed.


But the Ottoman guns win the day, forcing the Russians to sue for terms.

So we managed nine games in about three hours, including a complete campaign, which I thought was pretty good. I think that the campaign was probably a little biased towards Marlborough, Caesar's die-rolling aside, because I don't think that the scenarios are intended to be entirely balanced; they are slightly weighted in favour of the historical victors. So whilst it was a chance to test out the card-driven mechanisms of the campaign it was kind of a skewed result owing to the complete whitewash of the French. I need to try it out with some random armies.

Monday, 21 July 2025

Duna And Klisow

I spent Sunday morning mowing the lawn (which still needs to be done, even in the winter), and measuring up the garage for some much-needed shelving. And then part of the afternoon was spent helping my daughter put up a curtain rail. So a fairly busy day. But I found some time in the afternoon to set up, play and record a couple of games of 'Dominion of Marlborough and Peter The Great'. Great rules but, my god that title is cumbersome!

Up until now I've fiddled around with the WSS scenarios, but this afternoon I switched my attention to some battles from the Great Northern War. Rather than dive into the classic ones with the Swedes fighting the Russians, I played the two scenarios in the book which pitted Charles XII against Augustus II, Elector of Saxony and self-proclaimed King of Poland. This conflict would drag on for nearly six years, during which time Russia, who had been decisively defeated by the Swedes at Narva in 1700, rebuilt their army. That led, in time, to the Swedish defeat at Poltava and the effective end of their empire.

However that's a way off. For the first battle we find Charles XII facing a strong Saxon-Russian army entrenched on the opposite side of the wide River Duna, near Riga on 19th July 1701. Being Charles XII, he attacked.

The Swedes slipped part of their army across the river during the night, exploiting the fact that the Saxons defences were a couple of hundred metres back from the shore. By the time the defenders realised what was happening the Swedes had a toehold on the Saxon side of the river.

The battle starts there.

The Swedes (left) have three unit of Elite Ga Pa Infantry in their front line. Their reserves consist of  two more units of Ga Pa Infantry and one of Sabres, all of which are Unreliable, reflecting that they have to force a crossing of the river by either boat or pontoon bridge. I used my new pioneer bases to mark the unreliable units.

The Saxon front line consists of some Unreliable Artillery (a lot of Artillery is classed as Unreliable in these rules, since its battlefield capabilities are a bit hot or miss), plus some Saxon line.

You'll notice that the infantry have their centre base advanced a little. This is because defending foot that starts the game in the front line enjoys an advantage against certain troop types, representing them being in good initial positions. 


The Swedish reserve foot, showing the pioneers to the fore.


The main battle line.


Turn 1 - Swedish

The Swedes attacked on their right flank against the Unreliable Artillery here. It proved to be ... unreliable, and was removed. The Saxons moved up some Russian pike-armed infantry from the reserve.


Turn 1 - Saxon

In the centre the Saxon Line threw back the first wave of Swedish infantry.

(If you are wondering about the paraphernalia, the yellow die shows the turn number, the arrow shows which side is 'attacking', the blue dice shows the Swedish combat roll and the black die that of the Saxons. I roll both dice simultaneously even if one side gets to roll first. In this example that black 6 for the Saxons destroys he Swedish GaPa foot before their 6 - also a kill - takes effect. The orange blob shows which unit is destroyed.)


Turn 2 - Swedish

The Swedes pressed forward on the right and the Russian pikemen were cut down to a man (true story - there's a memorial to them). This brought the Swedes up against the main Saxon defences.


Turn 2 - Saxons

The Saxons activated in the centre where Swedish reserve infantry was attempting to cross the river. It failed to cross. Would the next wave make it?


Both sides attempted to rally lost troops at this stage. The Swedes rallied one of their Elite Ga Pa Infantry, whilst the Saxons tried to rally the Russian Pikemen, unaware that they were all dead. You don't rally back from all dead.

Turn 3 - Swedish

The Swedish left flank pushed forward, but the fighting was inconclusive. 


Turn 3 - Saxon

The Saxons centre tried to push back the next wave of Swedish foot as they crossed the river, but failed to stop them getting ashore.


A fierce musketry duel ensued, but neither side gave ground.


Turn 4 - Swedish

On their left the Swedes charged the Saxons but were cut down and driven back into the river in disarray. But the rallied at the last moment.

(They didn't rally. In game terms the unit was lost. But the reserve unit that replaced them was the rallied Ga Pa Infantry and is exactly the same type of unit, so we'll assume the original unit rallied because it makes for a better narrative).


Turn 4 - Saxon

The troops in the Saxon redoubts fired on the advancing Swedes, who were forced to retreat, all momentum having gone out of their attack. If their cavalry could be brought up in support all might not be lost on that flank. But that depended on the building of a pontoon bridge.


Would the cavalry get across?


Turn 5 - Swedish

In the centre the Swedish foot failed to make any headway against the Saxons. All of their units were committed to the fight now; the Swedes had no reserves left.


Turn 5 - Saxon

The Saxons activated on their left as the troops in their defences fired on the approaching pontoon bridge. But the Swedes toiled away and the bridge was built. The cavalry streamed across!


Forming up they charged the Saxon entrenchments, and routed the defenders. The Saxons now hoped for their cavalry to come and save the day.


Turn 6 - Swedish

Desperate fighting on the Swedish left saw the Saxons there collapse. And there were no Saxon reserves.


The Swedes could now turn the Saxon right.


Turn 6 - Saxon

The Saxon cavalry force arrived, and charged the Swedes. Both sides shattered each other.


This left the Saxons with only their centre. The Swedes had won the day!


Thing started to look a bit desperate for the Swedes in the middle of the game when they had to rely on their unreliable reinforcements, but their boats and engineers saved the day, getting the troops over the river in the nick of time. The Saxons had nothing to counter them.

So an historical result for that battle. Would it be the same for the next one?

The second scenario in the rules is Klisow, fought on  9th July 1702.  Charles XII had spent a year advancing into Poland in pursuits of Augustus II. At Klisow he faced a Saxon army awaiting reinforcements from their Polish allies. Hoping to attack before the allies arrived they found their left flank being attacked by Polish cavalry.

I set this up with a little bit of scenery, just to make the photos look nice. The attacking Swedes are on the left, the Saxons on the right in the centre and left sectors and the Poles (played by my Nottoman cavalry) are on the white horses in the distance.

The Swedes only have four units in this battle, but they are all either elite or determined. The Polish cavalry is determined but the reserve Polish cavalry is Unreliable (on the day the Poles quit the field after an initial setback - their alliance with the Saxons was fairly shaky).


Turn 1 - Swedish

The Swedish right, led by Charles XII himself attacked the Saxon cavalry before them, but the fighting was indecisive.


Turn 1 - Saxon

The Swedish attack in the centre was stopped dead by disciplined Saxon musketry. The Swedes committed their only reserve (more cavalry).


Turn 2 - Swedish

The Swedish left-flank advanced against the Polish cavalry, but made no headway against them.


Interlude: a shot of the battle so far, despite little actually having happened.


Turn 2 - Saxon

In the centre the line engaged the attacking Swedish cavalry, but were ridden down. However there's always more Saxon line to move up from the reserve.


At this point the Swedes tried to rally their lost infantry, but failed.

Turn 3 - Swedish

They activated on the left-flank where the Polish cavalry (led by winged hussars, in what would be their last battle) rode them down. The Swedes had no reserve.


Turn 3 - Saxon

The Polish cavalry swept into the Swedish centre and routed that as well.


A total disaster for Charles XII, left only with his cavalry! And a stunning victory for the Saxons, won almost entirely by their Polish allies.

To be fair I've played both of these scenarios a few times now and the honours have been about even. With small numbers of elite troops the Swedes can be prone to death by randomness (an elite unit is expensive but no harder to kill by an enemy who rolls first than one that isn't), but if it all comes together their troops steam-roller the opposition. Historically they did that in most of their battles. In Dominion the other side gets more of a look-in.

Related Posts Plugin for WordPress, Blogger...