Sunday 27 August 2017

Fascinating

As part of this blog's remit of being about my wargaming activities I do, of course, include some of my modelling and painting, even if, generally, I prefer to post game- and rules-related stuff. And it's always fun to be able to transfer skills picked up from my activities to other areas of my life.

Case in point this weekend. Every year, around this time, we go to a local charity ball, which always has a retro/vintage theme of some kind. It's an opportunity to dress up posh and fancy and strut our stuff, and you know I'll never turn down a chance to do that.

My wife and daughter made their outfits again this year, whilst mine was off-the-peg, albeit exactly what I wanted. But both my wife an I wanted headpieces to accessorise our looks.

My wife had made herself a 70s style jumpsuit in a rather unusual Hallowe'en spider-design fabric, and wanted something to match. we searched the files on Thingiverse, and found a set of pieces for making jewellery with. I printed off the necessary bits, painted them to match her outfit and assembled them into this. The assembly was a simple superglue and pinning with wire effort:


The fact that it matched her hair was just an extraordinary coincidence.

My beautification took longer (obviously). I wanted a fascinator to match the frock I'd selected; something fancy but not too over-the-top. I bought a few bits from Spotlight, watched a number of videos on You Tube, trawled through fashion blogs and Pinterest, and then set to. I assembled, and disassembled, but eventually with the aid of a little bit of sewing and a session with my daughter's hot-glue gun, I produced this:


All I can say is that it wasn't as easy to make as I thought it would be; I can see why people fork out wads of cash to buy one. However aside from time it cost me less than $25, so it was worth it.

Here's the bigger picture.

My whole outfit:


Mrs Kobold and I:

And the rest of our party - my daughter (seated), her boyfriend and her best friend. My daughter made her vintage-style dress and turban:


As you can see, we lead a glamourous life chez Kobold.

Storming The Redoubt

I tried another game of Pikeman's Lament yesterday with my Great Northern War forces.  I went with similar, mixed-arm, forces to the previous game, with a couple of minor changes.

For the Russians I dropped one of the Cossacks (Dragoons) and replaced it with another unit of Gallopers, giving them 4 x Raw Shot (with Socket Bayonets), 2 x Gallopers and 1 x Dragoons.

I wanted to make the Swedes more determined, but lower in numbers. I went with 2 x Raw Shot (with Socket Bayonets), 1 x Raw Pike and 2 x Elite Gallopers,. This left me with three points to spend, so I gave each of the three infantry units an Agitator/Priest, which would boost their morale, hopefully creating the effect I wanted.

I rolled for a scenario and got Storming The Redoubt, with the Russians attacking. The terrain was randomly determined, and I ended up with a small settlement with some fields just in front of the redoubt, but an otherwise mostly open field with just a couple of hills. The Russian leader was uninspiring (no activation bonuses) but brave (morale bonus), whilst the Swedes were led by a mistrusted mercenary (no morale bonus) who was bold in the attack (automatically pass one attack activation).

The Swedes deployed one Shot and one Pike in the redoubt. I didn't have enough defences to cover their baseline as the scenario suggests (with hindsight I think you just have a small area of defences in which the rest of the forces is deployed), so just had small stream instead to act as a defence.


The Russians led with their leader's unit, putting two Shot in close order to mount the main attack, whilst two other shot would cover with musketry before charging in themselves. The horse covered the flanks; Gallopers on their right and Cossacks on the left.


Terrible activation rolls by the Russians saw their attack stall from the start, and the Swedes quickly brought up their cavalry to oppose that of the Russians.


Initial exchanges of musketry saw Russian casualties, but with their leader to the fore morale remained high.


As the Swedish cavalry closed on the Russians the leader's unit received a volley from some supporting Shot which emptied a couple of saddles. The affected unit immediately turned tail and fled; the Swedes were right not to trust their mercenary commander.


The other Swedish unit took the fight to the Russians.


They drove the Russians back with heavy casualties (the post-combat follow-up is deadly) ...


But were counter-charged by the other Russian cavalry unit and destroyed after a fierce fight.


The loss of their cavalry meant that the Swedes had lost half of their force, and their leader, but their morale held. The Russians now launched their first assault on the redoubt.


It was driven back, but the Swedish defenders now faced a ring of steel, and their was little hope of relief; their other Shot unit was pinned down by the Cossacks. In fact all the Russians really had to do now was stand off and shoot, since they had time on their side.


Despite the protection of the redoubt, the Swedish shot were forced to fall back by Russian musketry. A Russian unit advanced to rush over the parapet and take the fight into the defences.


Ever aggressive, the Swedish Pike charged out of the defences (some of them anyway), and took the fight to the Russians, driving them away from the defences.


A volley from the Shot scattered the Russians, causing their leader to flee.


Russian morale held, but the Swedes maintained the offensive, their Pike driving into another Russian Shot unit.


That, too, broke and ran. A third Shot unit forgot itself and charged the Pike, with inevitable results. It fell back disordered.


The Pike counter-attacked, but the Shot rallied and held, and scattered their Swedish attackers.


On the Russian left their Cossacks had been skirmishing with the one remaining Swedish relief unit.


The Russians made another assault on the redoubt, but were pushed back.


The Cossacks took a casualty, but returned fire, and routed the Swedish Shot.


This now left the defenders of the redoubt as the sole Swedish unit on the table. However the Russians were depleted; not in units, but the units they did have were now well below full strength. One of their Shot units decided to slip quietly away from the battle.


Another rushed into the redoubt, however.


As they did so, the Cossacks fired a volley, felling another Swede. This was the final straw, and they surrendered.


This was a pretty close game. Both sides suffered failures to activate at key moments, shifting the initiative to their opponents. The extra morale boost the Priests gave the Swedes kept them firmly in the fight, and made the redoubt a tough nut to crack. The Swedes came very close to inflicting a 50% points loss on the Russians, forcing them to break off the attack and giving the Swedes the win, although the Russians had competed one of their special orders, which would have blunted the Swedish victory somewhat.

All in all, a great and exciting game.

6x6 - Game 3.4

Saturday 26 August 2017

Return To Zorndorf

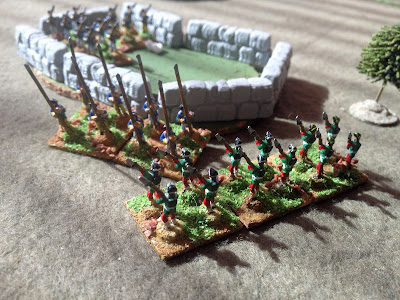
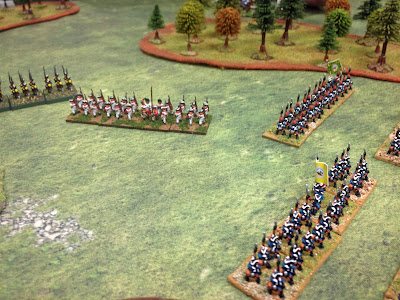
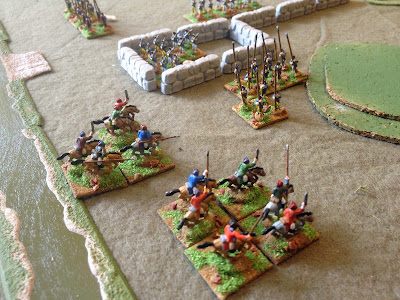
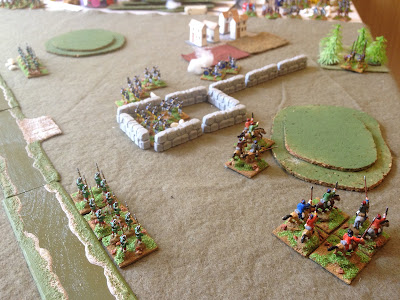
On Thursday evening we had another go at the battle of Zorndorf using Maurice, this time with a scenario designed by Daniel. We had three players on each side, with about 70pts per player, so it was a a fairly large game. Daniel, John and Ralph took the Russians, whilst Gary, Satvik and I took on the task of attacking them with the Prussians.


The terrain was broken up with lots of marsh and woods, which tended to channel the Prussian attack. The Russians were initially content to sit and wait.


We decided to make Gary's attack on our right the main one; he would move in and start to roll up their line, I would pin in the centre and Satvik would simply hold on our left.


As Gary's troops moved in, the Russians advanced in confusion. This gave Gary's attack the foothold it needed.


I moved up in the centre, as Gary tried to force his way through a gap in the terrain. Unfortunately the firing rolls weren't up to the task, and the Russians held.


In the centre the Russians responded to my advance. concentrating on the left of my force with their elite infantry and giving me the sound drubbing I deserved for advancing unsupported.


Satvik advanced on our left, on the hope we could distract at least some of the Russians from mauling us elsewhere.


On our right Gary swung his cavalry around the Russian left and the inevitable cavalry action occurred. Although outnumbered the Russians seemed to get the better of it; numbers are no good if you can't bring them to bear.


My infantry even got charged by cossacks. Awkward.


Fortunately my camera ran out of power at that point, so the steady disintegration of the Prussian army went unrecorded. With our victory condition of breaking the Russian army obviously impossible to achieve, we graciously conceded to our gallant opponents.

There was some discussion concerning the balance of the scenario and especially the national characteristics in lay. The Russians had Rally To The Colours which is incredibly useful if you're on the defensive and don't have to move around much. A few times we took Russian units to the brink of breaking, only to see them fully recover. The fact that the terrain broke up our attack made coming up with a decent plan difficult, but I'll confess that, with hindsight, our initial deployment and overall strategy - giving our highest quality command to a player who hadn't played before, and then encouraging them to sit tight whilst they learned the game - possibly wasn't the best thing to do.

Thanks to Daniel for putting together what was still an entertaining and spectacular game.

As ever, Ralph has a more detailed report on his BLOG.

Sunday 20 August 2017

The Pikeman's Lament - Great Northern War

It had been suggested by others that my Great Northern War troops could be co-opted into a couple of Pikeman's Lament companies, so this morning I gave it a try.  I put together two companies, rolled up some officers and randomly selected a scenario, getting the River Crossing mission.

Here are the Russians. Some of them wouldn't fit into the deployment zone, so started off-table.

4 x Raw Shot @ 3pts
2 x Dragoons @ 4pts
1 x Galloper @ 4pts


The Swedes cam on from the opposite corner. Both sides had to get all of their troops to the other side of the river, whilst preventing the opposition from doing the same.

2 x Raw Shot @ 3pts
2 x Raw Pike @ 3pts
1 x Regimental Gun @ 4pts
2 x Aggressive Gallopers @ 4pts


I determined the terrain randomly. Most of it ended up in the two deployment corners, slowing down both sides' initial moves, but especially those of the Swedes.


The Cossacks (Dragoons) raced forward, looking to cross the river quickly and skirmish with the Swedes.


The Swedes marched slowly towards the ford.


The Cossacks crossed the river.


The Swedes took cover behind a wall as the first shots of the skirmish were fired.


The Cossacks fell back and advanced as the Swedes tried to return fire whilst also advancing. The Russians advanced steadily, making the most of their officer's ability to reroll one failed activation per turn.


Away from the ford, the Swedish cavalry, led by their officer, was trying to turn the Russian left flank. Outnumbered Russian cavalry moved to block them.


The Cosacks were now properly across the river, but neither side was inflicting much in the way of casualties on the other.


As the Swedish cavalry advanced, the Russians closed, forcing the ensuing fight to happen in the river, where the Swedish advantage in the attack was nullified.


Both sides took casualties, but the Russians held, forcing the impetuous Swedes to charge them again and again in the river. The Russians were wiped out, but had seriously damaged the Swedish cavalry.


The Cossacks got their act together, and their fire drove back the Swedish pikemen. The Swedish shot behind the wall fired in support of their comrades, but scored no hits.


An overview of the action. The Russians were firing across the river, and holding back the Swedes whose activations were generally pretty awful.


The scenario ends when one side has all of its surviving troops across the river. With the Swedes in a muddle on their side, the Russians pushed forward, their officer leading the way.


The few surviving Swedish cavalry now found themselves facing Russian shot units. One unit was destroyed in the river, but that led by the Swedish officer charged forward ...


... and drove back the infantry with great panache.


However this left the Swedish officer as the sole surviving cavalry on their side, and the only one of their troops to have crossed the river and lived.


The Swedish pike got themselves organised, and charged the Russian officer's shot unit.


Both units took casualties ...


... and both routed, leaving the Russians leaderless.


There was now only one Russian unit left on their side of the river. The Swedish officer charged it (he had no choice). It routed. This left the Russians in a winning position, unless ...


... the Swedes could rout another of their units. This would bring the company's selected special orders into play and actually leave the action as a draw. The Cossacks were shot at and took casualties, but held firm. The final shot of the game saw the Swedish artillery fire at some Russian shot. They took hits ... and passed their morale test.


The Russians had scored a win 3pts to zero. The Russians failed both of their special orders, which cost them a couple of points, whilst the Swedes managed one of theirs (first charge of the action), but lost the point because their failed the other (routing half of the enemy force).


The Swedes were hampered by difficult terrain early on, and some poor activations, but the real decider was their cavalry being forced to fight in the river, where their combat advantage for being aggressive was nullified whilst their impetuosity remained unchanged. This left the Swedes toothless and unable to respond to the final Russian push.

The choice of 'raw' for the pike and shot units seems odd, but seems to force both sides to adopt a more close-combat orientated approach, something which works especially well for the Swedes. The effect of firing was erratic and unpredictable; had units been able to charge, the fights would have been more decisive.

6x6 - Game 3.3
Related Posts Plugin for WordPress, Blogger...