Sunday 30 August 2020

HOTT 52 - Week 35 - Dwarves vs Elephantmen

I redid the bases on some dwarves this week, to bring them in line with my original Dwarf army. So I decided that for this week's HOTT 52 game I'd let them have a run on the table. As is traditional with Dwarves, they are mostly blades, so I thought that it would be fun to pit them against an almost identical army - a blade vs blade fight basically. My Elephantmen are also mostly blades, so I selected them as the opponent.

Both armies had eight lades (including the general) and two riders. The Dwarves rounded their army out with a hero, whilst the Elephantmen could call on a god.

The Dwarves defended.


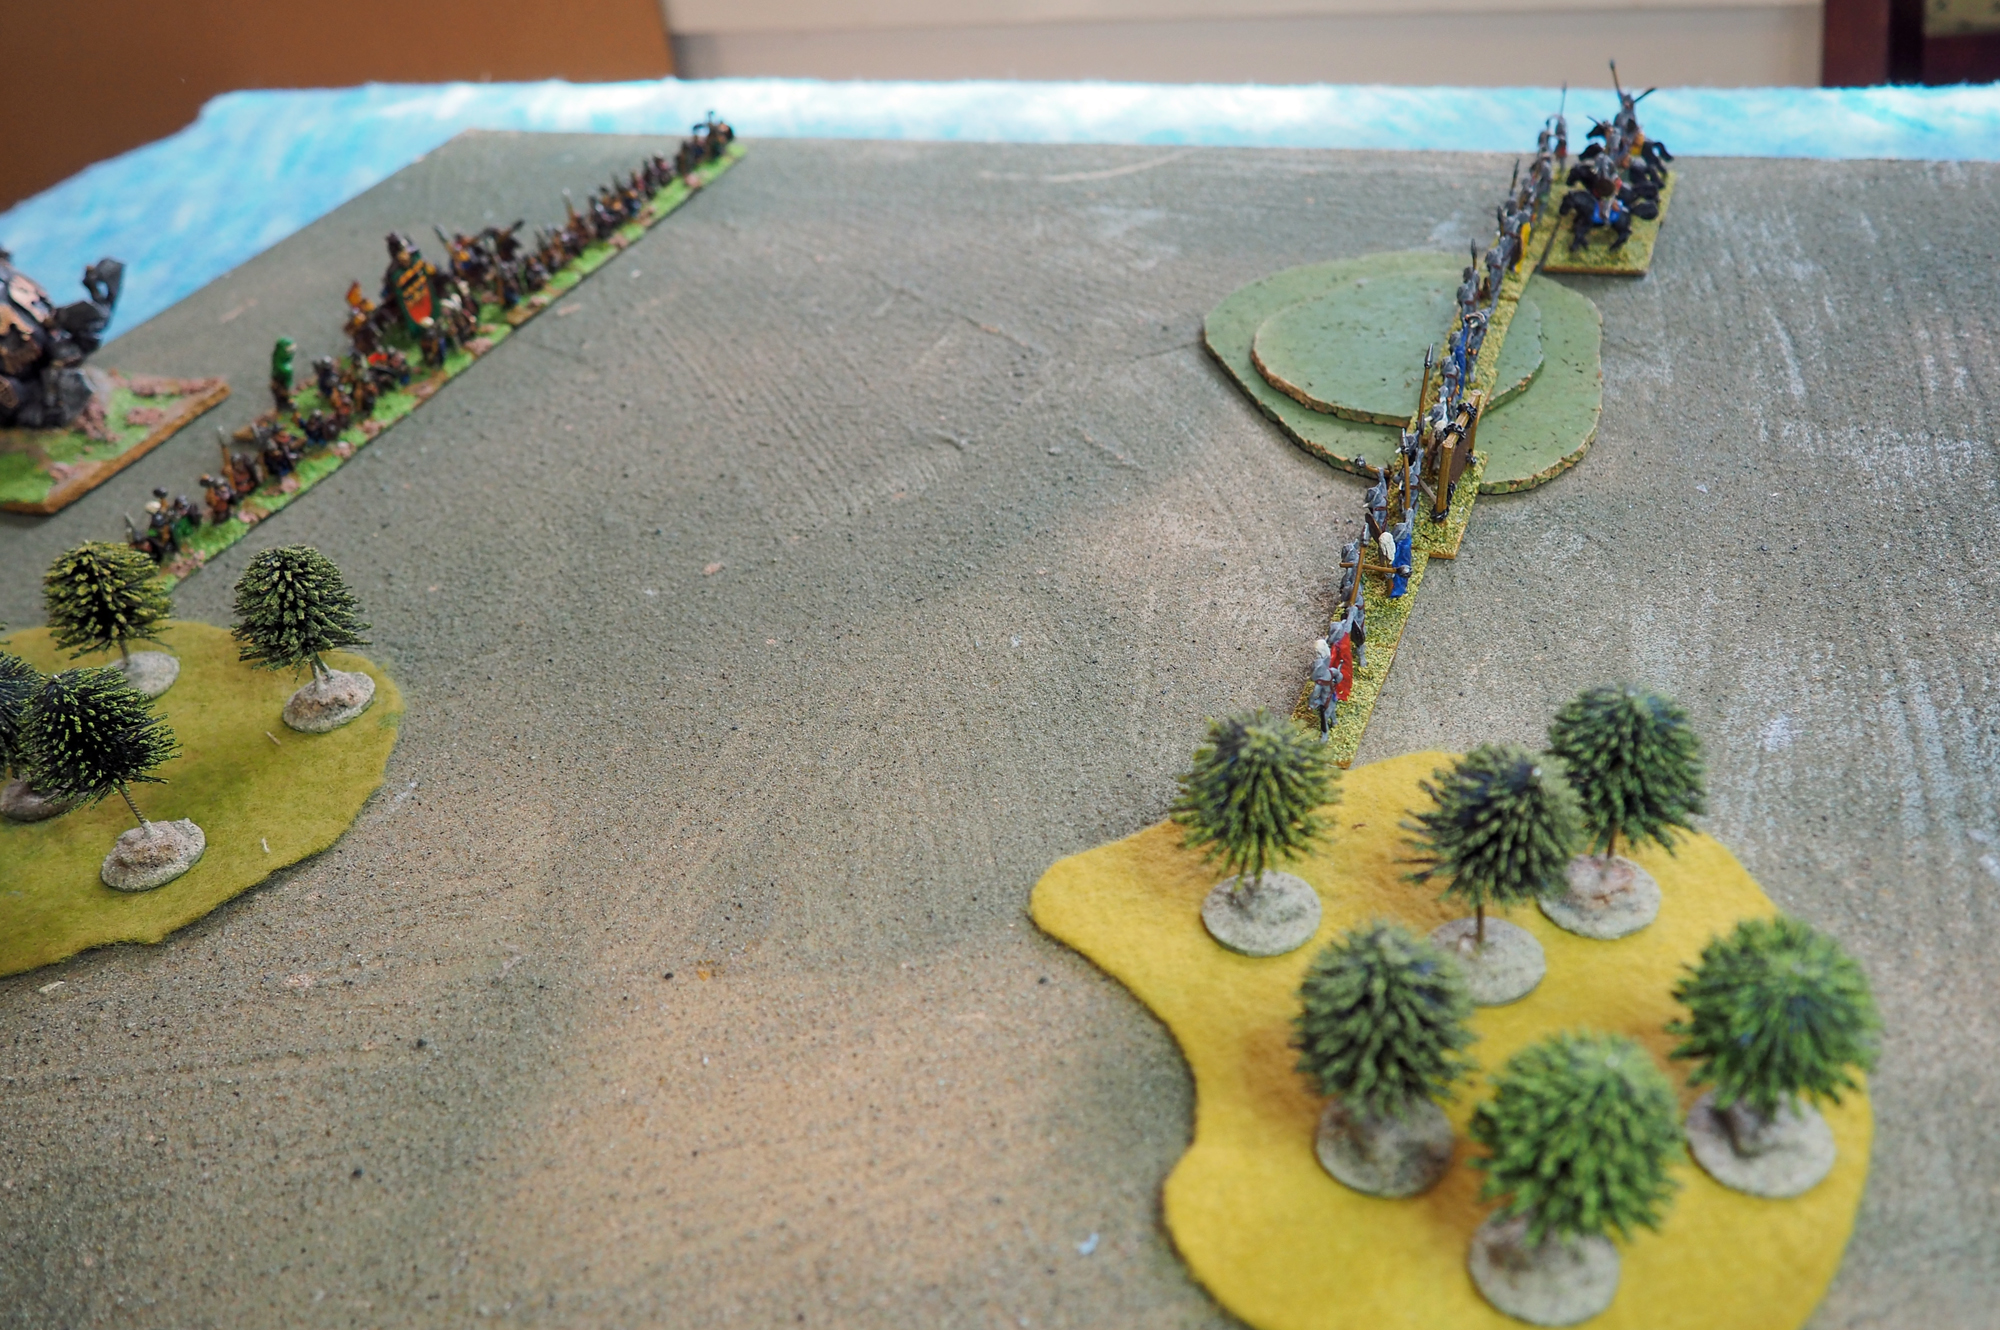
The Elephantmen got a chance to summon their god on the first turn, and went for it. They hoped that Kali would break up the Dwarven line a little before the armies contacted.


The Dwarves spread out their reserve troops to avoid them being recoiled into each other. Kali descended on the reserve cavalry, which retreated.


She then attacked the rear of the Dwarven right flank, but again her target fell back in god order.


The Elephantmen tried to come up and take advantage of the disruption she was causing.


The Dwarves engaged her with their hero


This seemed too much for the fickle Kali, who decided to seek her amusement elsewhere. She left just as her army reached the Dwarven line.


The Elephantmen's cavalry charge was driven back, with the loss of an element, and the two lines of blades charged each other.


The Elephantmen lost an element in the centre ...


... whilst the Dwarves lost the one on their extreme right flank.


The Elephantmen angled their line to prevent the Dwarves extending their flank.


Both sides took a couple of turns to reorganise their fragmented lines.


The fighting resumed. The Elephantmen had turned the Dwarf line, but couldn't destroy the dogged element on the end. The Dwarves were able to bring their hero up to support it.


In the centre the Dwarves reorganised their cavalry into a mobile reserve.


The Elephantmen on the Dwarven right fell back int the woods in order to avoid the mighty Dwarf hero.


The hero followed them into the woods, but was driven back


Fighting continued along the lines - the Elephantmen lost their second element of cavalry.


That put them one element away from breaking. The loss of the cavalry left a hole in the centre, which the Dwarves were quick to exploit, and they used it to destroy an element of blades, to win the battle.


I mad a big mistake with the Elephantmen at the start, when I brought the god on on the first turn. She was always going to struggle on her own  gods are best used to support the rest of the army rather than as solo element-killers. Ideally the Elephantmen should have risked it and waited for a '6' when the armies were closer; they did actually have a couple. With the god gone they were immediately on the back-foot. They came close to controlling the battle when the outflanked the Dwarven right, but their failure to kill the element there gave the Dwarves a chance to recover. The cavalry proved useful in a blade fight, since they force the blades to fight at the lower 'vs mounted' factor, increasing the chance of a kill. Unfortunately the kills tended to be the cavalry rather than the foot; low factors work in both directions.

Friday 28 August 2020

Mammoth Hunt

I took Palaeo Diet to the Gong Garage Gamers last night, and Caesar and I played a couple of games. 


We started off with a basic cooperative hunt to get get Caesar used to the rules. I'd painted a few more mammoths during the week, so I now have a decent herd - four adults and two juveniles.


Caesar and I took three hunters each. Our target was six bulk - each adult is worth four and the juveniles three. We were allowed to lose one hunter achieving this. If we lost two then we had to produce eight bulk to show for it. Losing more than two hunters would be considered a failure regardless of what bulk we gained.


We surrounded the herd. Our plan was to isolate one of the parent mammoths, since the reaction table will tend to have the juvenile follow them. This would give us all we needed in terms of our goal. The isolated pair would be drive along the river-bed between the outcrops where it could be trapped between two teams of hunters.


It all went according to plan until Caesar brought one of his hunters in too close to the mother mammoth, and she attacked him. This made it harder for the other hunters to coax it along, since any reactions would tend to translate into attacks on the hapless hunter.


In fact the hunter did an amazing job on his own, inflicting almost enough wounds to kill the mammoth single-handed, before taking a hit in reply (the mammoth rolled really badly for her counter-attacks).

Meanwhile the other hunters tried to break up the herd and at least isolate their targets.


In one case this involved the unintentional provoking of an attack, which cost us another wounded hunter.


I brought in one of my hunters on the juvenile mammoth. He injured it but, embarrassingly, was wounded in return (a one in six chance).


we now had three wounded hunters - each hunter can only take two hits, so we had to be cautious now in order to avoid losing any of them.


We pulled back the injured hunters, and brought up our clubmen from the canyon, where they'd been our ambush force. With two targets now wounded it was quicker to finish them off in the field. Caesar's clubman did the job on the adult mammoth.


And my spear-wielder killed the juvenile.

So despite not going entirely to plan, our hunt was successful, with seven bulk gained and no hunters lost. Three were injured though.


We had time for a second game, so I set up a scenario I'd not played before, Follow That Bird. In this one two groups of hunters compete to capture an ornately feathered bird in the centre of the table and return it to their chief. Obviously the bird will resist being captured. There are also a couple of predators on the prowl. We had three hunters each. The bird in the counter in the centre of the table (I haven't any suitable models yet). And there's two terror-birds on the prowl, which we classed as Pack Predators.


Caesar's initial activations immediately attracted the attention of a terror-bird.


His lead hunter decided to take on the predator, and despite being wounded he killed it.


This attracted the other terror-bird, leaving my route to the target bird free. Except in their enthusiasm to reach it the hunters disturbed it and it ran off.


Everything converged on Caesar's hunters.


Mine crept up on the target whilst the second terror-bird entered the fight.


Caesar's lead hunter fell, and the predator began to feast on his corpse. Caesar took the opportunity of it being distracted to nip past and head for the target bird.


There was a brief skirmish. One of Caesar's hunters was wounded by an arrow, whilst one of mine was killed by a spear.


The bird we were chasing fled into a thicket.


But the surviving terror-bird wandered over attracted by the scent of blood and fresh meat.


Despite being wounded, it was one of Caesar's hunters that caught the prize. All he then had to do was make a single move off the board edge in order to claim it. All I had to do was inflict one hit on him with two hunters making the attacks.

I missed, and Caesar's hunter escaped to claim the win.


I really enjoyed both games. Wrangling a herd of mammoths was quite a challenge, but made for some interesting decisions - the cooperative game is an interesting puzzle to be solved each time, with enough unpredictability to keep it interesting. Follow The Bird was a lot of fun and has some great replay value with different terrain set-up as well as the fact that the predator positioning is randomised as well (in our game they ended up between us and the target, for example).

We ended up in yet another room, which seemed to be the storage for  tremendous number of chairs, somewhat limiting our actual gaming space. As well as one of my stylish masks, I wore some wargames appropriate earrings as well.


Here's a better view from earlier in the day.


Monday 24 August 2020

Burlesque Update #15

In my last update I said that there was a possibility that we might start face-to-face classes again, and, back around the end of July, this happened. We're in a new space, which seems pretty good, and putting together the solo acts we'd started work on in April/May. There's still the possibility of a show, albeit with a very small live audience. The aim is to stream it online, though, so anyone with a ticket and an internet connection can watch it. It won't be quite the same, teasing a remote audience, but I'm sure we will rise to the challenge.

I am still pursuing my 'new' look:


But there's more. If all goes well (and in these times that's a big If), then at the end of this year I will be taking part in another burlesque competition. This time as part of a duet! A local performer asked if I'd like to partner up with her, and I was so shocked that I said Yes on the spot. She's someone I greatly respect and admire, and the chance to work with her in developing a new act is far too good an opportunity to miss. More on this as it progresses.

So a short update, but an update nevertheless.

Sunday 23 August 2020

HOTT 52 - Week 34 - Garden Gnomes vs Wonderland

For this week's HOTT 52 game I thought I'd play a game between two of my more whimsical HOTT armies - the delightfully silly Garden Gnomes from Peter Pig , and my Alice in Wonderland army. Both armies feature spears and behemoths. The Gnomes support them with a magician and some shooters, whilst Wonderland uses beasts and lurkers.

The Gnomes defended and drew up with the spears in the centre, their shooters defending a hill on their right and their snail behemoths on the left.


Wonderland had a mushroom forest down the centre of their deployment area, so formed up on one side of it, their spear phalanx facing the shooters on the hill. Alice covered one flank, whilst in the wood were the Griffon, Mock Turtle and flamingo beast elements


Starting positions.


As Wonderland advanced the Gnomes swung their left flank around. Thr snail behemoths moved in on the mushroom forest.


Wonderland's beasts swung around to meet them.


The Griffon and Mock-Turtle were quickly overrun. The advancing snail found its was blocked by an insane tea-party ...


... but swept that away as well.


It crashed into the flank of the spear phalanx.


Meanwhile the phalanx had come in range of the Gnomes on the hill, who rained down missiles on it, destroying part of the first rank.


The snail was driven back, and destroyed by a flamingo flank-attack from the mushroom forest.


This left the Gnomes with a behemoth stuck in front of their army and unable to safely recoil without destroying friendly troops. The Gnomes withdrew and reorganised.


On their right, their illusionist enticed Alice with images of home, and she fled. Angled to turn on the Gnome's flank, her flight took her off the board.


The phalanx pushed up the hill, and slowly drove the Gnomes back.


The height of the battle.


The Queen of Hearts led her bodyguard into the attack, pushing back some of the Gnome shooters.


The Queen was outflanked. However her troops fought their way ut, destroying the Gnomes facing them. But it was too little, too late ...


On Wonderland's right their spears were forced back into the mushroom forest and routed as the Gnome King personally led the attack. 


Their loss was enough to break Wonderland's army.


Wonderland were outflanked, which is never good, but could have held on and won a victory had some of the earlier combat scores been better. In fact the early combats were relatively even and could have gone either way, costing the Gnomes their expensive behemoths.

Whatever the result this was a colourful, fun and exciting game!

Related Posts Plugin for WordPress, Blogger...