Thursday 30 March 2023

Steam vs Sail

Although I painted them a few weeks ago I hadn't actually had my new steam-ships for Galleys & Galleons on the table yet, so yesterday I set up a game with them.

In keeping with traditional fantasy I designated them as a Dwarf fleet. I used four ships as follows:

Small Ironclads - Grey Crag and Bloodaxe - Q3 C2 - Gun Turrets, Ironclad, Steam Engine
Medium Ironclad - Kozah's Revenge - Q3 C3 - Gun Turrets, Ironclad, Steam Engine
Large Ironclad - Sea Cleaver - Q3 C4 - Heavy Bow Chasers, Ironclad, Steam Engine

Against them I used some galleons, representing the fleet of well-known HOTT army the Dukedom of Ceidonia. They were:

Fast Galleons - Serlo's Blessing and Great Tom - Q3 C3 - Chaser Guns, Galleon Rigged, Razee
Large Galleon - Duke Otto - Q3 C4 - Chaser Guns, Galleon Rigged, High Castles, Trained Gun Crews
Armoured Galleon - Aegis - Q3 C4 - Chaser Guns, High Castles, Ironclad, Square Rigged

I set up a straight fight. Here it is a few turns in - the Ceidonians at the top have formed a ragged line, whilst the Dwarves have sent their largest ships into action and are trying to work the smaller vessels into the Ceidonian rear.


Kozah's Revenge and Sea Cleaver advance on the Ceidonian line. The Ceidonins are in the order Serlo's Blessing, Great Tom, Duke Otto and Aegis bringing up the rear.


Serlo's Blessing opened fire on Kozah's Revenge, but couldn't get past the armour.


The Dwarves returned fire, but only did superficial damage.


The Dwarven ships passed down the Ceidonian line. Great Tom opened fire and managed to damage Kozah's Revenge.


The mighty Sea Cleaver opened fire as well, but missed the Ceidonian galleon.


The one spectator was unimpressed.


The Ceidonians turned into the wind so they could come about and work north to engage the Dwarves. But Aegis had got cut off through having to turn to avoid the advancing ironclads. Meanwhile Grey Crag and Bloodaxe had finally worked their way around the island.


Kozah's Revenge turned and opened fire on the Aegis, but failed to penetrate its armour.


A second shot did inflict some damage.


Aegis turned and returned fire, and the two ships steadily shot at each other for a while. Both took hits and Kozah's Revenge took engine damage as well.


The smaller ironclads were now in the fight - Grey Crag took a shot at Great Tom as it sped past.


Kozah's Revenge struck!


The Ceidonians were turning back into the action whilst the Dwarves attempted to overwhelm Aegis with numbers


The armoured galleon was raked by both Bloodaxe and Sea Cleaver, but still kept fighting.


The Dwarves now had a problem; they had three moving ships in a very small space ...


... A collision was inevitable. Both Bloodaxe and Sea Cleaver were damaged.


Bloodaxe was fired on by Serlo's Blessing and caught fire. The crew quickly extinguished the blaze, but it still caused some damage.


Sea Cleaver continued to fire on Aegis, which resolutely refused to strike.


Serlo's Blessing engaged Sea Cleaver on the other side as Aegis turned and kept firing.


Badly damaged, Sea Cleaver sank


At that point I gave the victory to the Ceidonians - whilst Aegis was crippled, having fought off three Dwarven vessels, it was still fighting. None of the other Ceidonian ships had suffered any damage. Meanwhile the Dwarves only had Grey Crag in a fit state to fight, with Bloodaxe looking very shaky indeed. With only their two smallest ships left the Dwarves steamed for home.


Steamships are quite fun in Galleys & Galleons - they don't need actions to move, but do have to spend them to slow down, speed up or stop, so need a little bit of planning. The ironclad trait was prevalent in this game as well, and helped prevent some damage. However it doesn't stop criticals or a good die roll, as the Dwarves found out.

Monday 27 March 2023

Another Galley Action

I used the same galleys from my previous game in a game yesterday, but this time I used the alternative stats I came up with in THIS POST. This spreads the C values a little more whilst reducing the spread of Q values and creating a larger jump in combat strength with increasing size. 

Here they are set up, with Romans at the bottom of the picture and Carthaginians at the top.


Smaller vessels went into action on the flank


The Romans detached some larger vessels as it became clear that the Carthaginians were massing some strength there.


The main bodies of each fleet closed up.


A lively action ensued. With the bigger ships firing the artillery that have was a fairly attractive proposition; less risky than ramming although, it has to be said, less likely to produce a result.


Naturally boarding actions ensued as well. Ships began to strike.


The Romans broke through with a trireme and rammed the Carthaginian flag, although to little effect.


Carthaginian ships threatened the Roman flag. With most ships having a Q value of 3, having a flagship in range was very useful, boosting them to a Q of 2. If a side could take out the enemy flagship then they would have a distinct activation advantage.


As you can see from the damage markers the fighting was brutal.


The Carthaginians lost half of their ships first, although the Romans were down five ships and were just as likely to lose. So it was another close-run thing.


A final view of the action.

I actually found the changed stats quite interesting to run. With the flagships giving most things a Q value of 2, ships could generally get all of the activations they needed, but sometimes bad luck saw a turnover when it was least wanted.  The quinquermes, which I ran as Q3 C4 were very useful, and felt like the kind of vessel a navy of the era might rely on. 

Anyway, it's always fun to experiment with different setups for games like this, and this one seems to give a fast and lively battle with plenty of action.

Sunday 26 March 2023

Nottomans 3

I finished off another batch of units for my Risk-figure GNW Nottomans today. This time it's the irregular light infantry. As with the regulars I did four units.


Here are the Nottomans so far. I have cavalry and artillery still to do. Not looking forward to either (and I may take a break to paint something else).

Friday 24 March 2023

Thursday Galleys

I took my scratchbuilt galleys along to the club last night and we played a game of Galleys & Galleons with them. I took one side whilst Bailey and Stuart took the other as a team effort.

Both sides had a hexareme flagship, three quinqueremes, three quadremes, three triremes and two biremes, for a total of twelve ships. My side was nominally Romans (apparently because I deployed so neatly) whilst Bailey and Stuart were Carthaginians.


I didn't keep track of a lot of the detail of the game. Here's the very early stages as we advance towards each other. As you can see, I kept my fleet together in a neat block by being cautious and economical with my activation rolls, whilst the Carthaginians just went for a wild charge.


As ever the smaller ships opened up the fight on one of the flanks. A Roman bireme was rammed but the other returned the favour. Within a couple of turns both sides had lost a ship.


In the centre Carthage had contrived to shift some of their ships around the Roman left, whilst others looked set to move around an island and threaten the Roman right. The Romans reorganised their second line to face these threats.


The larger ships were now engaged, and we had the first boarding action when a Roman quinquireme boarded a Carthaginian trireme as was repulsed.


This boarding action was more successful, with a Carthaginian quinquereme striking to a Roman quadreme.


Bailey and Stuart consider their options.


A wider view of the action.


The Carthaginians ram and damage the Roman flagship!


At this point we called it an evening. I normally play until one side loses half of its ships and we'd reached a point where both of us were five ships down and looking for that last kill. So we called it a draw.


We had ships sunk by ramming, captured by boarding, burned to the waterline and even one where the crew panicked and ran it aground (thanks to the All At Sea table), so on the whole I think the evening went well. Neither Stuart nor Bailey had played Galleys & Galleons before, but they soon picked up the basics, and the game rattled along fairly well. With hindsight I think the forces would have been better split into two six vessel commands, but they otherwise gave a pretty good game.


Wednesday 22 March 2023

Lunchtime Hunts

I set up some Palaeo Diet on my lunchbreak, and ran a couple of hunts.

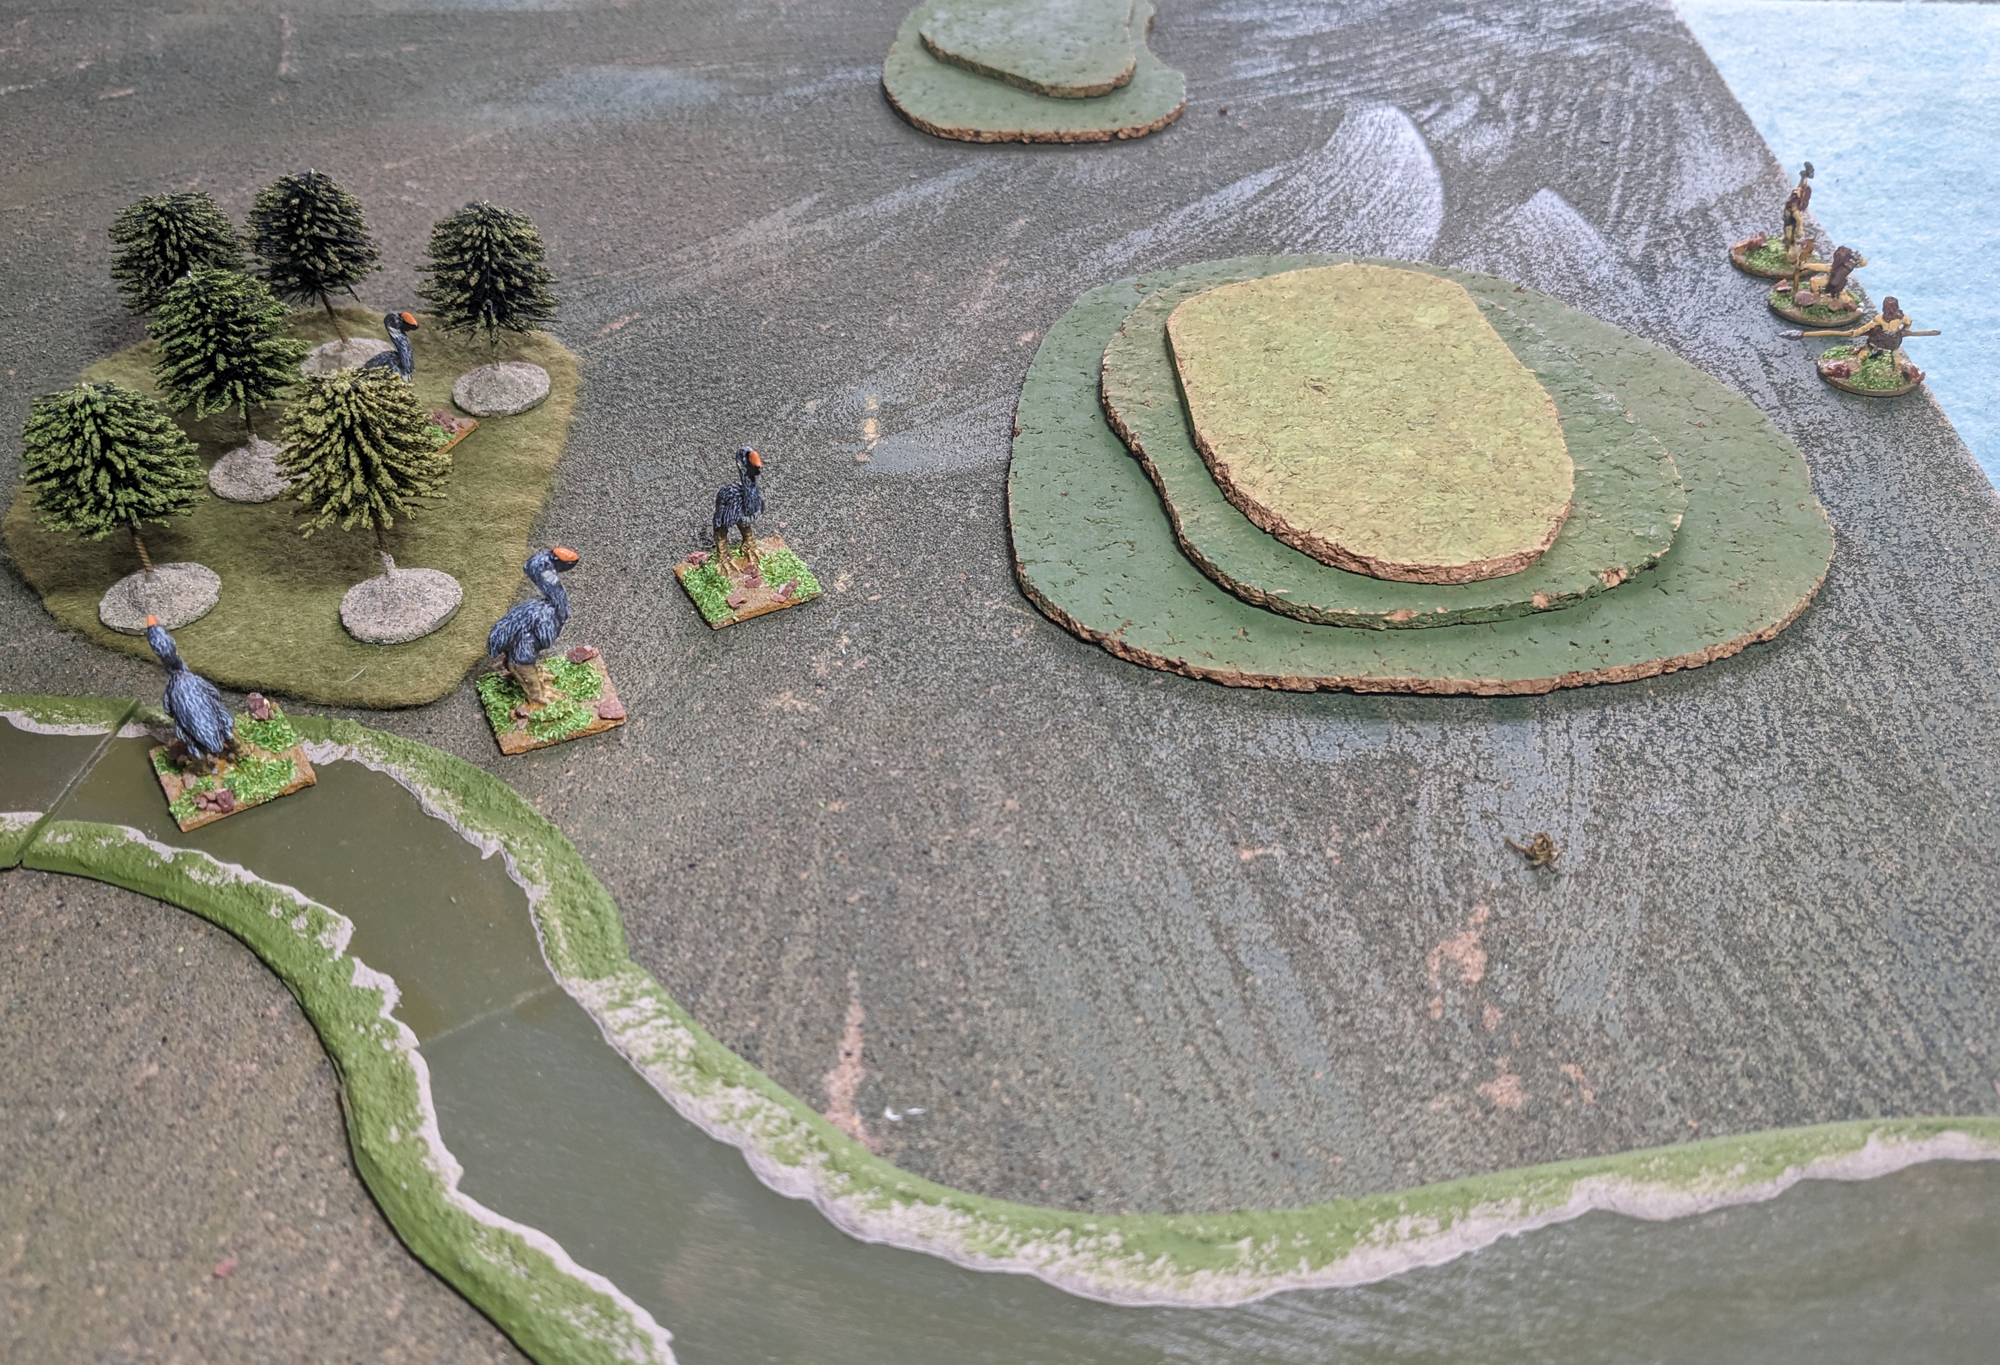
In the first a group of three hunters (Axe, Spear and Bow) were after some big birds who were grazing in a wood near a stream.


The skittish animals needed to be staked carefully. Axe went into the woods to flush out the one there, whilst Bow and Spear teamed up; Bow would shoot at one and drive it towards Spear for rapid dispatch.


Bow startled the birds with his shot, but nothing more and the animals fled towards Spear.


Spear also managed to miss the target, and the bird turned on him!


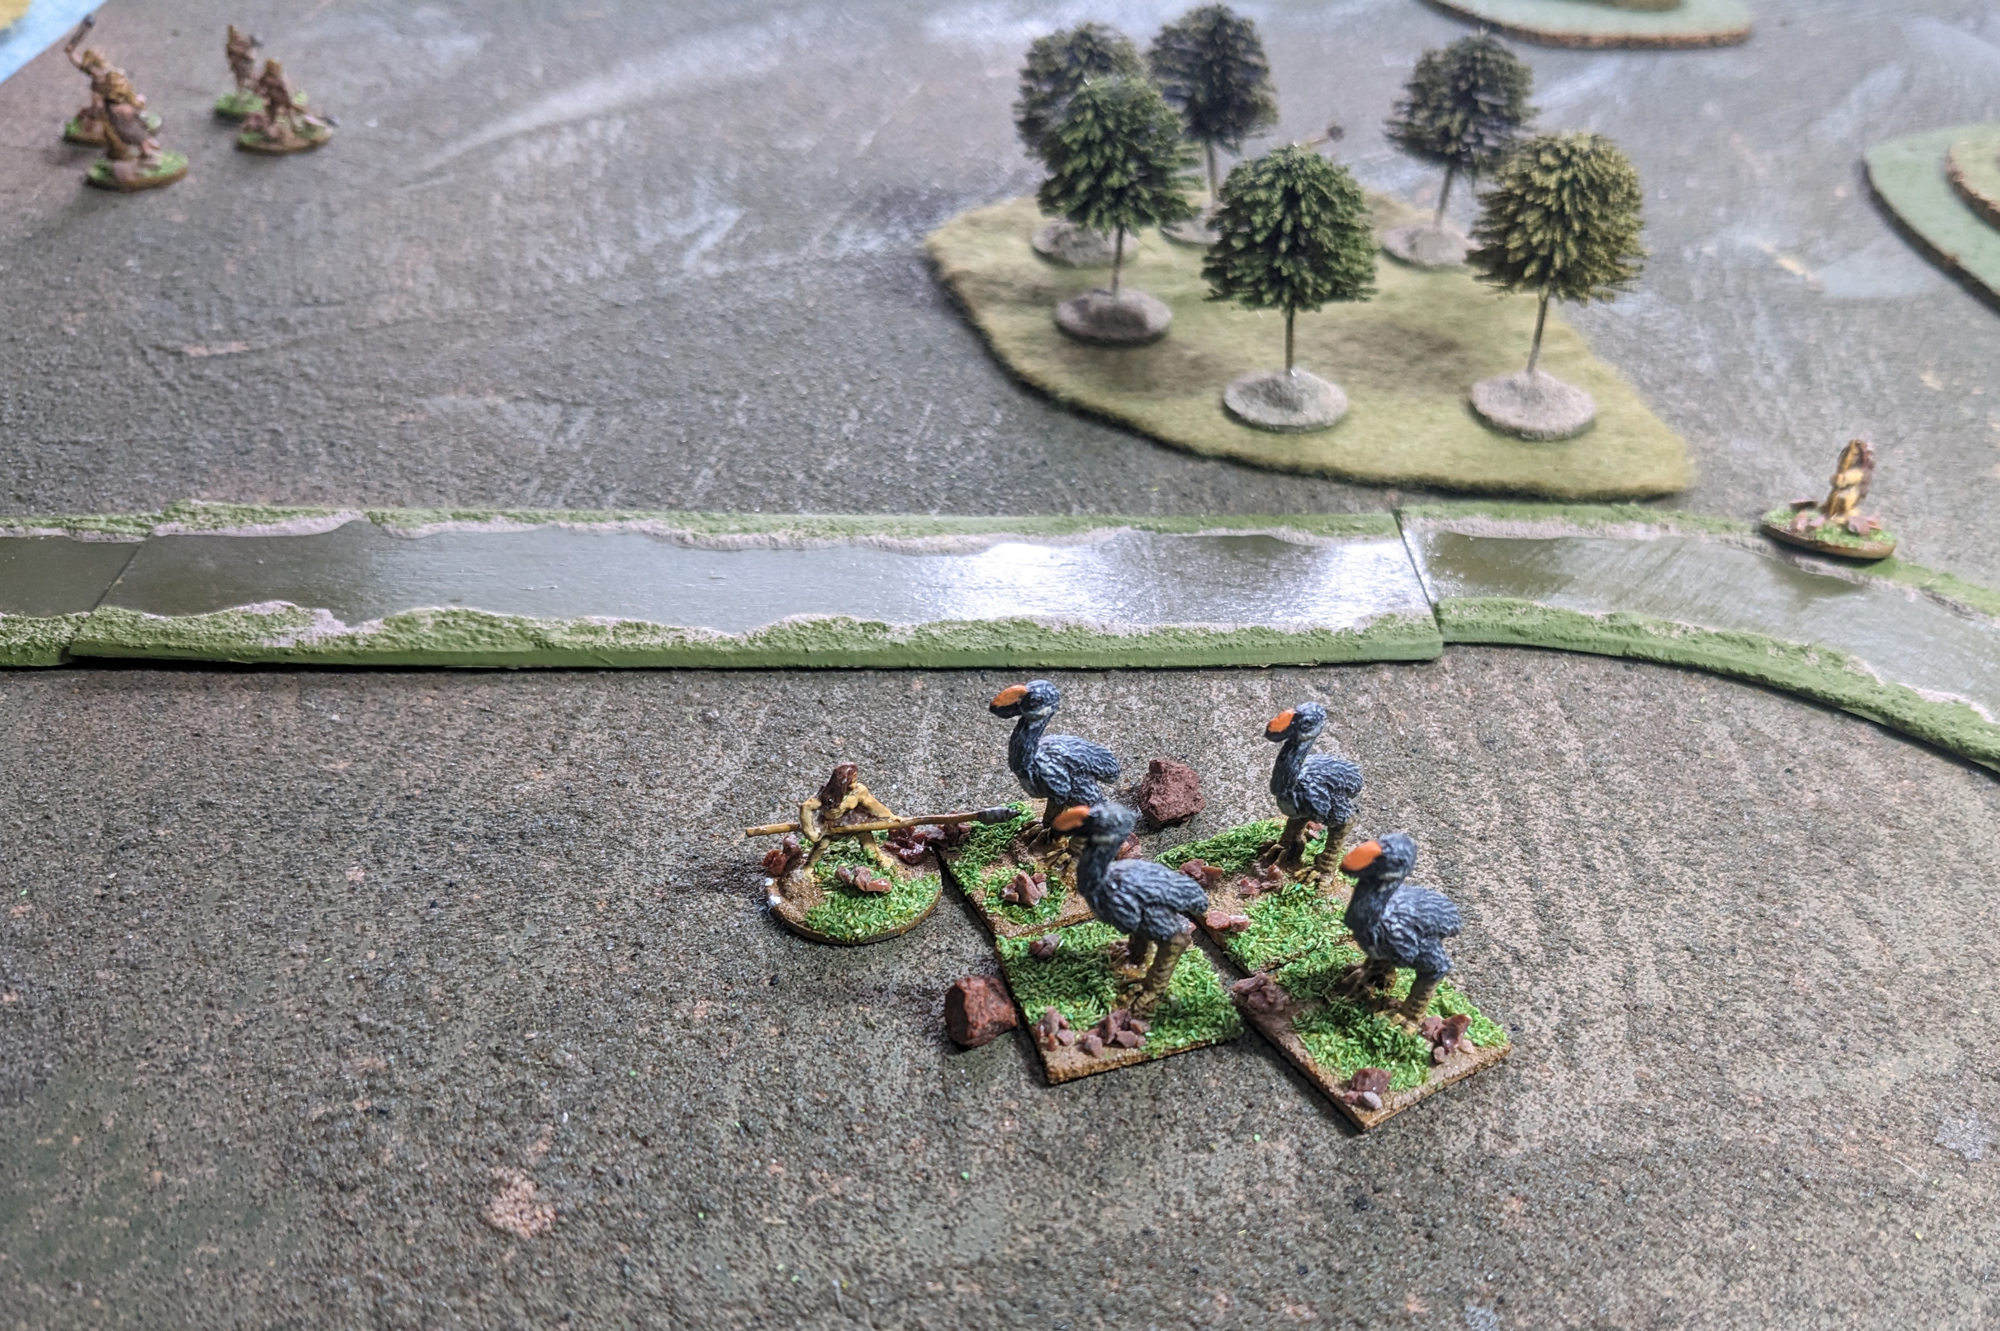
Meanwhile the other birds milled around in confusion.


The noise attracted some Outfolk hunters, who were looking to steal whatever kills my party made.


Eventually Bow and Spear managed to wound a couple of the birds, and the two hunters now tried to finish them off. Axe continued to blunder around in the woods.


The birds started to flee towards the table edge. If they got away the hunt would fail.


Spear intercepted them, and finished off one of the wounded ones. In response two of the birds attacked him. 


The birds were getting dangerously close to the edge now.


Fortunately the hunters managed to split one off from the group and bring it down, to give them the two kills they needed. The Outfolk seemed content to watch.


I set up a second game with different terrain, fewer Outfolk, one extra spear-armed hunter and three mammoths instead of the birds.


The hunters spread out to try an break up the mammoth group and isolate one of them, but one of them became enraged almost immediately, attacked a spear-armed hunter and wounded him.


Axe wounded the mammoth as did Bow, but Axe got wounded in return.


All this activity had brought the Outfolk close to the hunt.


The watched as the very angry mammoth killed Axe. 


And then killed one of the spear-armed hunters.


Amazingly it was Bow who killed the mammoth, with a critical hit to its vitals.


But the Outfolk were still hanging around - I don't count a hunt as successful until there are no predators within one Long of any kills, and the Outfolk count as predators.

The hunters tried to scare them off with shouts and wild gestures, and this caused a couple to back off (especially after Bow wounded one as well), but one was bolder than the rest and ran into the attack.


The Outfolk hunter wounded Spear, but then went after Bow, wounding him too. His friends watched and edged closer.


With two of my hunters dead and two wounded I felt that I couldn't really take on the Outfolk, and had to abandon the kill to them


So this second hunt was a total disaster. But that happens sometimes. And it all made for an entertaining lunchbreak.


Related Posts Plugin for WordPress, Blogger...