Friday 31 May 2019

Burlesque Update #4

Another week of wargaming missed, but another week closer to our first performance on 8th June!

I'm actually quite excited. Yes, there's a small part of my brain that reminds me that I could walk on stage and simply forget everything I've learned, but you don't listen to that bit. But most of me is keen to get up on that stage and do my thing. My solo act is now pretty much where I want it; I have all the moves and timing sorted, and the costume all assembled. We're mostly there with the costumes for the group performance as well, but there's some sequences near the end of the performance that we all need to practice a lot more. No point in looking good if we don't have the moves.

We did a quick post-rehearsal shot of the group as well. Two people are missing, and on the night there will be more makeup and sparkle, but this is what we're taking on stage.

Next Thursday is the final wargames evening I'll be missing for rehearsals. The Thursday after that I'll be missing gaming in order to perform!

Update: It's pure coincidence that we are dressed in the colours of Gran Colombia.

Wednesday 29 May 2019

Trench Hammer Video

Over at  Jozi's Tin Man Blog there is short video showing the basics of a Trench Hammer game. To be fair it's been there for a while, but I only stumbled across it today.


And in case the embedded video doesn't work, here's the direct link.

Monday 27 May 2019

Battle of Salta

I has a go at refighting the 1813 battle of Salta last night, using my Liberated Hordes HOTT variant for the South American Wars of Independence, and the paper armies I'd been using for Simplicity in Hexes.


It was an excuse to use my latest purchase - one of those toy wooden villages that I've always admired in other people's game setups. To be honest in this battle the town (which is Salta of course) simply act as as garnish, but I wanted to get the pieces on a table at some point over the weekend.


Salta is pretty much a straight up fight between two generals of equal ability (as in they're both Poor). The Patriots, under General Belgrano enjoy a superiority in quality, as well as a slight edge in numbers. So the Royalists, under General Tristan were content to sit and wait for them to attack.

The Patriots attacked, and as the infantry lines got closer, launched their cavalry at their Royalist counterparts.


Against the odds the Patriot horse were thrown back; the Royalist cavalry is inferior, but were supported by artillery.


The infantry lines were now in musketry range, and the initial volleys saw the Patriot advance stopped in its tracks.


Things were looking good for the Royalists. Their cavalry was actually winning the action on their left flank, and General Belgrano was acting with hesitation causing his army to waver in its desire to get to grips with the enemy.


Unfortunately the Royalist infantry line was also beginning to break up.


Their cavalry drove off the last of the Patriot horse, leaving it free to turn on the Patriot right flank.


The Patriots pushed forward again.


The Royalists seemed to hold, as their cavalry swung in on the Patriot right and skirmishers harassed their left


But the Patriot's resolve held. They saw off the flank attack and made one final push. The Royalists fell back ...


... and then, starting from the right of their infantry line, began to rout.


General Tristan was unhorsed and captured trying to rally infantry in the centre, and the battle was lost for the Royalists.


Casualties were heavy. The Royalists saw virtually all of their infantry destroyed or routed, whilst the Patriots lost all of their cavalry.


I always love refighting this battle. Despite the imbalance it gives a short, dramatic game and sometimes the Royalists can pull off a lucky win.

Friday 24 May 2019

Burlesque Update #3

My burlesque classes are progressing very nicely so whilst I'm still a shame I can't get to my Thursday evening wargaming, it's great to see all of our hard work bearing fruit. We have most elements of our costumes to work with now, and some of the group moves are starting to look rather spectacular. My solo performance is also progressing well. I have choreographed all the way through, and the early stages developed to a point I'm more than happy with. I still dance like a geriatric hippo, but I'm a geriatric hippo that's having fun. Now it's just a matter of rehearsal, rehearsal and rehearsal.

Whilst of little relevance to most readers of the blog, we now have a flyer for the shows we'll be doing and this means, of course, that tickets are now on sale. It's very exciting!


Facebook Event Links:

Wollongong Showcase

Shire Showcase

Thursday 23 May 2019

Cavalry Encounter Refought

I replayed the Charles Grant 'Cavalry Encounter' teaser last night, with the minor changes to setup I outlined in my previous post. The game flowed better, although the result was the same; Bolivar's cavalry was routed by that of the Royalists. I took pictures, of course.

The setup.


Initial skirmishes on the northern hill.


Bolivar's cavalry form up as the Royalists advance down the road. The terrain in the centre was free of unexpected boggy ground this time.


Both sides form lines.


Bolivar's right collapses, and an attack in the centre and on the left fails, forcing the survivors to retreat from the road.


A series of Royalist attacks leave the Patriot cavalry at breaking point.


Monday 20 May 2019

Cavalry Encounter

'Simplicity in Hexes' (SiH) is an adaptation of Neil Thomas's 'Simplicity in Practice' (SiP). It's designed for fighting scenarios from One Hour Wargames using forces with about six units per side. SiP was written to fight the various CS Grant 'Tabletop Teaser' scenarios on a 3' x 2' table. So this got me thinking; could SiH be used for a tabletop teaser?

Coincidentally, in Battlegames 23, the issue which contains 'Simplicity in Practice' there is a CS Grant teaser - Cavalry Encounter. Both armies are exactly what you'd expect - cavalry. Red Force is riding hard to seize a strategic river-crossing. Blue Force has got wind of this, and has sent a force through the night to intercept and block them. The two forces approach from opposite corners. Red is surprised by the force in front of it and must organise for battle. Blue is ready for battle, but has troops tired after the night's ride. And, to top it all, the terrain, whilst seemingly good cavalry country, may contain unexpected difficulties. Red must break through Blue's force with enough strength to seize the crossing. Blue must force Red to withdraw. Here's the map.


And here's my adaptation of it to hexes. I used a 6 x 9 grid. I left off most of the scattered trees, as the rules aren't granular enough to use them, although I did put one wood on the board. I included the two central farms, as they seemed significant. The black counters were randomly paced in the central third of the board, between the two forces. If a unit moves adjacent to one, the player rolls a D6. On a 6 the terrain in that hex is impassable marshland. If a road passes through it, units may enter and leave the hex along the road only.


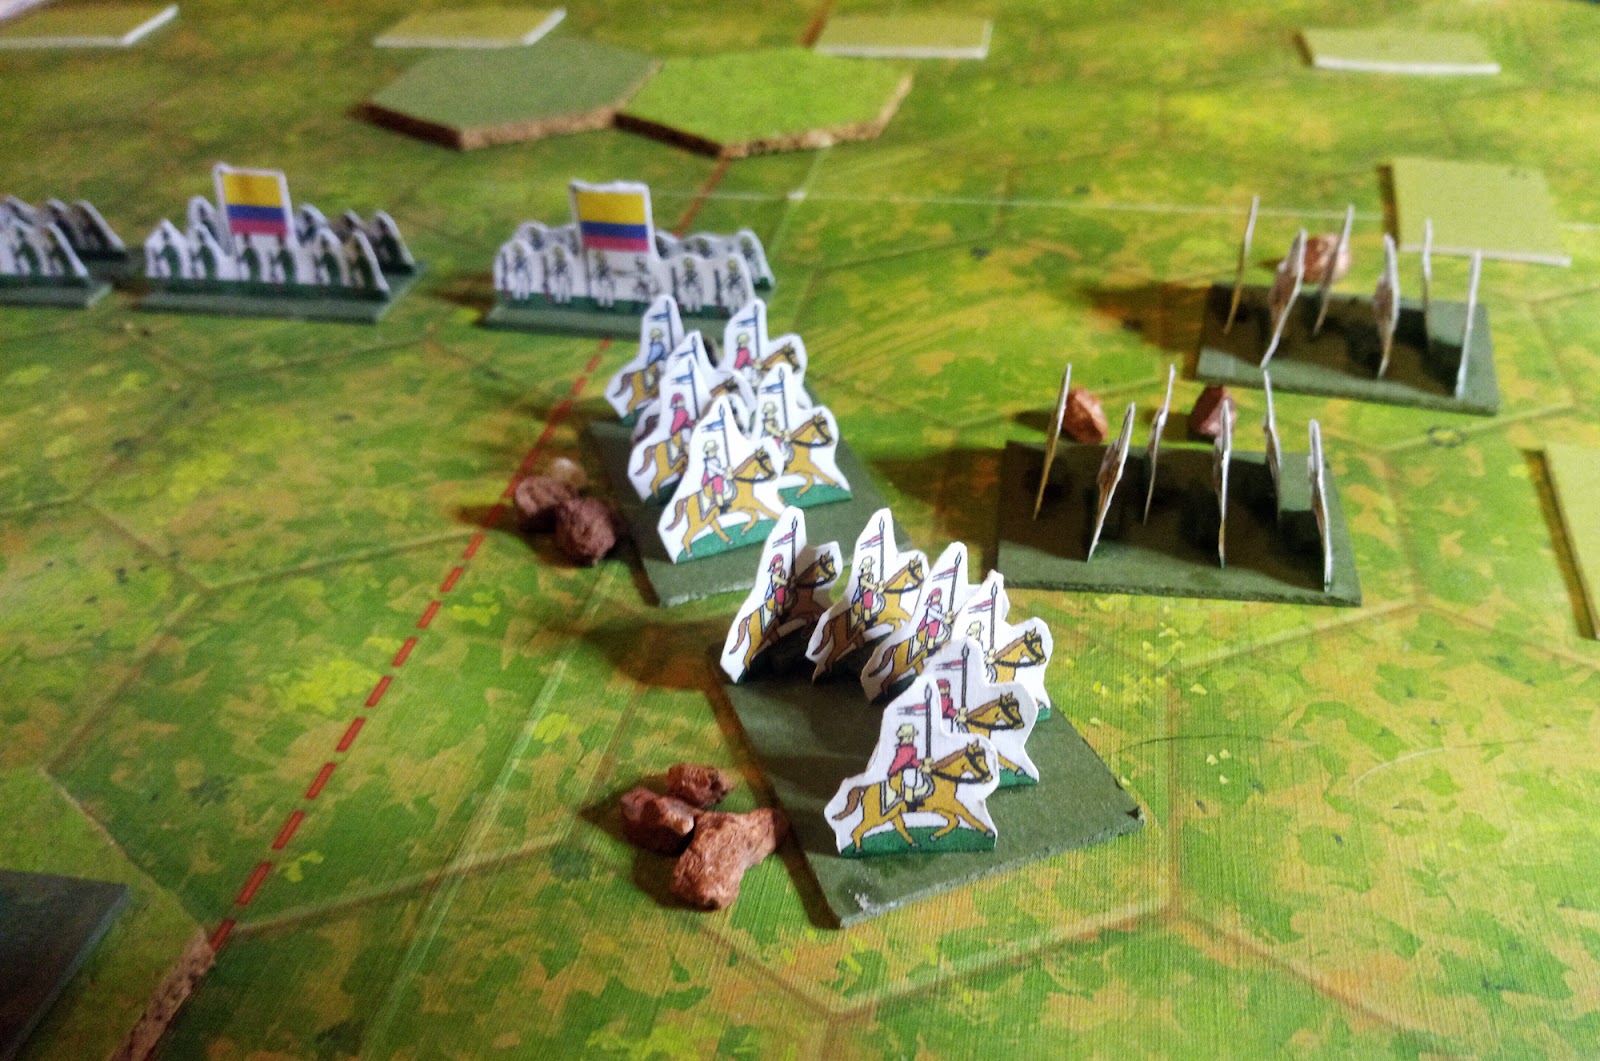
As ever I set the scenario during one of Bolivar's Venezuelan campaigns. The Royalist cavalry is attempting to reach the river crossing, whist Bolivar has sent his finest horsemen to stop them.

Here are the Royalists. In the original scenario they have restrictions on their orders on the first couple of turns. Since I use the card-driven initiative system, I simulated this effect by only including two cards for the Royalists in the deck on the first turn.


Bolivar's men are active from the first turn, but all units start with an exhaustion marker. This counts as a temporary hit on the unit. If the unit moves, or takes part in a combat then the marker is converted to a permanent hit. The unit can try to remove the marker instead; when activated they roll a D6, and on a 5 or more it is removed.


So that's the battle. The Royalists are slow to get started, but the Patriots have to try and recover their force as quickly as possible, or choose to fight at a disadvantage.

The lead Royalist units moved forward rapidly to scout the terrain, and found an area of boggy ground straight away.


They swung to their left, where they encountered a Patriot unit that had taken position on the northern hill, and drove it off.


The Patriots were slow to recover, but pushed their left lank forward to cover the southern approach to their position. The Royalists rushed along the road, discovering more boggy ground as they did so.


The Royalist left pressed their advantage, and routed one of the Patriot units.


The Patriots counter-attacked, but their force was still tired, and their advance was fragmented. The Royalists pushed forward confidently.


They pushed another attack over the northern hill, and shattered the Patriot right flank.


A drive down the road in the centre also saw the Patriots pushed back.


Local charges by the Patriots left a couple of Royalist units seriously weakened, but the Royalists now had the numbers and position to gain an advantage, and a final charge saw the Patriot force all but destroyed.


The last Patriot unit withdrew in the face of all six Royalist units.


So an easy win for the Royalists.

If I played this again I'd make a few changes.

(i) Reduce the northern hill to two hexes; it dominated that part of the board a little too much.
(ii) Have the Patriot units recover on a 4+
(iii) Slow the Royalists a little more at the start by maybe only giving them two cards on the first turn, then four on the second, and not giving them the full six until the third turn. Both this and the previous change will leave both sides deciding whether to push forward and grab a tactical advantage with a  few units, or hold back and wait for their whole force to become ready.

And in terms of Simplicity in Hexes, I allowed units to move adjacent, but not charge. If  a unit moved adjacent to multiple enemies then it had to attack an opponent's front before any flank hexsides that were on offer.

And to answer my initial question - Yes, it appears that SiH can be used to fight Tabletop Teasers.


Friday 17 May 2019

Burlesque Update #2 (Comic Gong 2019 Edition)

Another Thursday evening wargames session missed, but our burlesque group is one step closer to our performance in June. My solo act is coming along, and I have about 75% of it ready to go, although it needs a review by expert eyes and a lot of polish.

Actually there's not a huge amount more to report this week as we missed our Saturday classes. This was because they coincided with Comic Gong, our city's annual free pop-culture event. Once again Mrs Kobold and I cosplayed; this time we both went as the same character - the wonderful infomational assistant Janet from 'The Good Place'.

Here we are, about to head into town. Maya made the waistcoats and skirts for us:


Here I am proving that Janet is worthy to wield Mjolnir:


And here we are hard at work. After several years enjoying Comic Gong as visitors, we decided that this year we'd give something back, and we went as volunteers. We spent the day running the cosplay competition registration desk, which was a great way to meet people:


 I didn't get any other photos of the event, mostly because we were busy all day. But it was as fun as ever, with some great costumes and loads of things to do.

I should also add that it was my birthday. On top of Comic Gong, Mrs Kobold had arranged a surprise evening out for me, with our children and friends turning up for Chinese food, an escape room (we escaped) and karaoke. A great end to a great day.

Wednesday 15 May 2019

More Simplicty in Hexes

The title says it all. I've been playing some more OHW scenarios with Simplicity in Hexes, partially to try out some changes to the rules. Most of these relate to the idea that a move adjacent to an enemy unit is counted as a charge, and the fact that this creates a number of strange situations and odd 'gamey' blocking possibilities that I don't think were intended. I am now playing with the idea that any unit can move adjacent to an enemy, but only units permitted to charge can then initiate one. Other units can shoot if and when eligible. And no unit can voluntarily move out of a hex adjacent to an enemy, but they can pivot. This creates a pinning effect which can only be broken by the retreat of one of the units through close combat, or the destruction of one of the units by either close combat or shooting.

Anyway, I played a couple of scenarios on Monday evening, but had left my phone at work and my camera on charge, so there are no pictures. I didn't encounter any issues with the rules or changes however. Last night I played through OHW Scenario 1, the basic Pitched Battle. Again I used Bolivar's Patriots against the Royalists. The Royalists are in the foreground, with three line infantry, two cavalry and some artillery. The Patriots in the background had four line and two cavalry.


The battle started with the opposing cavalry fighting for supremacy on one of the flanks. The Patriots got the better of the action, driving back their Royalist counterparts.


As the cavalry fought, the Patriot infantry advanced. With victorious cavalry on the enemy flank, a volley of musketry was needed to weaken the main Royalist line and allow a final mounted charge that would allow Bolivar's troops to sweep to victory.


The Royalist cavalry formed up for one last counter-attack, but were finally defeated. They'd left their mark on the Patriot horse, however, who were obliged to hold back away from the Royalist artillery.


The infantry on each side now engaged. Initially the superior Patriot numbers told, but some terrible shooting rolls soon saw this advantage thrown away.


A desperate Patriot bayonet charge destroyed a Royalist unit.


It was supported by a cavalry charge on the Royalist artillery.


The Royalists turned their guns but to no avail. A second desperate charge saw them eliminated.


However the Royalist infantry were shooting well and, despite the hits they had taken, very much had the upper hand. Eventually only the Patriot horse was left. A final charge destroyed one Royalist unit, but the other fired a volley that saw the cavalry rout. The battle was a Royalist win in 10 turns.


The changes to the charge rules seemed to work OK, although I'd like to try them out a bit more with some light infantry/skirmishers as well.

I made two other modifications as well:

(i) A unit hit in the flank that is required to retreat will first pivot by the minimum necessary to put the attacking unit to its front (it will turn to face, in other words). It then retreats.

(ii) A unit unable to retreat because of other units , terrain or the board edge takes an additional hit. In the original SiP (and implied in the original hex version) a unit unable to retreat is destroyed, but with the low unit density of the OHW scenarios this seems harsh. An extra hit is still pretty devastating.


Tuesday 14 May 2019

Campaign Rewards

As any regular readers of this blog know, I'm a bit of a fan of mini-campaigns, where you play a series of battles linked together into a narrative. You'll also know that I've been messing around with Simplicity in Hexes a little bit recently, and that there's a small campaign linked to the rules - The Emperor's Balls.

There's no denying that The Emperors Balls is a lovely piece of work, with an entertaining (if slightly silly) narrative, but one thing I noticed was the lack of reward or results in the games. Each battle is fought in isolation and whilst the result of one battle dictates which scenario is played next, there are no stakes. Essentially it's a simple Best of Three games, with the setups being pre-determined.

It got me thinking that one of the essential features of a campaign - even a simple one - is some kind of stakes. Either the victor should get a reward, or the loser accrue a penalty. Or both.

In classic, old-school, campaigns some of this would be a change in the situation on the game map, plus such things as losses. Pyrrhic victories are possible; you win a battle, but at the cost of your elite guard cavalry, for example. Losing a battle by withdrawing troops so that they can fight another day becomes a possibility. And this is fine is the campaign is relatively involved; if there are multiple participants, players who are losing can withdraw and regroup, whilst the other participants continue the fight.

But in simpler campaigns - the basic two-player ladder campaigns, for example - the stakes need to be simpler. Some of these do count losses from one battle to the next, but the danger here is the horrible Death Spiral, where one player loses a battle so badly that their remaining forces are unlikely to ever win any ensuing battles, thus making their involvement in the campaign uninteresting. I personally like campaigns where losses are mostly or entirely replenished between battles, and each game sees both players on a nominally equal footing. I'm egalitarian like that. The Emperor's Balls adopts that approach, and I like it. But the winner of a battle should get some kind of edge in the next; the trick is to make it worth having, but without weighting the game too heavily in their favour.

In a simple campaign one of my favourite rewards is a one-off bonuses, such as a reroll. So the winner of the previous battle, for example, may be allowed a combat/initiative reroll in the next game. This is nice because it's an advantage, but it's up to the player to decide how and when to use it. A more interesting option, which would work for The Emperor's Balls, is to allow the victor in the previous game to make two rolls for their force composition, and choose which one they wish to have, whilst the loser simply gets what the dice gives them. Again, this gives the victor a choice, the benefit of which is theirs to exploit or throw away. A more complicated approach is to have two scenarios available to each player as the next game, with the winner being able to choose. For example, at present, if the attacker wins Scenario 1 the campaign automatically proceeds to Scenario 2, whereas if the defender wins it goes to Scenario 3. This option would have the attacker being able to choose between Scenarios 2a and 2b if they win, whilst a victorious defender gets to choose between Scenarios 3a and 3b. Obviously this approach requires a lot of scenarios (since each of the four scenarios that branch off the first one will themselves give rise to two options), although some could be reused, but once again it allows a victor to decide how to exploit their win.

I appreciate that this post is a bit of a ramble. A skim through posts tagged 'campaign' on this blog will turn up examples of the idea I've mentioned, and other thoughts as well, and give a feel for the approach I use. What are your favourite campaign 'reward' mechanisms?


Sunday 12 May 2019

Double Simplicity

I tried a couple more games of Simplicity in Hexes this afternoon. Once again Bolivar's Republicans took on their Royalist foes. In both games they defended.

The scenarios were, of course, lifted straight from One Hour Wargames, and were played with six units per side on a 6 x 6 hexgrid.

The first game was Static Defence - the Republicans had to hold a hill and a village against a Royalist attack. The Royalists would win by capturing one of the objectives. The Republicans had to defend both, and each objective had to be closely defended by two units that couldn't move more than a certain distance from it, leaving two units as 'free roaming' defenders.


When I've played this before I've always gone for the hill as the target objective, but I decided that this time I'd go for the village. It's a tougher nut to crack, but closer to the attacker's baseline.


The Royalist cavalry pushed forward to try and drive off the infantry supporting the village. It didn't succeed.


The Royalist infantry formed up, and poured musketry into the village, putting the defenders under extreme pressure.


They soon ran, but other Republican units were defending the village closely, making an advance on it difficult.


But the Royalists pushed forward, and soon drove the Republicans back.


The Republican units defending the hill included some artillery, which attempted to shell the Royalists occupying the village, but the other Royalist units soon drove it away.


Eventually only one Republican unit remained, and that couldn't attempt to retake the village, so I declared the game a Royalist win.


The next scenario I played is a fairly involved one; the Double Delaying Action. The attackers have to cross a river, take a village and exit two units off the board via a road. This would be tricky in the face of a strong defence, but the defenders have to withdraw units as well; one unit every four turns. if they fail to do this then they lose the battle.

The Republicans defended the village and river crossing with line and light infantry. The ford on their right flank was covered by more line infantry, supported by skirmishers, and would gradually fall back. meanwhile on the baseline a battery of guns and some more line acted as a reserve, as well as a source of units to withdraw from the battle.


The Royalists arrived, and launched straight into an attack on the village. Their lead unit was decimated almost immediately.


The Royalists attempted a charge, which was repulsed.


Their cavalry crossed at the ford, but its advance stalled when it was trapped between the village and the guns, neither of which were an enticing target for a charge.


With the Royalists on the back foot, the Republicans withdrew a line unit. It simply wasn't needed.


The Royalists put pressure on the village, but couldn't drive out the defenders. Their crossing at the ford saw them lose another line infantry unit.


The horse was scattered by the artillery.


Eventually they pushed into the village, but by now they were so reduced in units that reaching the road exit was going to be pretty much impossible. The Republicans withdrew their artillery.


Eventualy the Royalist attack was reduced to a unit of skirmishers. The Republicans won this one.


The rules held up OK, but I still have a few issues with the idea of moving adjacent to an enemy unit always being counted as a charge - what if the hex-border is terrain neither unit can cross for example? I created a couple of situations where units were forced into 'impossible' situations. I did actually add in a change to allow units to retire as well; if not adjacent to an enemy unit, and unit can move 1 hex directly to its rear without changing facing, so long as it doesn't move adjacent to an enemy in doing so. I think I may create an editabe copy of the rules, and play around with them.
Related Posts Plugin for WordPress, Blogger...