Friday 29 September 2023

Bloodfeud

Last night Caesar and I played Lion Rampant. We cobbled together two armies using his mix of Dark Age and Early Medieval figures, using the Anglo-Norman list. We ended up with the same forces - a Elite Foot with the leader, and Elite Cavalry, two Heavy Infantry and two Skirmishers.

Randomly rolling for a scenario we got Bloodfeud. This is a straight fight except that one side has the goal of killing the enemy leader (which ends the game and gives them loads of Glory) whilst the other has to keep their leader alive and destroy the enemy force (which gives them slightly less Glory). Caesar ended up as the attacker, with my leader as the target. We both chose a few boasts to add some extra points in as well.

The terrain consisted of three large woods in a rough diagonal across the table, the two in each corner also having hills in them, and a stream winding across the other diagonal. My troops are at the bottom of the picture.


I pushed my skirmishers into the woods to slow Caesar's advance. But he put his Elite Foot to the fire and they fight just fine in rough terrain, so quickly slaughtered one unit of them.


The other group of skirmishers commanded the open ground approach to my leader. They moved up to tempt Caesar's elite cavalry into a charge


Too easy! Naturally fighting an enemy in rough going the cavalry suffered badly.


Especially when they were charged by my cavalry as well. That swept them from the field.


The majority of Caesar's troops were moving carefully down the middle of the board using the woods for protection.


Meanwhile my elite cavalry resisted the temptation to charge some of Caesar's skirmishers, and moved up to some of his heavy foot instead. Then charged them. This shattered their morale and they never recovered, falling back steadily and eventually disintegrating as a unit.


Caesar had pushed his skirmishers forward quite boldly, and they found themselves sandwiched between my heavy infantry units.


One of these fell back from an attack, got shot at and routed.


My elite cavalry was down to its last two figures and still charging boldly (not that I had any choice in that). It attacked Caesar's other heavy infantry unit, inflicted a couple of hits and took no casualties in return.


I lost some heavy infantry to Caesar's elite infantry. But each fight was costing his unit figures, and this was the unit that would need to attack my leader's unit in order to kill him.


My elite cavalry kept charging, riding down the last of one of Caesar's skirmisher units.


Having destroyed half of the enemy units and (at one point) caused two enemy units to be battered, I had now completed two of my three boasts. I failed on the other (make the first attack of the game). So I was looking good in terms of points.


And so we were into the end-game. My leader was hiding in the woods on top of a hill, for maximum defensive advantage. But Caesar had moved up ready to issue a challenge to single combat; one of his boasts gave him points for doing that, with the added advantage that it would help achieve his overall objective as well. But we were now down to only five units on the table, which meant that each turn we had to see if the game ended.


It did.


If the game ended before either side achieved their victory condition then you simply scored points for destroying enemy units. I had destroyed three of Caesar's and he had destroyed four of mine, so he was up on points there.


But we also had to check boasts. Caesar had achieved one of his (destroy half of my units), so got another couple of points of Glory, but lost 2 Glory for two failed Boasts. I had achieved 4 points of Glory for Boasts and failed only one, increasing my score by 3. So I managed a 6-4 win.

Caesar had a chance to issue a challenge earlier, but opted not to in favour of attacking one of my units. Had he issued the challenge he would have gained a net 2 Glory, making the battle a draw at the very least and possibly killing my leader for a big 5 Glory bonus.

Just goes to show how important the Boasts can be in affecting the end of game scores.

Anyway, the game was a lot of fun. I was convinced I'd lost the fight as Caesar's forces cooperated very well, and seemed set to concentrate very neatly on mine. But we picked off each other's units and with my leader being hard to get at the game came down to casualties. My elite cavalry pretty much accounted for all three of my kills (albeit that they struck the final blows on units that had suffered at the hands of others). With a lot of woods in play the skirmishers came into their own as well. A couple of well-deployed skirmishers in woods can be really useful.

Monday 25 September 2023

Frocktober 2023

It's that time of year again!


Yes, October is approaching an, once again, the Kobold household will be dragging out the finest frocks in our wardrobe in order to raise money for the Ovarian Cancer Research Foundation as part of their annual Frocktober event.

Naturally we have brought back Team IT HAS POCKETS for it's sixth triumphant year.

So if you'd like to slip us a bit of cash at some point, that would be grand! Thank you.

Sunday 24 September 2023

Arnhem Bridge

On Thursday I took along Memoir '44 just in case there was anyone looking for a game; I thought that in keeping with the evening's theme we could try the Arnhem scenario. As it was there was no-one available, so on the following evening I got it out at home. Here's the setup. In terms of terrain it has a weird long bridge setup, with units only being able to enter and exit it at the very ends, creating a real challenge for the attacking Germans. The Allies simply have a load of dug-in infantry and (oddly) a couple of artillery units. I think these are there to stop the Germans from simply sitting back and bombarding the Allied infantry from the other side of the river.


The Germans have a formidable group of elite infantry and armour, but it's all queued up at the back of the board and has terrain to negotiate before it can get into action. It's actually quite a neat mechanism to slow down how quickly the reinforcements can be deployed.


Initial German attacks from across the river and from the infantry on the flanks of Arnhem were broken up fairly easily.


The Germans kept pushing.


And slowly the paratroopers' positions fell.
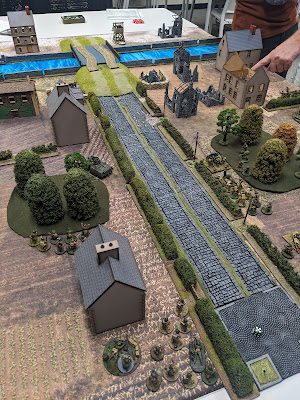


An air attack on the reinforcements ...
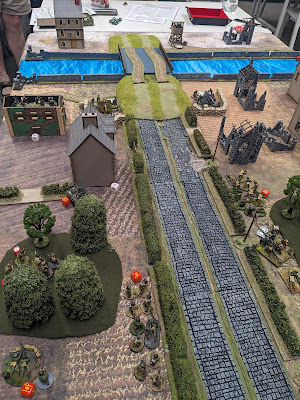

... caused a fair bit of damage.


The paratroopers consolidated their position, but the Germans had a lot of armour attacking them now.


Paratroopers fell back from the end of the bridge ...


... and a final thrust by the Germans finished them off. The Germans won 5-4, so it was pretty close. The German reinforcements never moved.


I set it up again and this time decided to have the Germans allow some of the reinforcements to come up before pushing their attack. This left the paratroopers trying to pick off any units in range with their artillery but otherwise playing a waiting game. With some of their heavy armour in play, the Germans pushed forward aggressively...


... but despite some successes they were driven back across the bridge.


However the paratroopers had a couple of vulnerable units, so the Germans tried a risky attack with their weakened armour units. They failed to break the British force ...


... and were wiped out by the return fire. The Paratroopers won this one 5-2, although the battle was closer than the scores suggested.


Yesterday I was leafing through the book for one of the expansion packs and saw that there was a scenario for the XXX Corps attack on Nijmegen, so I set that up and gave it a go.


The Allies have a ton of tanks, but the Germans have a load of infantry dug in, including in bunkers, so it's a tough fight. However the Allies got plenty of cards to keep the momentum going on an attack on their right and in the centre, and won it 6-2. A few of their units were looking weak towards the end, so a good counter-attack may have tipped the balance towards a German win, but they'd committed their armour early and lost it, so weren't really in much of a position to exploit the Allied weakness. 


Saturday 23 September 2023

Ston Bridge

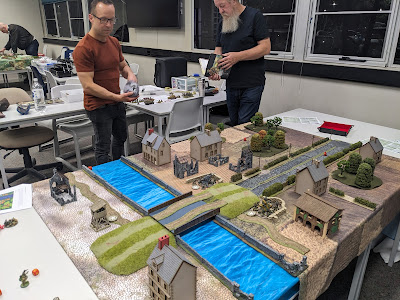
This Thursday our club did a couple of Market Garden games, since the date was about right for the 79th anniversary. One was a big Flames of War game, that I failed to photograph, whilst the other was a Bolt Action game covering the US attack on Ston Bridge. I played that one because Bolt Action is the lesser of two evils.


Caesar organised this game, with various people providing figures (some of which were far from accurate but helped make up numbers). The paratroopers would land (deploy) randomly to the right of the table, looking to capture objectives around the bridge. There were some German units on the table, and reinforcements would quickly appear along the long edges.

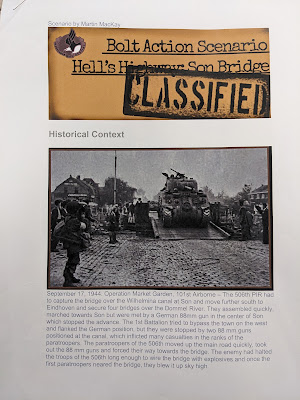
Here's the brief.


The paratroopers have landed!


They quickly advanced, seeking cover and positions from which to attack the German defenders.


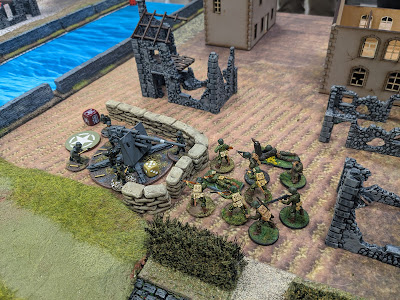
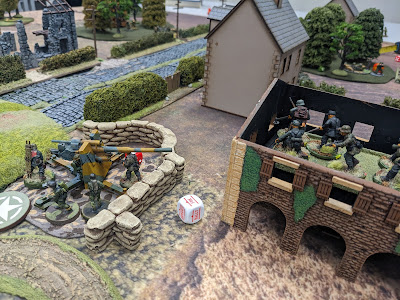
Not really knowing the rules or how odds worked in this game I decided a direct approach was best, and simply assaulted one of the objectives, defended by an 88mm gun. 


Despite horrible casualties I took it.


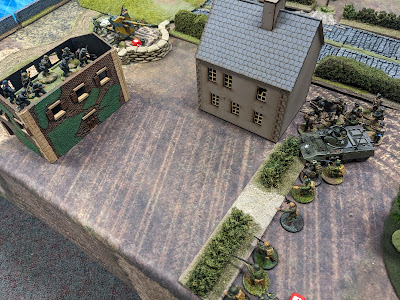
My other troops were tied up by a couple of building full of Germans. Note that the armoured car represented a jeep with a machine-gun, so was far less impressive than it looked.


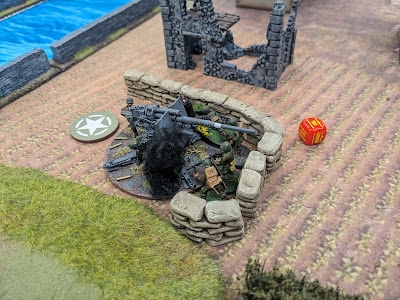
With a taste for close combat I moved into the ground-floor of each building, since the Germans had chosen to deploy upstairs. Bryan turned his other 88mm gun on the ground floor of one of his buildings, ruthlessly risking its total collapse (and the loss of his defending squad) in order to wipe out the attacking Americans.


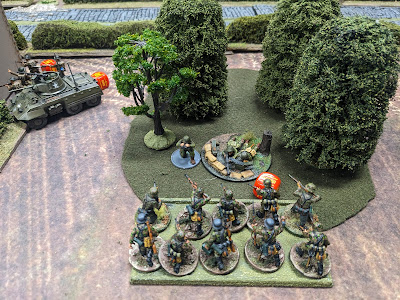
The first of the German reinforcements arrived, sweeping onto the board and assaulting my heavy machine-gun. So that was lost, despite a gallant fight.


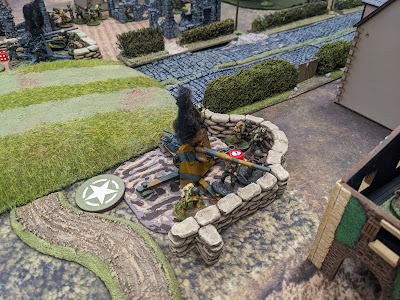
Peter wasn't going to be left out of the assaults, and took the other 88mm gun with a wild charge. We now controlled both objectives on our side of the river.


We now had to cross the bridge and take the final objective, then hold them for a couple of turns, but we became pinned down in a firefight on the banks of the canal and aware of steadily increasing numbers of German reinforcements on the other bank. Running out of troops we realised that we simply didn't have the strength to take it and called it a night. 

As games of Bolt Action go it was pretty exciting; thanks to everyone involved in putting it on.

Thursday 21 September 2023

Buildings Of The Emirates

Martin Smith was asking about the model I used as the stronghold in my most recent game, so I thought I'd do a quick post on it since he's not the first person to ask.

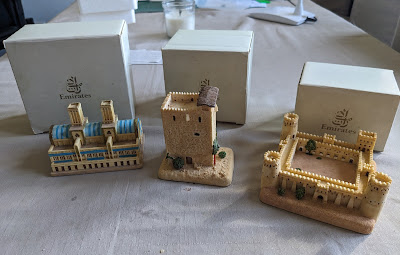
Many years ago, before I lived in Australia, I lived in close proximity to Heathrow Airport. So local car-boot sales often had odd bits of airline merchandising in them. And that's where I found these:


As you can see they were produced by Emirates and, intriguingly, are part of a series of at least eleven models. Naturally they are all of 'local' Emirates buildings.

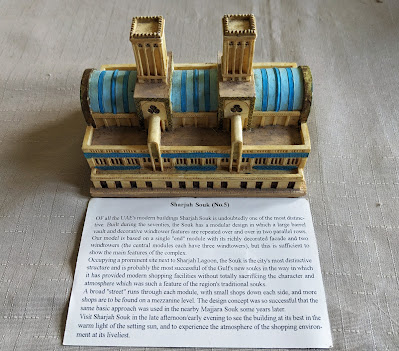
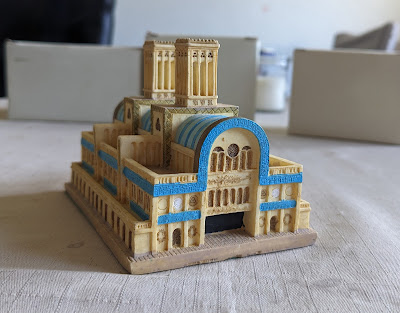
The first one, and one that sees the most use in games is the Sharjah Souk - essentially a large modern shopping mall. It makes a great general-purpose stronghold, and has also featured in my giant monster games.


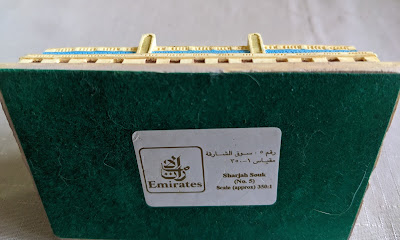
Each model has a nice felt bottom. The label tells you what scale the model is.


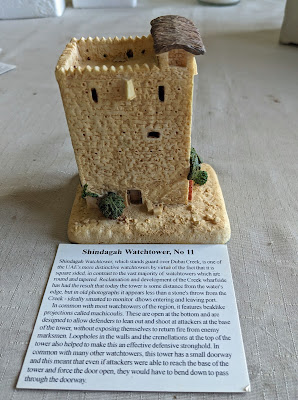
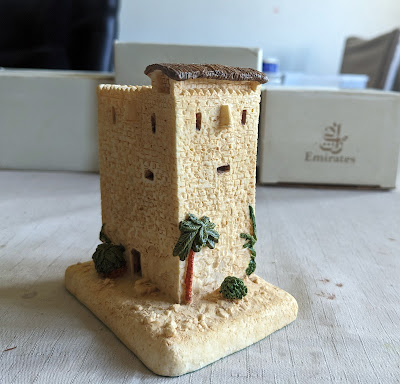
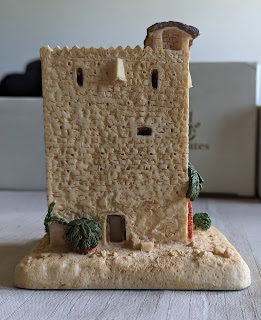
This one also sees use as a stronghold from time to time. It's a 1/100th (so 15mm) model of the Shindagh Watchtower


It's a great model for fans of pareidolia ...


... and Picasso


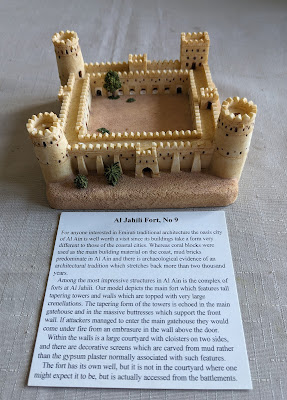
This one is my favourite, which is odd because I keep forgetting I have it and it never sees much table time - a 1/300th model of the Al Jahili Fort. A bit big for DBA, but an occasional large footprint stronghold. 


It's roughly 4" square. I'm thinking that it might look quite nice as part of a horse and musket game featuring my Nottomans, if I ever finish them.


Related Posts Plugin for WordPress, Blogger...