Wednesday 31 May 2023

Alexander vs The Inca

My first game in our new house.

Unlike our previous place, I don't have enough room in my new office at present to also have a dedicated gaming space. Maybe further down the line, when I have the storage organised, there might be possibilities, but for now I have returned to playing games on the dining table.

So here's our new dining room. It's still a bit disorganised, whilst we sort out where things need to go, but it not only has the dining table in it, but also all of our books, the majority of our boardgames and some space for Catherine to have her desk for work as well.


Back to the game. A lot of my HOTT armies are down in the garage, which is where most of my soldiers will live now, but I did keep a few odds and end separate when we moved so I could get back into games before the unpacking had finished. My Renaissance Alexander army was one and, for some reason, my Inca. So they are the ones that feature in my first game! 

The Inca defended.


The Great Inca watches Alexander's phalanx advance from the lofty heights of his litter.


The Inca extended their line to meet the Macedonian attack. But Alexander had artillery and was initially happy to sit back ans let it do its work.


With no way of replying to the steady bombardment which, it has to be said, had had no effect so far, the Inca attacked.


Alexander and the Great Inca met in the centre.


The Companions held the fight flank against the Inca heroes.


Alexander fought the Great Inca in the centre; it was a stalemate.


After the first combats both lines were a little ragged and the Inca had lost a horde.


The Inca regulars charged Alexander's gun, and overran it.


The Hypaspists were wiped out as well. The Inca were on a roll in the centre.


On the far flank the Inca hordes were falling back, but slowly. This tied up much of Alexander's phalanx.


The Companions fell beck from the Inca heroes, hoping to gain some space to move and bolster the centre. But the Inca kept pressing them. In the centre Alexander forced the Great Inca back.


Inca heroes pushed forward, supported by lesser troops. 


Alexander found himself under attack from front and flank, but managed to hold his ground.


The Inca were driven back.


The Companions were being pushed to the very edge of the battlefield as the heroes drove forward.


Alexander was surrounded again. And this time, although the combat was close, he did not survive. The Great Inca was victorious.


The Inca won 9g-2, losing two hordes against a hero general, artillery and a warband. Alexander couldn't really come back from an aggressive Inca attack along the line that pinned his whole army and prevented him from repairing a gaping hole in his centre-right.

Still, a nice simple game and a great way to christen the new house.

Catherine and I played Jaws this evening, but I didn't get any pictures. The shark got in plenty of kills in the first half, before the crew attached two barrels to it, and definitely had the upper hand going into the second half of the game. But the crew of the Orca fought back and, whilst most of the boat was destroyed, used a flare to inflict a load of early damage on the shark, whilst Quint relentlessly hacked it up with his machete. As the last of the boat began to disappear, Brody shot and killed the shark with his revolver to win the game for the crew.

Friday 26 May 2023

A Short Break

I've just moved house, which is why posts here are a little sparse at the moment. A lot of my wargames stuff is still in boxes and likely to remain so until I sort out some kind of storage for it - we were blessed with a lot of built-in cupboards in our previous place, plus some of our furniture was old and needed ditching, leaving us down several cupboards and so forth in our new place. Sadly model soldiers do not get priority in the current storage. 

I do have some stuff handy, and will be able to resume gaming once the pile of Ikea boxes we currently have unopened allows me.

However I did take a short break yesterday evening to pop along to the Wollongong Wargamers - just a flying visit as I was too tired to cope with thinking or rolling dice.

One group was playing Nimitz, with the Royal Navy taking on Italians.


Meanwhile Brian and Ed were playing Hail Caesar - a scenario set during the Baltic Crusades with a pagan village being raided by from the sea by Crusaders.


And, yes, as you can tell, I've only moved locally; just a couple of suburbs.

Normal service will be resumed as soon as possible.

Tuesday 16 May 2023

Alexander vs Asag

I'm packing up for a house-move at the moment, so painting figures and playing games is going to be suspended for a little while. However I squeezed in one last game of HOTT in this house yesterday. My Renaissance Alexander The Great army was still around from the other week, and Asag and the Stone Allies was being reboxed ready for transportation, so was also easily to hand. And that's why Alexander The Great found himself up against a hideous Sumerian demon.

Asag was defending, but didn't really get that helpful a terrain; a plan to position his massed hordes on a hill fell through when neither of the hills quite ended up where he needed them. But he did get to anchor both of his flanks on bad going.

In response Alexander massed his phalanx in the centre, covered by shooters and warband on one flank and his mounted troops on the other. The aim was to send the mounted out first and take out the few hordes Asag had stationed on his right, then combine a flank attack with a frontal assault. 


Asag's army of rocks.


Alexander the Great's phalanx.


Alexander led his cavalry on the flank attack. The Companions were supporting the flank of the phalanx. Asag moved forward to make best use of the bad going.


Alexander attacked the hordes, which survived the initial assault.


The thing with Asag, though, is that he is an aerial hero. So he swooped in from the centre and attacked Alexander's cavalry in the flank, destroying them


This left Alexander somewhat isolated, with an enemy hero in the offing, so Alexander wisely pulled back. At this stage neither hero could afford to attack the other; there wasn't enough of an edge.


The phalanx had closed up and was ready to launch its attack. With Alexander temporarily out of the way , Asag switched to the flank of Alexander's centre, taking on the Companions.


The rest of Alexander's army surged forward. With a powerful enemy aerial on their flank, piling into the rest of their troops seemed the best strategy. In fact on the far flank the shooters and warband had been slowly pushing back Asag's larger rock beasts in the bad going.


Asag's army was pushed back with casualties. To make matters worse, the Companions held off the mighty demon for a couple of rounds of combat, allowing Alexander to come up and threaten him. This time Asag pulled back from a confrontation.


The two generals eye each other warily.


Alexander's army was in a strong position, with Asag's hordes unable to resist the remorseless advance of the phalanx. Alexander pitched in, eliminating some rocks on the flank.


But Asag was back as well! He attacked the rear of the phalanx, destroying one of the elements.


However his biggest, mightiest rocks were smashed up by the right of the phalanx.


Asag took out the Companions. A risky move with Alexander lurking in his rear, blocking any recoil.


More rocks were smashed to ... smaller rocks. 


Both armies had taken a fair few casualties at this point. With Asag in contact with a spear element on one flank, Alexander decided to go for it, and attack whilst he had a slight advantage.


But no slight advantage can offset a 6-1 roll! Alexander fell to Asag, and that was the end of his army.


Alexander lost 10-12g. His army was doing well, slowly grinding down Asag's troops, but Asag was causing a lot of problems and had to be dealt with. Unfortunately Alexander was the only one capable of doing it effectively. And that meant taking a risk.

Anyway, my gaming table is now folded up and all of the armies are in boxes ready to move. So in terms of games it'll be a while before you see anything here. Even the Paint Something Every Day Project is going to have to be suspended for a while. 

Sunday 14 May 2023

Swarm

In an earlier Palaeo Diet post I tried out a swarm for the first time. In Palaeo Diet Pulp these mostly exist to be summoned by Witch Doctors or Mummies, but work perfectly well as a complication for a conventional hunt as well. I said I'd had an idea for depicting them better that the piece of cotton wool I was using, and here it is:

As you can see it's a piece of clear plastic mounted on a base with some unconvincing blobs painted on it to represent the insects. But it was quick and easy to make and from a distance looks the part. I'll make a couple more and be satisfied at that.

Friday 12 May 2023

Birthday Gaslands

Caesar and I decided to celebrate our respective birthdays with a game of Gaslands last night. Bailey (who was not celebrating his birthday) joined us.

We used minimal terrain (because I forgot to pack some of the bits I meant to), and 50 Can teams we'd prepared earlier. We randomly determined a scenario and got ... Flag Tag!

In Flag Tag, each team has a flag in their section of the board opponents can drive over it to capture it. The first team to drive over opponents' flag three times wins. So you have to defend your flag whilst attacking that of your opponents. All very good, you say, until you realise that both Caesar and I had opted for teams consisting of a single vehicle.

Here's the setup. Caesar was running a single Idris bus - loads of guns and a ram on the front, lots of crew with handguns and then extra speed and handling. Bailey was also running an Idris team, although this was a more conventional one with two cars armed with a selection of weapons and useful traits. I ran my James Bond Aston Martin DB5, because both 'Goldfinger' and myself debuted in the same year. For this game Bond was sponsored by Verney, and I'll include the stats below.


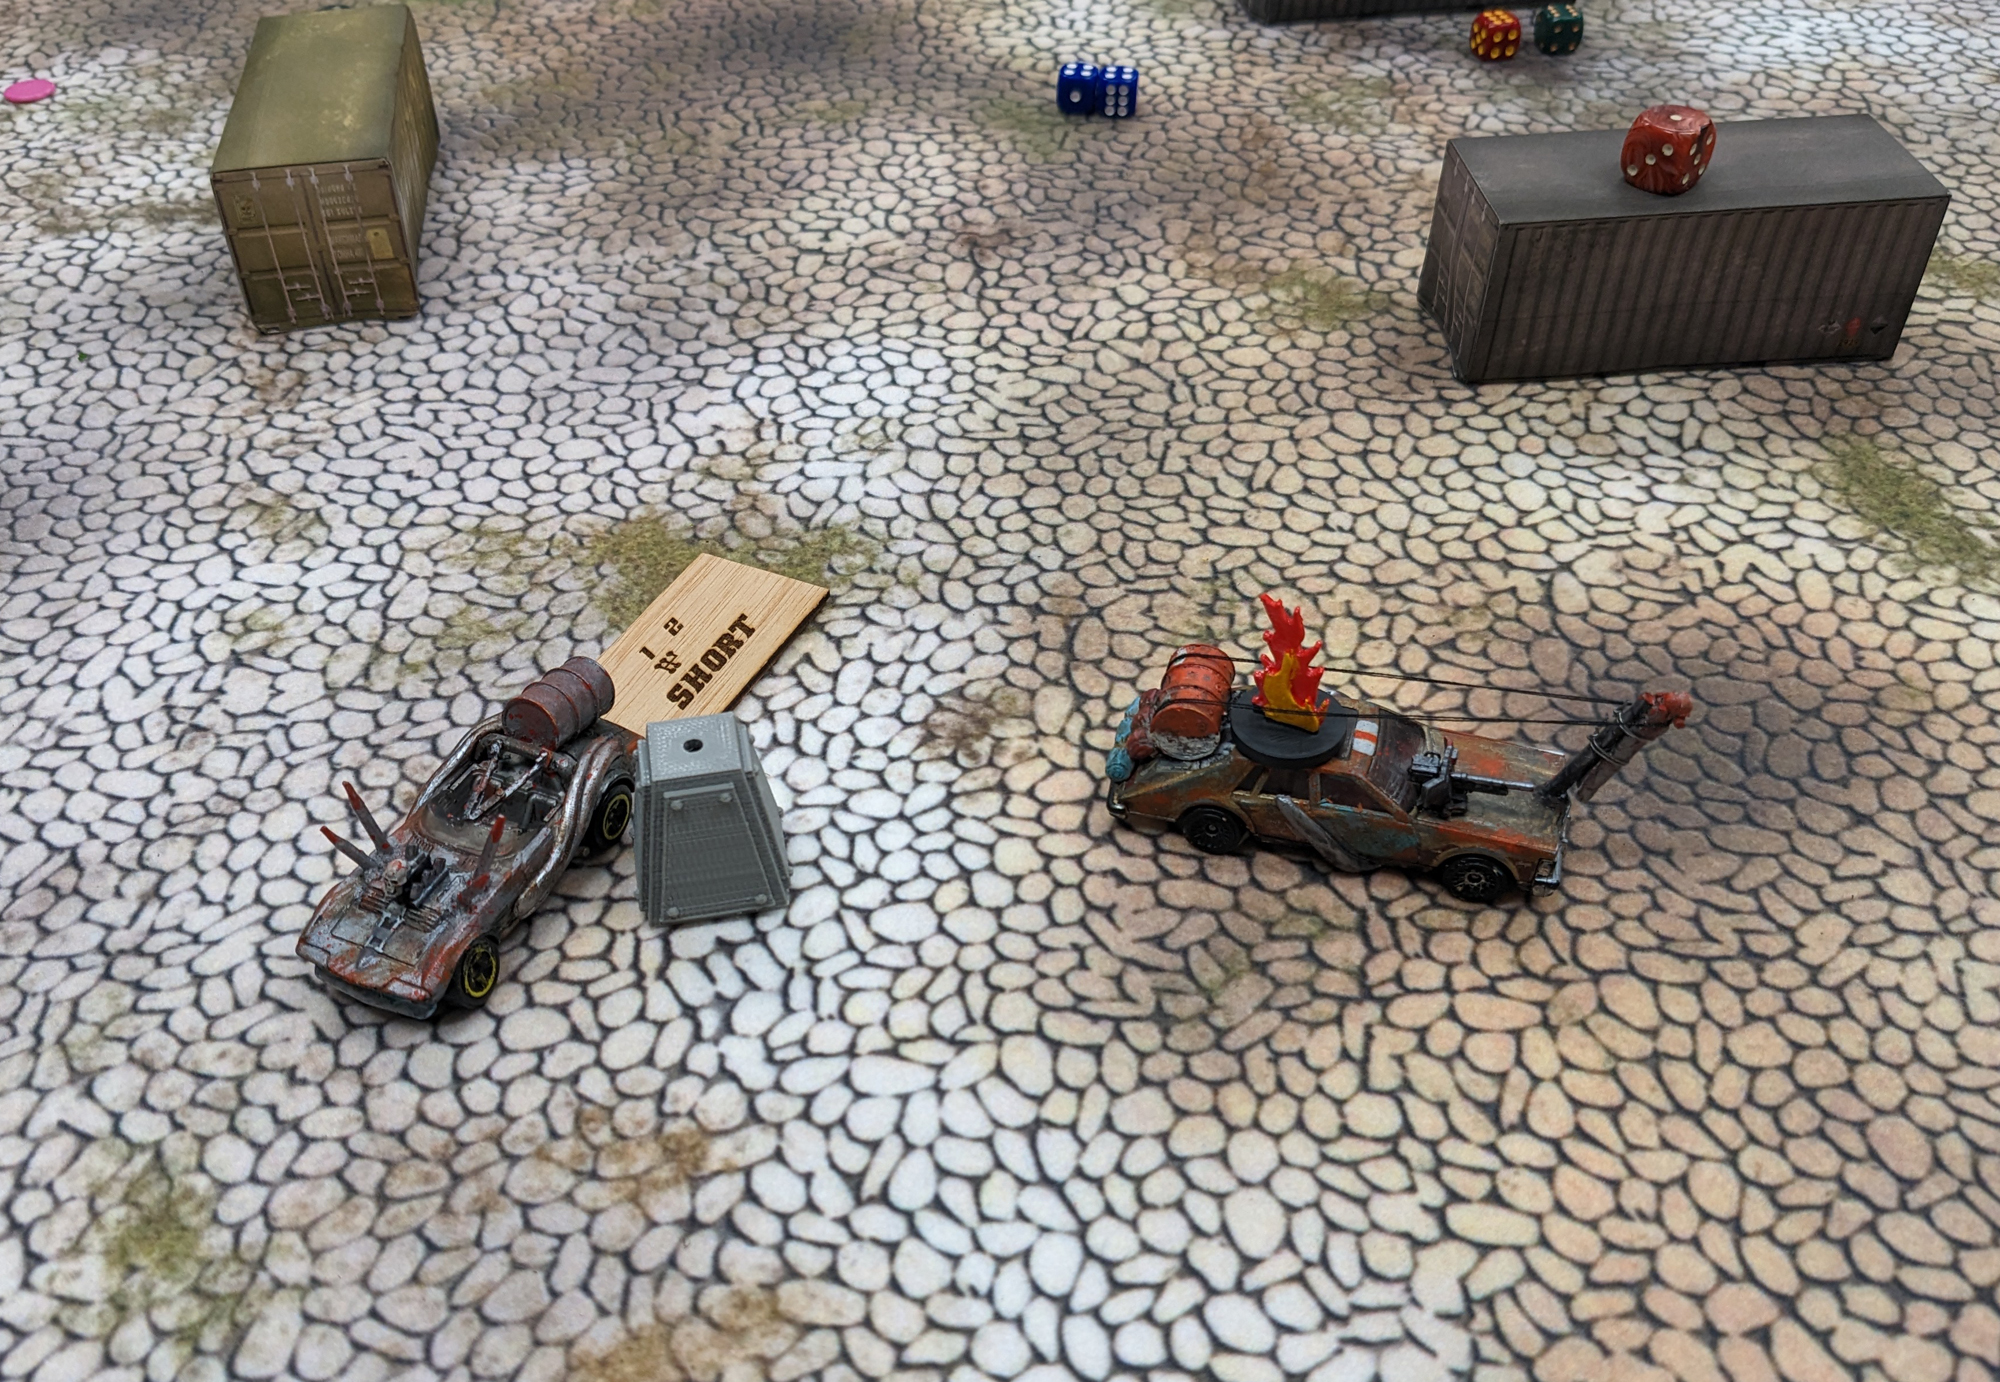
Here's Bond, ready to go. The pink markers are the teams' spawn points, whilst the purple marker is my flag.


With two cars, Bailey had a distinct advantage, although technically each one was individually a lot weaker than either Caesar's vehicle or mine.


Caesar sent his bus after Bailey's flag but getting there quickly and actually being able to drive precisely enough to pick up the flag are two different things. He missed it, despite throwing the bus into a spectacular slide. His positioning did allow him to unleash his massive firepower on Bailey's vehicles, damaging both.


Bailey's performance car took more hits from the bus, whilst Bond, also heading towards Bailey's flag, received a volley from the bus's front guns. The DB5 is solidly built, though, and shrugged off the damage (the Feel No Pain perk meant that I ignored the two hits that got through - it's expensive, but worth it).


Bond retaliated by dumping caltrops in front of the bus. Fun Fact: The DB5 in the film was supposed to have caltrops, but the makers decided not to include them as they felt people might be inclined to copy it. It had the oil-slick dropper instead. 

The bus took damage from the caltrops, which was nice.


Bailey lined up a precise run on Caesar's flag which just clipped it whilst avoiding a collision with the shipping container. This was a beautiful move, which would have been more spectacular ...


... had the car not slid at the end of it, lost control, flipped, wrecked and exploded.

The explosion took out Bailey's other car.


Bond drove coolly and calmly and collected Bailey's flag. I got good rolls on the skid dice in this game.


Caesar tried a tight turn with the bus ...


... misjudged it and collided with a concrete pillar.


So that was more damage on the bus, but not enough to stop him collecting my flag.


A collected flag is replaced in the next Gear Phase. Baily positioned his behind me, but I pulled off some tight turns to collect it again, albeit that this time I damaged some paintwork bouncing off a concrete obstacle.


Bailey had respawned one of his vehicles and, at some stage, had collected by replaced flag, giving both he and I two flags each. However whilst I turned for a third pass at his flag, Bailey was on track to pick up Caesar's flag again. 


This he did, albeit that immediately afterwards his victory was sullied by the car wrecking in a collision with a container. But he had the third flag and claimed victory!


Final positions. Caesar's bus was a deadly foe, but not best suited to collecting items by precise driving. The BD5 performed admirably, even if I didn't get to use all of its abilities. I was happy to get a couple of flags. And with two cars Bailey was well set for a win, even if, to be fair, he did a lot of it with one respawned vehicle.


Here's my build:

James Bond Aston Martin DB5 - 50 Cans - Sponsored by Verney

Performance Car - Heavy Machine Guns (Front), Oil Dropper (Rear), Caltrops (Side), Micro-Plate Armour (x2)
Perks: Whizzbang, Gyroscope, Feel No Pain, Mobile Mechanic, Eureka!

Related Posts Plugin for WordPress, Blogger...