Sunday 28 February 2016

3D Printing

There is a steep learning-curve on this 3D printing lark. Not only do you have to get to grips with the operation of the printer itself, but there is software to convert a 3D model into the actual print-code to be mastered. And that's assuming you use an existing model; designing your own things requires learning how to use suitable software. Fortunately there are some great designs for things around on the web, which can be used to try the printer out.

I have been playing around with more of Marco Bergman's lovely tank designs. The problem I have with the is not the designs themselves, but the software which converts his 3D models into a set of print instructions. It would seem that if a model is below a certain size then the software won't automatically generate supports for 'hanging' structures, such as the guns. This means that they don't print, or print very badly. You can reorientate the objects to try and force the printer to do them, but that creates issues of its own. So a lot of the tanks I have tried to print just haven't come out. The hulls are mostly good, but the turrets and guns are a mess. The software doesn't allow the manual insertion of support structures either, which is annoying. Those can be added by editing the original files, but that's a skill all its own. I have tried it and it's going to take some time to master. The alternative is to find a better piece of conversion software.

Anyway, it hasn't all been disasters; here's a 1/200th KV2 3D design, scaled down to 1/300th.


I have tried printing figures as well. On the right are some generic, geometric archers which are designed to replace the figure blocks in Command & Colours Ancients. They are part of a set of such elements, including infantry, cavalry, chariots and elephants, and I will probably explore them in more detail later. The base needed a little bit of cleaning up, but nothing too drastic. And it printed very easily.

On the left is a 15mm square base with some very, very simplistic soldier designs using simple cylinders. I actually put that together myself in Sketchup, then printed it. Rudimentary, but I am please with how it turned out for a first attempt.


I messed around with prints for most of yesterday, but for the reasons described above had little success until I switched to less ambitious designs with simpler shapes and a larger size. This is a 1/300th house, with a ruined version. It's actually scaled at 1/300th; I suspect for actual gaming purposes I'd resize it to about 2/3 of it's current size.


And finally this. It's part of a set of 18mm Dwarves I found. I scaled it up to match my partially painted Mantic 25/28mm Dwarves, and it came out very nicely indeed. It's a good couple of inches tall, and printed like a dream, being designed to require minimal support. It took just over 2 hours to print, and you can see that the 18mm detail came out OK at the larger scale.


I think it's going to be a while before I produce anything truly spectacular, but at the moment it's interesting trying out the whole process.

Oh, and the models do switch from being printed in yellow plastic to blue plastic. The printer came with a fairly limited amount of material, which I used up testing it. The blue is a proper 1kg roll of plastic, which should last me for a while.

Note: If you are reading this post on http://morieorgames.info/ then you are reading a stolen version. Please go to 'The Stronghold Rebuilt for the original posts. Thank you.

Friday 26 February 2016

Byzantine vs Crusader DBA

We played big-battle DBA last night, pitting Geoff's Byzantines against Peter's Early Crusaders. I have a bit of a soft-spot for Early Crusaders; their list in DBM always looked like a disaster waiting to happen, with so many impetuous troops of different types in it. However yesterday I was on Team Byzantine, running the infantry on the right flank.

Here's the lines closing, with the Byzantines nearest the camera.


Both sides had lots of cavalry and knights. At the rear of the picture are the light cavalry. We came unstuck there, as the Crusader's lights easily saw off our, who seemed very half-hearted in their will to fight.


It didn't take long for the lines to break up. Our left flank command broke early on, mostly due to our light cavalry's unwillingness to fight, and our centre wasn't looking too well either. But it was the Crusader centre command which broke first there, giving us a little bit of breathing space.


On my flank I had archers mixed with the Varangians holding off Crusader spears. Casualties were light; one Crusader archer element destroyed by skirmishing light infantry in the background of the picture. Otherwise it was a shoving match.


The battle was close, but the Crusaders went over the edge first, losing enough tropps in the centre for their army to break. Geoff had a run of bad luck in combats early on, but once his rolls picked up the Byzantines were just able to hold on for the victory.


Note: If you are reading this post on http://morieorgames.info/ then you are reading a stolen version. Please go to 'The Stronghold Rebuilt for the original posts. Thank you.

Thursday 25 February 2016

New Technology At The Stronghold

I have a new toy. Well, the family has a new toy, but I have the kind of obsessive mind, combined with the right hobby, to make use of it.

We bought a 3D printer. We bought one mostly because not buying one seemed a less sensible option at the time.

I'm a wargamer. I have no doubt that I will find a 3D printer of use in the future. And even the present.

Anyway, I have been playing with it, mostly by doing stuff with the wonderful 1/200th tank collection offered for free by one m_bergman of New Zealand.

I printed off some Churchill Mk IVs. They came out pretty well.


Certainly wargames quality models, anyway. 1/200th, in case you weren't paying attention above. At the moment I don't have any great use for 1/200th scale tanks, so they'll go into my Memoir '44 box in order to provide a change from the omnipresent Shermans.

Other experiments have been less successful, but that's mostly down to me not having fully explored the software and the printer settings. And, of course, at some stage I will have to bite the bullet and try to make some 3D designs of my own.

Update: The originals were printed in garish yellow plastic. I ran a couple of coats of green paint over them. But I suspect you guessed that already.


Monday 22 February 2016

Climb Every Mountain

It's been quiet here for the past week. This is mostly because I have been busy not gaming, and if I'm not gaming there's not much to write about here. Those of you who have been following this blog for the past four years (and it has now been going for four years - I missed that particular milestone, once again) will know that this time of year sees my wedding anniversary, and on my wedding anniversary we go away for a few days. So stuff doesn't get posted.

This year for our trip we decided to kill two birds with one stone, and head down to the Snowy Mountains. This enabled us to visit an area we'd not really been to before and also to check up on my son in Jindabyne. He's fine; looking good and seeming to be enjoying his job. We listened to Snow FM on the way down, so finally got to hear him in action, as they don't have an online feed, like most local Aussie stations at present. It's an odd, but wonderful, feeling sitting in a cafe and hearing your son's voice come on air announcing a record, promoting a local business or doing the weather. But he really does play some rubbish music. Kids these days ...

We took our daughter with us. She stayed in Jindabyne with her brother, whilst Catherine and I went off camping in the Snowy Mountains National Park.

Here's the location of our camp:


Pretty good, eh?

We lounged round for a day, enjoying the sunshine and scenery. And then we headed out to achieve the main thing we wanted to do whilst we were here - climb Australia's highest mountain, Mount Kosciuszko. It's not often you get to say that you've climbed the highest mountain in not only the country you live in, but the continent as well. But we did it. Actually it's not difficult. You get a cable-car from Thredbo halfway up, then walk for two hours - it's 6.5km (4 miles) from the cable-car to the summit, on a prepared track with little in the way of any real steep bits. There are proper toilets within 800m of the summit. If you want to climb the highest mountain on a continent, then Australia has just the peak for you*. 

Here's Catherine on the path, which is, as you can see, pretty well maintained. The scenery is beautiful, and unlike anything else we've seen in Australia. But it's going to take me a couple of weeks to sort out the photos and post them to Flickr.


And here we are on the peak, with the crowds of other people who also did it on the same day as us. I failed to walk off my tummy. That's a proper campsite full-English breakfast in there.


Anyway, having walked two hours back and having had lunch we went back to our camp, where we did actually play a game; I'd brought Memoir '44 with me.


Catherine beat me.

In other news I lost bits of my eyebrows and some of my hairline to a gas stove which decided to flare up aggressively, in an incident that was quite funny afterwards, but might not have been at the time, and we also, after seven years, finally got to see duck-billed platypus in the wild. See that first picture in this post? They aren't in it, but if you wait patiently at dawn or dusk you can see them swimming around in that bit of river. 

All in all this was a fine way to celebrate our 23 years of marriage.

*Apparently if you take Oceania as a whole, it's not the highest peak; the highest is in Papua, Indonesia. But, shush - we won't mention that.

Tuesday 16 February 2016

The Attack on Port Stanley

I put together a scenario based on the Argentinian attack on Port Stanley not long after I first bought Memoir '44. To be honest I haven't played it in years, and reading through it now it has some definite flaws, but I still thought that it would be a fun game to try out my solo Memoir '44 variant.

For these games I had each side draw one card, plus they rolled one Battle Dice for each Command card they had and got an extra card for each Star rolled.  You got an extra dice if you played a Recon card on the previous turn and lost a dice for each Ambush card you currently held. I then picked the best card for the side, and played it.

Here's the setup for the scenario, with the British as the 'Allies' and the Argentinians as the 'Axis'. The river represents the coastline; everything to the left of it is the sea and is impassable.


The western end of the board has Government House, defended by a detachment of troops, and some lurking Argentinian commandos advancing to attack it. In reality the defenders of Government House actually outnumbered the attackers by two-to-one, but it appears that neither side was really aware of this and the defenders thought they were facing much larger numbers of troops.

Beyond Government House is the other Argentinian objective, the town of Port Stanley itself. This is defended by the Falkland Island Defence Force, about 40 civilian volunteers. Two units is probably excessive, but the British need all the help they can get in this scenario. The FIDF units only have three figures, though.

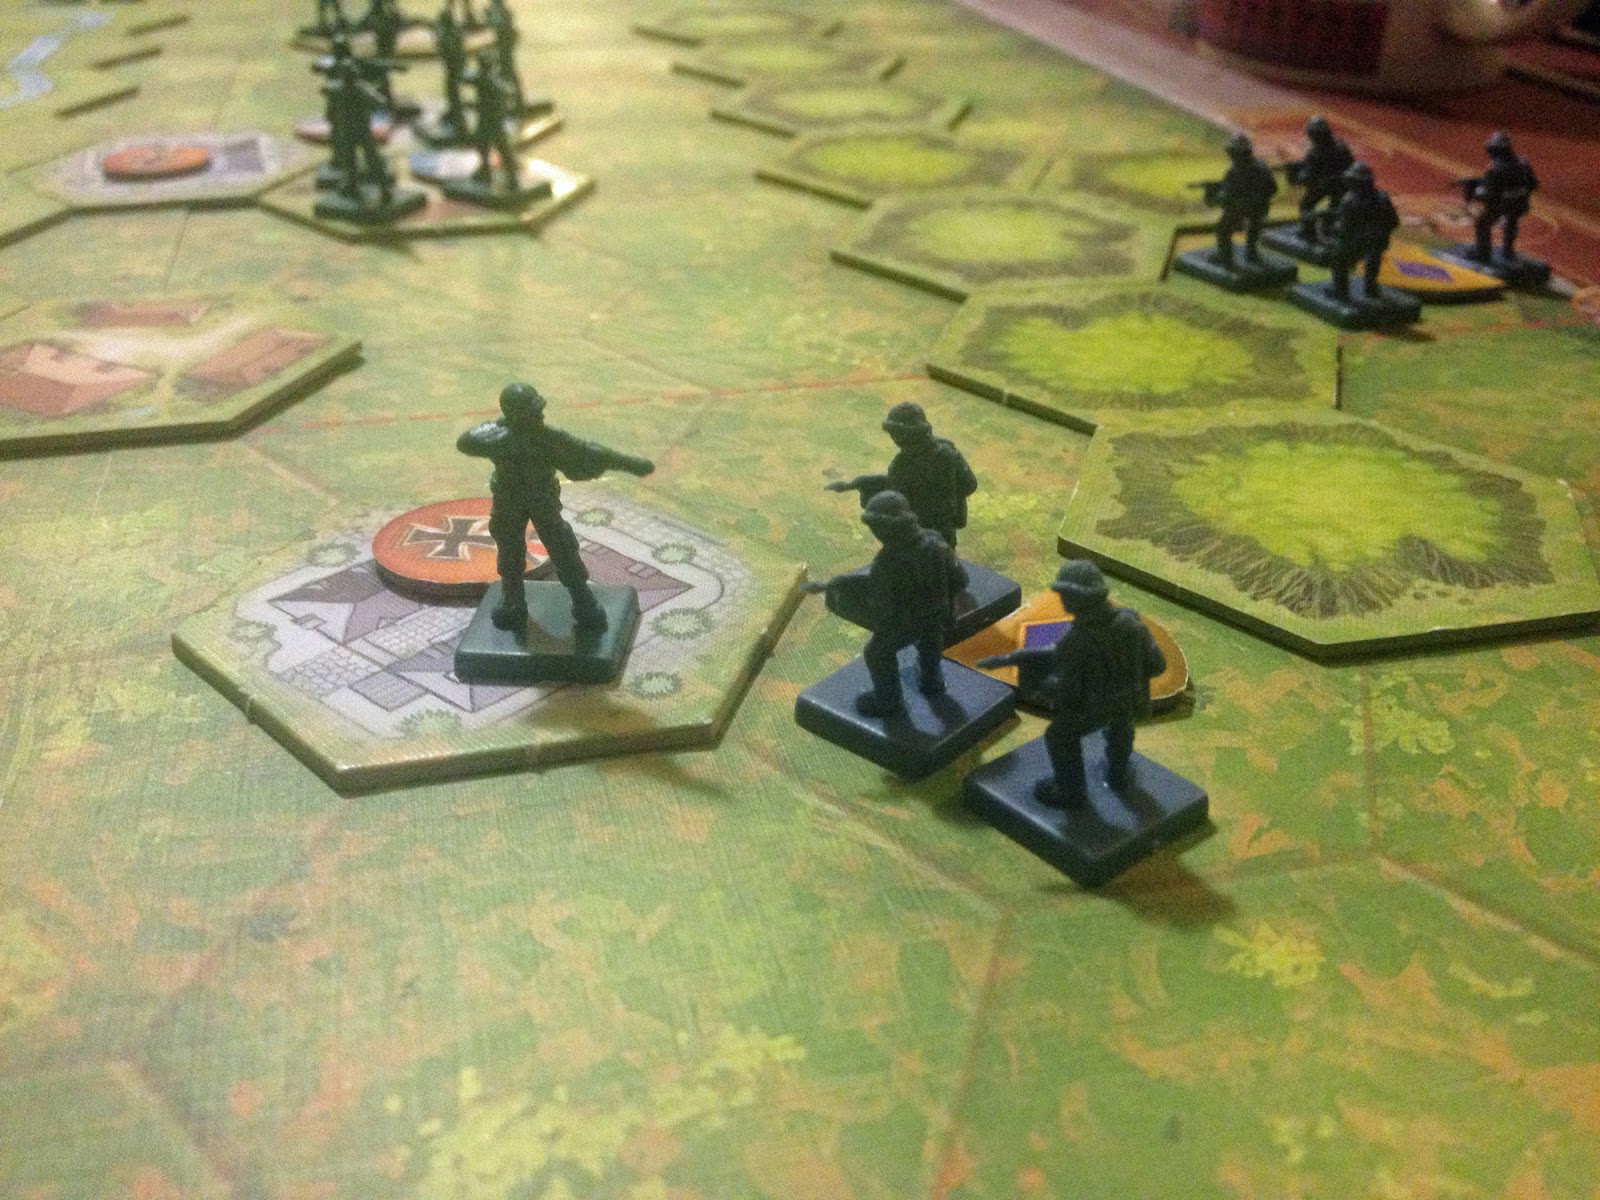
The Argentinian commandos count as special forces.


At the other end of the field, more Argentinians are deployed. They are four figure unit, with the first figure being a tank to represent their armoured transports. This allows them to move two and battle, until they lose their first figure, at which point they revert to being ordinary infantry.


In the first game the Argentinians got off to a flying start ...


... and launched a fierce attack on Government House.


At the other end of the field they were able to quickly push their main force into action, against a small detachment of British troops holding a scientific research station.


The Argentinians had already attacked the Marine barracks at Moody Brook, and the game allows for some of those troops to enter the fray as Argentinian reinforcements. They appeared quickly in this game, and the defenders of Government House found themselves under extreme pressure.


However there were also scattered units of British troops around as well, and the scenario also allows those to appear. A group of Marines comes to the aid of Government House.


The Argentinians kept up their attack ...


... at both ends of the field.


Government House fell, and the commandos moved on the town itself.


The troops in the research station were also being driven back.


At this point, with everything going the way of the Argentinians, the British won ...


You read that correctly. The British won. When I wrote the scenario I added a 'ticking clock' for the British, which gave them victory medals if certain types of cards were played. This was to encourage the Argentinians to push their attacks forward a little recklessly, thus giving the British player more to do and prevent the game bogging down with Argentinian caution. I think that really I set the clock too much in the Brits' favour; they won 4 medals to 3.

I scrapped that particular clock and tried a second game. In this the British rolled a Battle Dice at the end of any Argentinian turn in which the Argentinians failed to inflict a casualty. On a star the British got a medal.

Once again the Argentinian reinforcements turned up early on.


Once again Government House was the target of a massed attack.


The defenders were quickly driven out.


The Argentinians pressed them, an attacked the town.


Meanwhile the troops in the armoured transports advanced cautiously toward the research station, and came under fire.


The defenders were quickly driven out.


British reinforcements appeared, confusing the Argentinian advance on Port Stanley.


But not enough to stop the commandos from seizing two of its three hexes to pick up the final medal they needed for victory. The British picked up no medals.


Time for the deciding game. This time it was the main attack force which led the advance. The defenders of the research station were missing a figure when I set up. It was getting late.


The defenders of Government House managed a pre-emptive Behind Enemy Lines attack on the Argentinian commandos.


When it came the attack on Government House was less aggressive than in the previous games.


Indeed the attackers quickly retreated to regroup.


The troops in the research station were also holding off the Argentinians at their end of the field.


The defenders of Government House were slowly whittled down.


British troops arrived to bolster the defences of Stanley itself.


The research station was assaulted ...


... and the defenders fell back.


Government House in Argentinian hands.


Port Stanley came under attack by the armoured infantry. Some of the FIDF had already fled.


More Argentinians advanced on the town.


The British put up an heroic defence, though, breaking up the Argentinian attack.


An attempt was made to retake Government House.


But the Argentinians were prepared. The attack failed, and fierce fighting in the town saw off the last of the British regular troops. The Argentinians won again.


This third game was closer, with a few Argentinian units close to being destroyed, and their hold on Government House in doubt as well. The British got unlucky with their cards in the middle, drawing little of real use, whilst the Argentinians were able to get some real momentum going.

There is, of course, no reason to make any Memoir '44 scenario balanced, but it's nice to feel that victory, of a sort, is a possibility. In this battle the Argentinians were always going to win. A British 'victory' represents their defence being a particularly epic one. This is partially why I'm keen to keep the 'ticking clock' aspect; the British can win by just sitting tight. What I will try in future games is to allow the British to play any section card as an Epic Defence card. This allows them to roll two Battle Dice. If either one is a star, then the British get a medal. No units are activated. The low unit density of this scenario often seems to give players cards that they can't use. This allows the British to use them.

Note: If you are reading this post on http://morioergames.info/ then you are reading a stolen version. Please go to 'The Stronghold Rebuiltfor the original posts. Thank you.

Related Posts Plugin for WordPress, Blogger...