Sunday, 11 December 2022

Atteint!

Inspired by a picture of some jousting knights on a box of colouring crayons, and the memory of a blog post from the other day, I finally got around to getting my Atteint! jousting rules out today for the first time in four years. Actually it's pretty much the first time I've had them out since the week in which I wrote them. 

The blog post about jousting I'd seen drew my attention to some figures for jousting knights on the Junior General site, so I downloaded them and out them together. And here they are:


As you can see, I hadn't got around to painting the bases, but I was keen to get playing, and decided to forego that nicety for now.

I picked four knights - Black, White, Red and Yellow - for a quick mini-tournament. Black and Yellow would joust, then Red and White, and the winner of each one would go through to a final, third, joust.


I'd got a couple of notes for some rules changes. Nothing much though, but I decided to try them. The first was that a strike takes place when the knights are diagonally adjacent (see picture below). This is simply aesthetic, although it does have a small effect on the game since they contact one space earlier. The next change builds on this; if the knight that initiates the strike ends in this position then resolve the strike as normal. But if their move would leave them immediately adjacent to the other knight (because they got to move two spaces) then when rolling against Force to test for a broken lance they get to reroll a fail. I need to word that better. Finally I only allowed a knight to hold one Favour from the Ladies Court at a time. 


The first bout was between the Black Knight and the Yellow Knight.


On the first pass, Black rolled well for Force and advanced quickly down the list, but Yellow got the initiative in the strike. Despite that, it was Black who threw off Yellow's aim, only to then miss with their own attack. Neither knight scored any points.

The second pass saw both knights miss each other again. The approaches were slower, but neither knight build up much in the way of Force or Aim. Yellow was a favourite with the Ladies' Court by this stage, and could count on a reroll in the next pass, but Black's actions had caught the notice of the Marshal of the Field, who would certainly award the joust to Black if the scores were tied at the end,


The third pass started with everything to play for - Yellow had the support of the ladies, whilst Black was currently considered the better knight. Black could afford to play for a tie, but Yellow had to score a point. Yellow managed to catch the Marshal's eye on the approach, negating Black's edge there. Black threw  off Yellow's aim on the strike, but despite that both knights hit each other. All was set for an epic tie-break, except that Black's lance broke, unbalancing Yellow, who was unhorsed (a triple '1' rolled by Black saw to that). This gave Black 3 points and an overall 3-0 win in the first joust of the day.


The second joust of the day was the White Knight against the Red Knight. In the first pass both knights concentrated on their Aim, hoping to get a quick point to start things off. As expected both scored hits but, against the odds, both also broke their lances, starting the joust off at 2-2.

The second pass was steady and saw both knights build up good scores in all three attributes. White threw off Red's aim in the strike, but Red opted to go for a reroll anyway. Both scored a hit, but this time only White's lance broke. So the pass was scored 2-1 and White now led 4-3 on aggregate.

The third and final pass saw both knights roll incredibly well for attributes. White played safe, opting for a high balance to throw off Red's attack. Red naturally opted for a good hard attack. On the strike White was able to blunt the force of Red's attack, making it less likely that he would shatter his lance. Both knights hit, and White's lance broke. The score was 2-1 to White again, and 6-4 on aggregate. So teh White Knight was the winner.


So the final joust of the day would see the White Knight face the Black Knight - a classic pairing.

The first pass saw White score a hit, and shatter his lance, whilst Black missed. This put White 2-0 up.
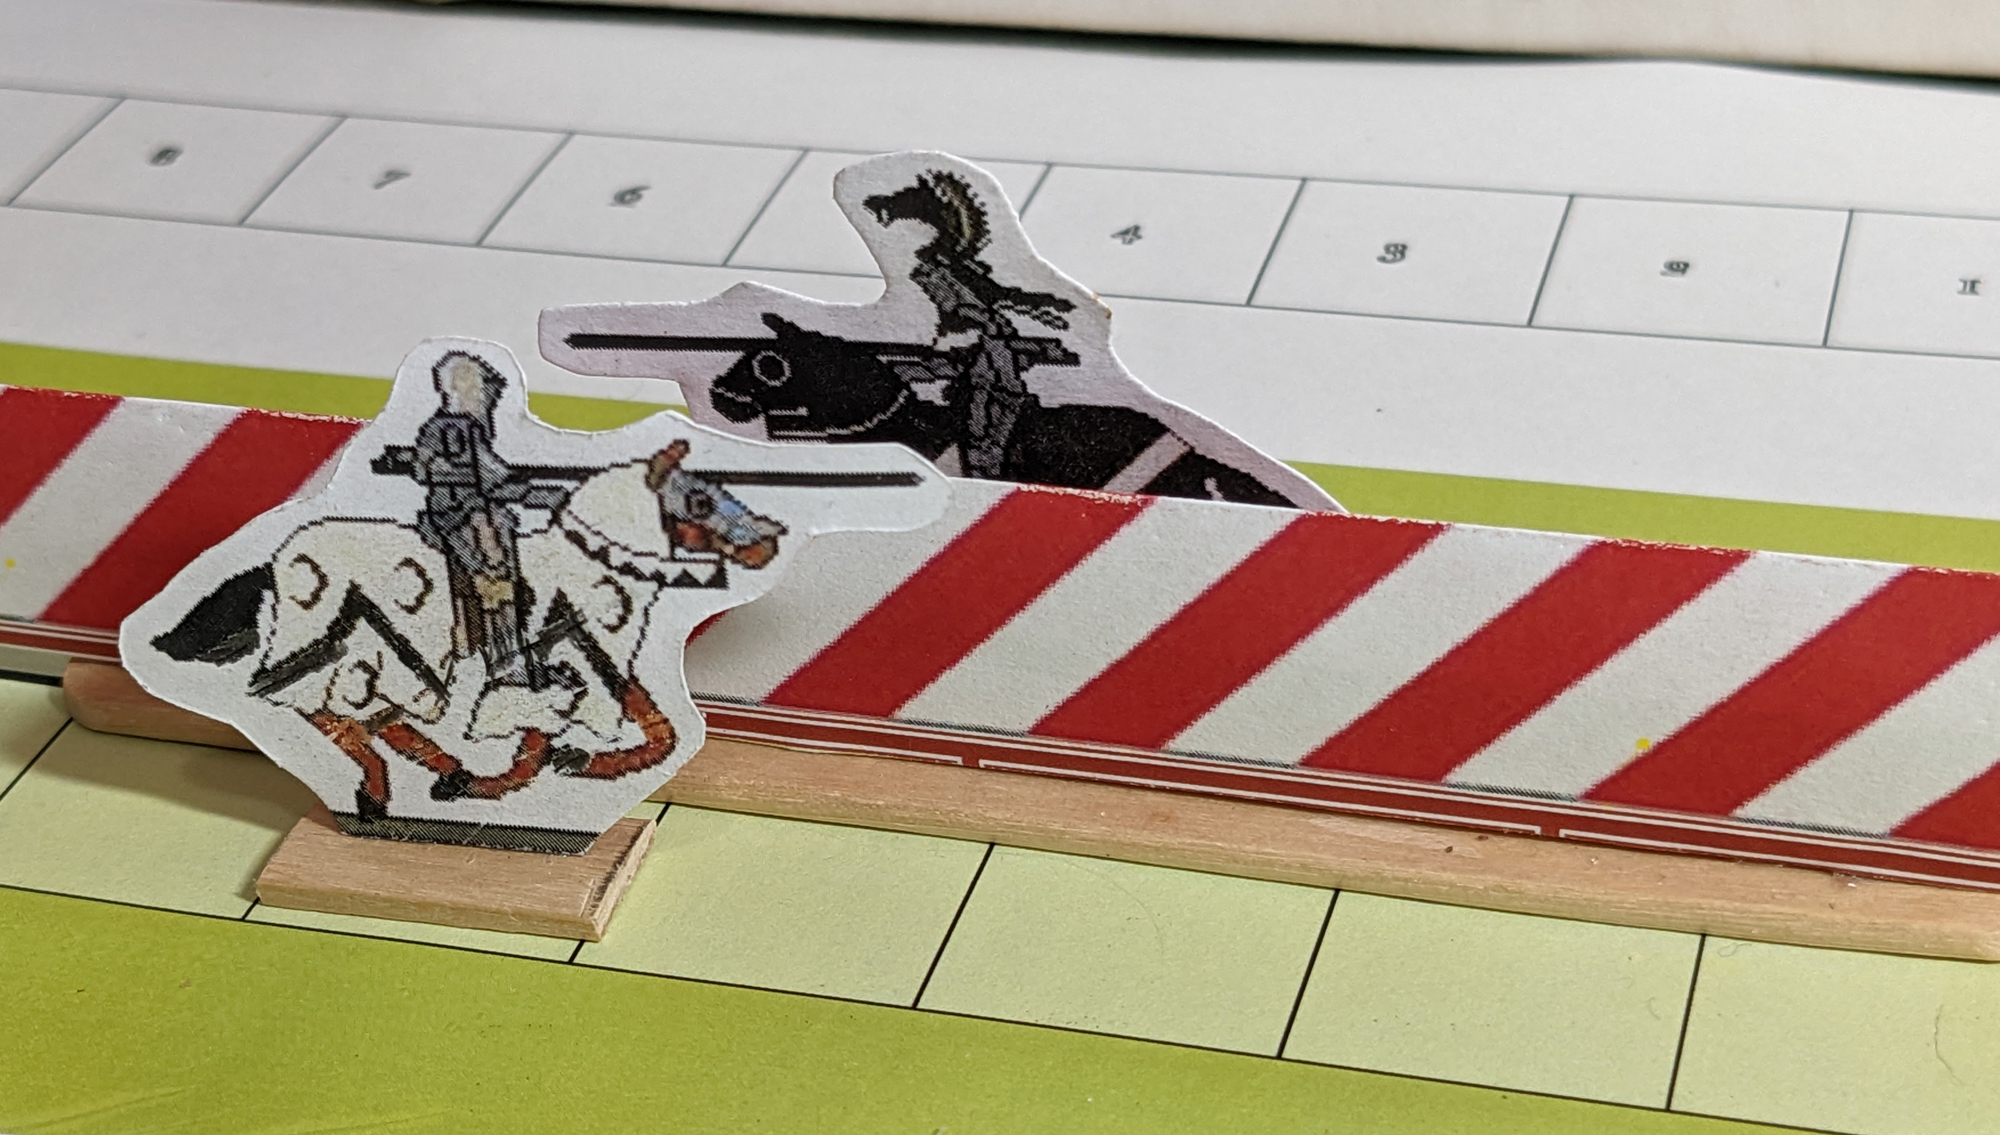

The second pass saw White play defensively, opting to risk a hit from Black but prevent his lance from breaking. And that's what happened; Black hit but his lance remained intact. Black won 1-0, leaving the aggregate score at 2-1 to White.


All White now had to do in order to win the joust was score at least as well as Black in the third pass. Black caught the Marshal's eye on the approach, though, which meant that if the final score was tied, Black would now win. White got the edge on Balance and threw off Black's aim, but despite that Black hit and White didn't, leaving the scores tied! To add insult to injury Black's lance shattered, giving Black a 2-0 win in the pass and a 3-2 win overall.


So the Black Knight was the champion for the day.

I need to go through these rules again, and tweak sequences and how the attributes work, so that there can be different strategies in how to apply them. To some extent, at present, there is a strong advantage in putting points into Aim, as this ensure a hit. This makes sense, obviously, but there needs to be an incentive to consider Force and Balance as well. Still, overall I'm pleased with how these rules work, given that they were basically written in a day or so.

Friday, 9 December 2022

Middle Earth HOTT

We played HOTT again at the club this week. Rather than one big game the four of us played two one-on-one games using Geoff's Middle Earth armies.

The idea was to play 36AP on normal-sized board, but I played Lachlan in the first game, who hadn't played HOTT for years (if at all) so stuck to 24AP for what was a kind of learning game.

I took Orcs, and sorted out a kind of Riders of Rohan army for Lachlan, consisting of four knights, six spears and two warband. This was the setup. I had a ton of hordes in the centre, wolf riders on my right and some Uruk Hai blades on the left.


Meanwhile Dave and Geoff were playing a 36AP game with Geoff's Haradrim taking on Dave's Gondorians. 


These are Geoff's wonderful mumakil. Apparently they spent most of the game being forced to flee by Gandalf's magic.


Meanwhile in my game, Lachlan had massed his forces against my left, leaving me in the strange position of being outnumbered at the point of contact. Owing to my stupid general placement (on my far left) I was slow to bring across reinforcements.


I had plenty of troops on the other flank. They were mostly on the wrong side of a hill, and faced a grand total of two enemy elements.


The first combats of the game - Rohan's spears charged my Orc hordes.


In the centre some Rohan warband broke through and made a run for my stronghold. I was able to bring back hordes to stop, and eventually destroy them, but it did slow down my efforts to reinforce my left.


On my left flank my two elements of blades, one of which was my general, had become somewhat isolated.


The one blade fell, but the general fought off every attempt to destroy him. Each turn gave me more chance to bring back hordes and (not depicted) take out the Rohan knights on the other flank.


But eventually the odds caught up with me. I was pushed back into the village and the general was cut-down, losing me the game.


We swapped partners. This time I was facing Dave, who kept his Gondorians. I used the Orcs again, but added more riders, a Nazgul hero and Sauron himself as a hero general*.


Our armies, each at 36AP, made an imposing sight.


The battle opened with the hero Faramir attaching my trolls and being driven back.


Gandalf hit the trolls in the flank, and was promptly killed by them.


In the centre Gondor's blades sliced their way through my hordes.


Faramir charged the trolls again, and they recoiled. Straight into Sauron. This killed the Dark Lord, and that was another lost battle for me.


One week I plan to win a game of HOTT.

*Or maybe a Nazgul pretending to be Sauron.

Tuesday, 6 December 2022

Pyrates On Mars

I took a few armies to the wargames club on Thursday, but only ended up using one of them (and loaning one in the second game). So I got two of the others out yesterday for a couple of games. One is my Barsoomian Gathol army, and the other is my venerable Pyrates army, probably the oldest HOTT army I still have in use, dating back to the mid 1990s.

The Pyrates defended, although I kind of assumed that they'd invaded Mars and were having their bridgehead attacked. 


The Pyrates consist of a Pyrate Captain (airboat general), six scurvy dogs (warband), two scurvy dogs w'muskets (shooters), a cannon, by the powers! (artillery), some lubbers (horde) and some sharks (lurker). The figures are almost all Peter Pig, aside from the cannon (I can't remember where that came from) and the ship (Irregular Miniatures).


Gathol you've met plenty of times before - three thoat riders (including the general), five blades, two airboats and a flyer. Terrain meant that they were split into three groups.


As Gathol slowly advanced, the Pyrate Captain pushed his ship ahead of his line to break up the advance of the Gatholian foot. He assumed the shooters and cannon would cover his flank from the more numerous Gatholian air-navy. That, and the command issues the Gatholian Jed would have controlling them from the other side of the field.


The flying ship swung into the flank of the enemy infantry, and destroyed an element.


Meanwhile the Gatholian jed led his riders in an attack on the Pyrates' left flank


The Pyrate Captain kept up his attack, but was caught in a draw. This allowed a Gatholian blade to move up on the flank, with inevitable, general-destroying, results.


The final position. Gathol had lost 4AP, and the Pyrates 5AP and their general. So a quick game. 


So quick that I set them up again, with a change of terrain. The Pyrates defended again.


This time the Pyrate Captain was less reckless, advancing with his men rather than ahead of them. Gathol had a poor start with PIPs, and only got to push forward the riders at first.


The Gatholian navy quickly came up in support, as the two lines met in a proper fight.


Dispatching the Gatholian flier, the Pyrate Captain turned his ship onto the enemy flank, destroying one of Gathol's mighty air-vessels as well.


Meanwhile fighting surged back and forth on the ridge, with the Pyrates struggling to dislodge the Gatholian cavalry, but the cavalry unable to break the attackers. Eventually, though, the weight of Pyrate numbers told and an element of riders was destroyed.


The Pyrates pushed forward, and the Gatholian Jed found himself backed up against his own surviving airboat. It proved fatal.

Gathol lost their general and 9AP of troops, whilst the Pyrates lost 2AP.


Friday, 2 December 2022

Double-Sized HOTT

We played a couple of four-handed games of HOTT last night, with each player taking a 24AP army and running it as a 48AP mass-battle.

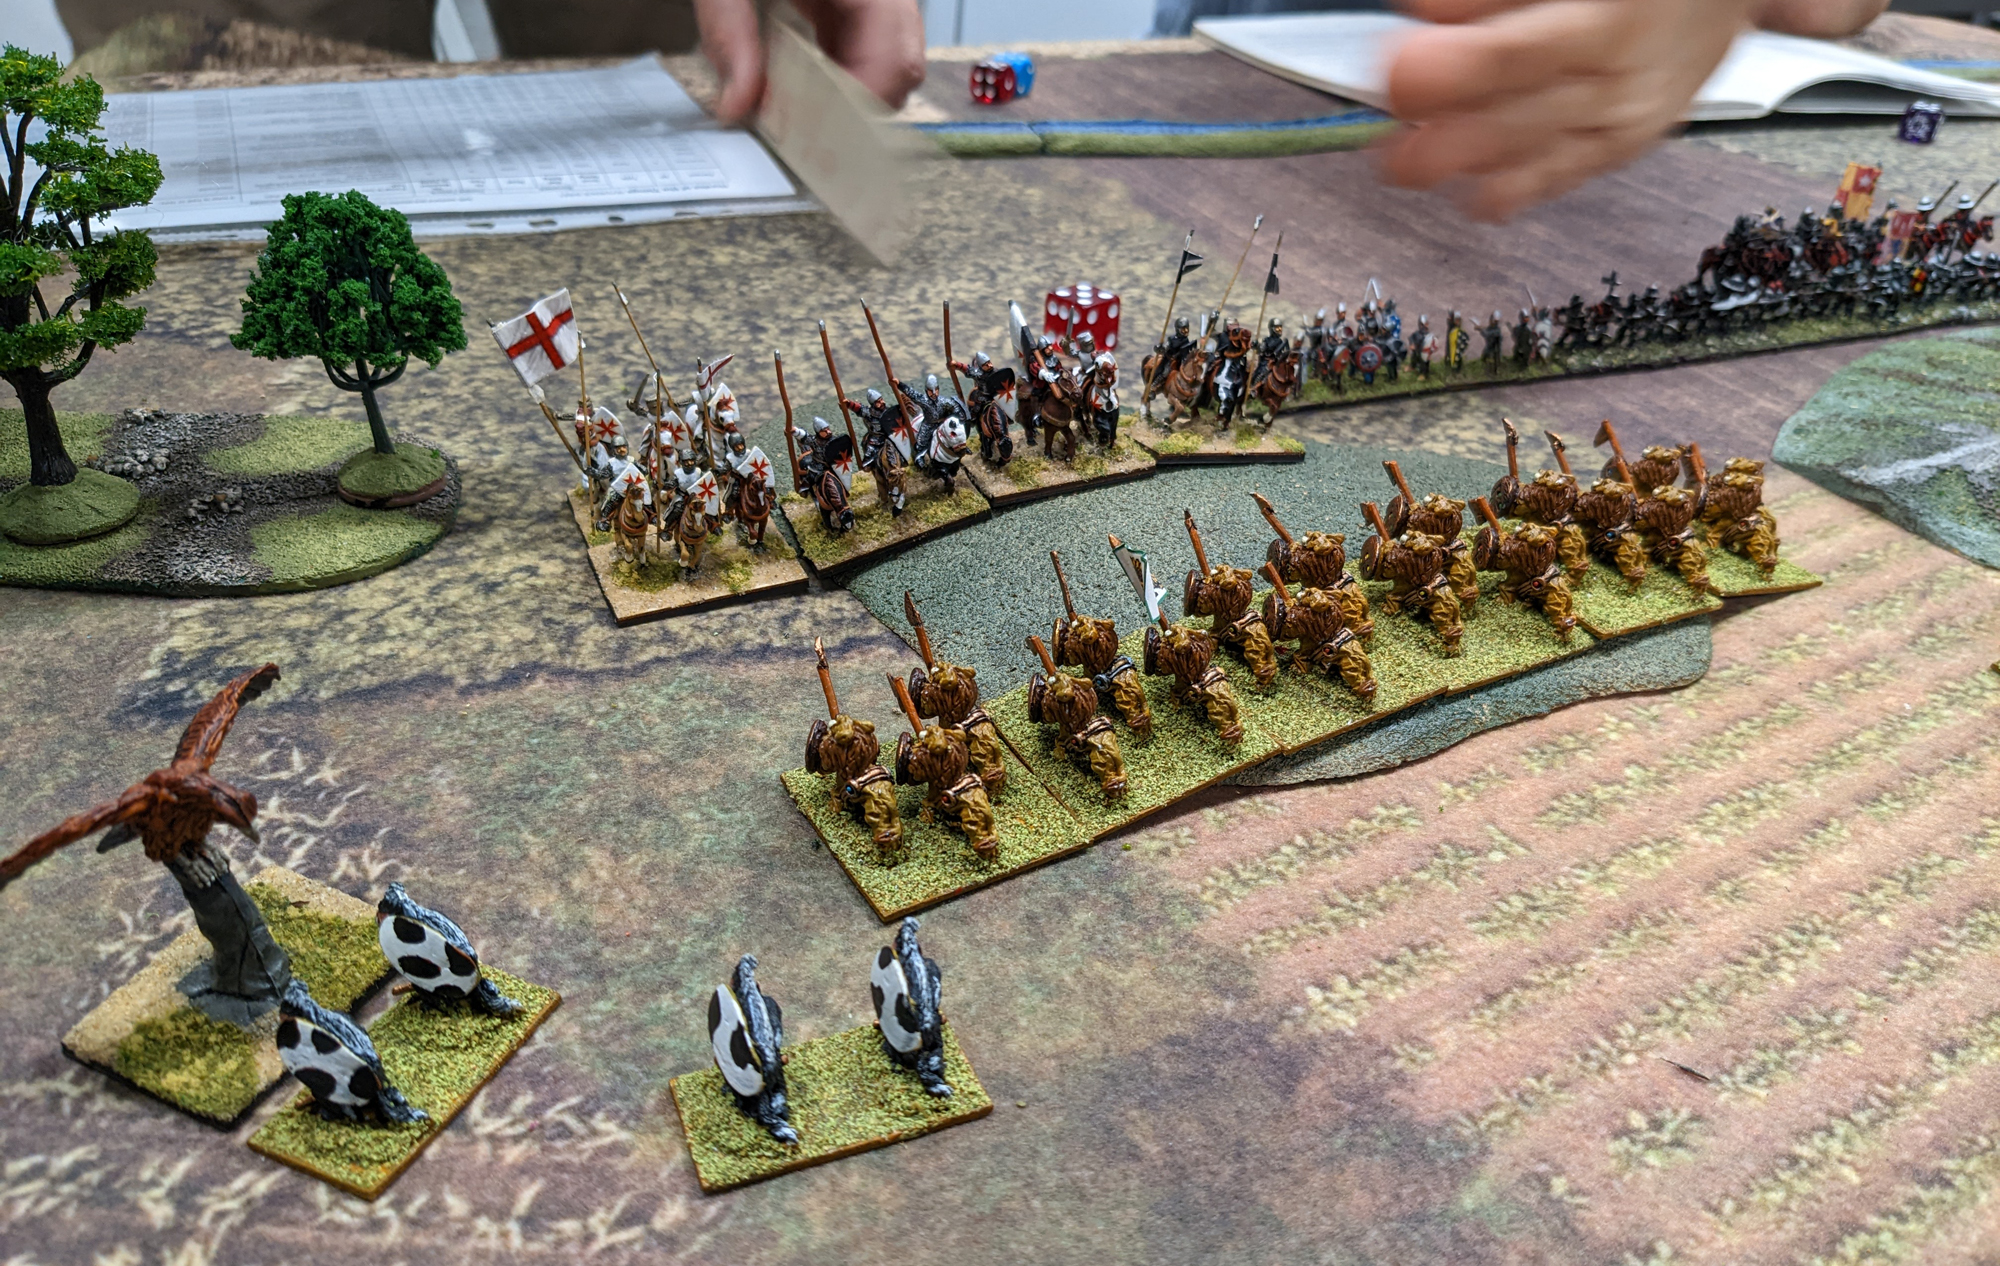
We kind of threw some terrain together and narrowed the table using rivers (which made for wonky baselines, but that was no big deal). Each of us selected an army, and we split into two teams. Three of us went for knight-heavy armies - Peter went for Crusaders but with a couple of dragons, I went for my Knights of Simba lion-centaurs and Geoff went with the Riders of Rohan. Only Caesar went with a blade-heavy medieval army, supported by a hero/paladin combination.

Here's Caesar and Peter set up, with my Knights of Simba in the foreground to the left and Geoff's Riders of Rohan to the right of them.


The Knights of Simba - six knights and six warband. I had a patch of bad going in my deployment area and split my army up to go around it.


Rohan - six knights, four spears and a hero. They had a clear run at the enemy.


The enemy lined up along a hill and anchored against a village.


Geoff ploughed straight forward into the attack, whilst I struggled to get the PIPs to organise my troops on the other side of the field they'd skirted.


Without my support Geoff's attack was quickly flanked by some of Caesar's evil men-at-arms.


As with any combat involving knights on both sides, the lines soon broke up. Geoff was mostly getting the best of the fight at this stage. And Peter couldn't roll a six to get his dragons on.


Meanwhile I had advanced on the hill, if only to pin Caesar's troops and cover Geoff's flank.


Peter's foot - classed as warband - rushed out of the village and attacked Rohan's spearmen, sweeping may of them away. At this point Geoff killed Peter's general, and teh Crusader army collapsed into demoralisation, with many elements fleeing. Unfortunately those that stayed behind did enough casualties to break the Riders of Rohan as well.


Caesar charged the Knights of Simba ...


The lion-centaurs were scattered and their general killed. This caused the Knights of Simba to go demoralised as well.


Elements started fleeing across the field, and our side's losses were enough to lose us the game. But it was close; had Peter's entire force of Crusaders fled, their army would have broken, despite Caesar not suffering any losses.


We set up a second game. Geoff had to go, but Dave stepped up in his place and took my Ophidians, with their three magicians. I used The Knights of Simba again, Caesar kept his blades and Peter swapped the dragons for an aerial hero.

This time I was quick off the mark with an attack. The aerial hero (an eagle) came in on my flank.


Dave took the Ophidians on a slow flank-march through a wood, so this game was kind of the reverse of the previous one in terms of one flank being delayed whilst the other attacked.


The fighting commenced ...


My general was hit in the rear by the aerial hero and destroyed. Once again his army became demoralised.


I tried to hold the troops together, but Peter and Caesar whittled the survivors down (that -1 for being demoralised is a killer).


My last element was surrounded and destroyed. This broke our army.


A shame, because Dave had finally got the Ophidians in position for an epic flank charge. They didn't lose a thing. Neither did the enemy.


48AP is an odd size for a big HOTT battle. Since you lose the battle at 50% losses this equates to losing one of your two commands, so if a command goes demoralised that's pretty much it. With 72AP you have three commands, so losing one will, on average, only cost you a third of your army - two-thirds of the way to a loss, it's true, but enough to keep you in the game maybe.

Related Posts Plugin for WordPress, Blogger...