If you read this blog regularly, you'll know I'm a fan of mapless campaigns, that are simply an excuse to link battles together with minimal bookkeeping.
One popped into my head this morning whilst I was on the train to work, so I thought I'd post it here, partially so I have it written up, and partially because by sharing it people might add some ideas of their own. It does use ideas from earlier campaign systems I've rambled about here.
Anyway, it's for HOTT. It assumes that you use fixed 24AP armies (although it would work if you allowed a player to change a few AP in each game). It also assumes an even number of players, and that there's at least four of them. It's designed such that in each round the players play simultaneously; that's an important feature in a campaign; HOTT is a pretty short game, but if you have a group of players together for a campaign it's a bit dull if some of them are sat watching two other players playing their entire game before they get their chance.
So, each player has a 24AP army, and gets three Resource tokens of the same colour. Each player has a different colours for their Resource token.
You win the campaign when you end a round with three different-coloured Resource tokens in your collection.
The campaign is played in a series of rounds.
In each round players choose an opponent. In order to determine the order in which this happens, each player rolls a D6 and adds the number of tokens they have to the score. In the event of a tie, the player with the fewest token goes first, then the player with the fewest colours, and if there's still a tie, dice for it. The lowest-scoring player declares an attack on another player. Keep going until all players are paired up - obviously a player who is attacked doesn't get to choose; they're locked into a battle already.
(This process allows players who are behind in the campaign first pick of opponents, allowing them to choose easier battles in order to get back into the game.)
Play the battles. The player who chose their opponent is the attacker, the other is the defender.
A side loses the battle according to the rules. However if a player lost their previous battle, they lose if they take 10AP of losses rather than 12AP. Note that this could apply to both players in the battle.
In addition work out the margin of victory. Both sides score Victory Points (VP) as follws:
A player scores 2 VP for each enemy AP that is destroyed or is ensorcelled at the end of the battle
A player scores 1 VP for each enemy AP that fled the field or moved off the battlefield.
A player scores 4 VP if they captured the enemy stronghold
A player scores 4 VP if the enemy general was lost (regardless of how it happened).
A winning attacker can take a random Resource token from the defender. But if their VP score is at least double that of their opponent, they choose which resource token they take.
A winning defender can take a random Resource token from the attacker only if their VP score is at least double that of the attacker.
(You generally only get Resource tokens if attacking, unless you win big as a defender. Since players are less likely to attack as they acquire more tokens, it does make it slightly harder to gain resources as you do better in the campaign. The VP are designed to allow players who feel they are in an unwinnable game to reduce the margin of victory by retreating units off the table.)
After the battles, all players get their lost elements back; players always run their full 24AP armies.
(This prevents the 'death spiral' effect, where once a player loses they continue to lose because their army is under-strength or otherwise seriously penalised. The reduced breakpoint does encourage a player not to lose,, but the effect isn't cumulative.)
Needless to say I haven't tried this out.

Friday, 13 September 2019

Monday, 9 September 2019
A Mexican Adventure From The Archives
I was doing another trawl of my PC's hard-drive last night, and came across this folder of photos. I think they used to be on my old website (of which The Stronghold was a part).
They were taken in 2003 and are of a Mexican Adventure game using 'Principles of War'. It featured and Imperial column, made up of poor quality Mexican units and better-quality Austrian troops was attacked by Republicans, who had a mix of regular and irregular units to manage. Sixteen years on I don't remember the details of the game, but the photos offered a few clues (there were some helpful titles).
This is the Imperial column on the march. In the background you can see one of the hidden unit 'blinds' which may or may not represent a command of Republicans.
The column was marching down a road towards a ford, and there was a farm on the other side (just out of shot to the right).

The Imperial cavalry breaks from the column to investigate possible enemy troop movements.

Republican cavalry appears on the flank of the column.

I think some Republican units must have appeared in front of the column as well, as this shows the Imperial foot forming up.

The opposing cavalry gets stuck in to each other.

The action develops. The cavalry fight is bottom right. To the top left are Republican guerillas, sensibly hiding in the scrub. Imperial infantry advances to clear them out. There are Republican troops in unknown strength on the other side of the stream.

Guerillas.

The Austrians form a line and advance on the irregulars.

The opposing commanders - the Republican CinC ...

... and his Imperial counterpart.


This was never going to end well for the Imperials.

Republican artillery added to their discomfort.

I don't recall the details of the final result, but I think the Imperial column was forced to fall back, unable to force a passage across the ford in the face of a determined Republican defence.
I might try to reconstruct this game using the Portable Wargame or some similar set.
All figures are by Irregular Miniatures and are, as you've probably guessed, 6mm. The buildings are by Hovels and Steve Barber.
They were taken in 2003 and are of a Mexican Adventure game using 'Principles of War'. It featured and Imperial column, made up of poor quality Mexican units and better-quality Austrian troops was attacked by Republicans, who had a mix of regular and irregular units to manage. Sixteen years on I don't remember the details of the game, but the photos offered a few clues (there were some helpful titles).
This is the Imperial column on the march. In the background you can see one of the hidden unit 'blinds' which may or may not represent a command of Republicans.
The column was marching down a road towards a ford, and there was a farm on the other side (just out of shot to the right).

The Imperial cavalry breaks from the column to investigate possible enemy troop movements.

Republican cavalry appears on the flank of the column.

I think some Republican units must have appeared in front of the column as well, as this shows the Imperial foot forming up.

The opposing cavalry gets stuck in to each other.

The action develops. The cavalry fight is bottom right. To the top left are Republican guerillas, sensibly hiding in the scrub. Imperial infantry advances to clear them out. There are Republican troops in unknown strength on the other side of the stream.

Guerillas.

The Austrians form a line and advance on the irregulars.

The opposing commanders - the Republican CinC ...

... and his Imperial counterpart.

Some poor-quality Imperial foot pushed across the ford and occupied the farm, only to find themselves faced by the bulk of the Repulican's regular foot.

This was never going to end well for the Imperials.

Republican artillery added to their discomfort.

I don't recall the details of the final result, but I think the Imperial column was forced to fall back, unable to force a passage across the ford in the face of a determined Republican defence.
I might try to reconstruct this game using the Portable Wargame or some similar set.
All figures are by Irregular Miniatures and are, as you've probably guessed, 6mm. The buildings are by Hovels and Steve Barber.
Saturday, 7 September 2019
Isandhlwana
I've wanted to do a refight of Isandhlwana for years now, and on Thursday I got my chance, when Vic and Caesar arranged a game using Black Powder. We were all rusty with the rules, and some of the scenario was made up on the fly, but we ended up with a great and entertaining game, albeit that the result was somewhat inevitable.
John and Vic took the Zulus, ran as three 'brigades' with a CinC. Caesar and I took the British, who were split into two commands with no overall commander, thus restricting their actions a little and reflecting a confused defence as well as friction between Pulleine and Durnford.
The camp and the eponymous mountain.

Zulus mass behind the hills.

Durnford organising his end of the defence-line.

And here they come!

Caesar sent the NNC (represented by some very un-NNC tribesman loaned to the game by Bryan) on a wide sweep to the left in order to slow Zulu flanking moves around the mountain. The lower slopes of the mountain were passable, but the very top section wasn't, and provided a possible defensive anchor-point.

The Zulus reach the donga, which would offer them some cover from the British fire. A couple of dodgy command rolls, as well as disorder from the British firing did manage to keep the Zulus at bay for a couple of turns.

John's left horn advanced quickly, though, putting Durnford's horse under immediate pressure.

On the other flank the NNC came under attack.


Meanwhile the Zulu centre was now pushing forward against the British centre.

The British line started to fall back, the horse voluntarily and the foot less so.

From then on it was simply a matter of how long the British would last, as the Zulus threw in attack after attack. Although casualties in combat were roughly even, the Black Powder support rules favoured the Zulus who had more units to provide it.

Caesar anchored the British left on the mountain, but the Zulus were determined and wiped them out.

Most of the British line fell back. The artillery didn't. They put up a brave fight, but died at their guns.

The Zulus mass for a final attack ...

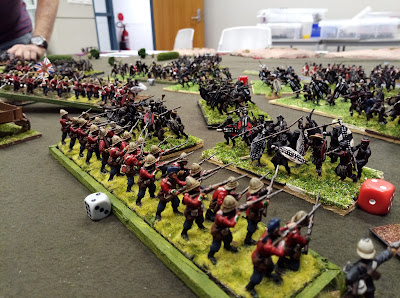
... and the British collapse. With only three units left Caesar and I conceded.

Thanks to Vic and Caesar for putting everything together. I was amazed at how long the British lasted. When I saw the endless masses of Zulus facing us I just assumed we'd be in melee in a couple of turns, and our units would rout from lack of support. In fact the British line proved more resilient than we though (we did play one of the support rules incorrectly for about half the game though, which did give us a small advantage).
John and Vic took the Zulus, ran as three 'brigades' with a CinC. Caesar and I took the British, who were split into two commands with no overall commander, thus restricting their actions a little and reflecting a confused defence as well as friction between Pulleine and Durnford.
The camp and the eponymous mountain.

Zulus mass behind the hills.

Durnford organising his end of the defence-line.

And here they come!

Caesar sent the NNC (represented by some very un-NNC tribesman loaned to the game by Bryan) on a wide sweep to the left in order to slow Zulu flanking moves around the mountain. The lower slopes of the mountain were passable, but the very top section wasn't, and provided a possible defensive anchor-point.

The Zulus reach the donga, which would offer them some cover from the British fire. A couple of dodgy command rolls, as well as disorder from the British firing did manage to keep the Zulus at bay for a couple of turns.

John's left horn advanced quickly, though, putting Durnford's horse under immediate pressure.

On the other flank the NNC came under attack.

They lasted about as long as you'd expect.

Meanwhile the Zulu centre was now pushing forward against the British centre.

The British line started to fall back, the horse voluntarily and the foot less so.

From then on it was simply a matter of how long the British would last, as the Zulus threw in attack after attack. Although casualties in combat were roughly even, the Black Powder support rules favoured the Zulus who had more units to provide it.

Caesar anchored the British left on the mountain, but the Zulus were determined and wiped them out.

Most of the British line fell back. The artillery didn't. They put up a brave fight, but died at their guns.

The Zulus mass for a final attack ...


... and the British collapse. With only three units left Caesar and I conceded.

Thanks to Vic and Caesar for putting everything together. I was amazed at how long the British lasted. When I saw the endless masses of Zulus facing us I just assumed we'd be in melee in a couple of turns, and our units would rout from lack of support. In fact the British line proved more resilient than we though (we did play one of the support rules incorrectly for about half the game though, which did give us a small advantage).
Wednesday, 4 September 2019
Weekend Games
This weekend included Fathers Day in Australia, and both of my children came over to see their old dad. We went out for a meal on Saturday (the day before actual Fathers Day, so we missed the rush), then had some family time on Sunday. And we played games.
First up was 'Murder Most Fowl', by Invincible Ink. This is a card game of bird-watching, with each player laying cards to create a 'path' which shows off a particular family of birds to its best advantage.

As the paths develop, players can sabotage each other's efforts, and eventually this may lead to ... Murder!
The game is inspired by Agatha Christie-type mysteries where rivalries within a harmless and innocuous hobby lead to death.

The game was fairly interesting, but we found several bits of the rules were unclear. It turns out that my daughter's copy is an older edition, and that there are updated rules, which clear up a couple of points, but we've had to raise questions with the designers over other areas.
Problems aside, the game occupied us happily for a chunk of Saturday afternoon, and that's really what you want out of a game.
On Sunday I was presented with this as a gift:

First up was 'Murder Most Fowl', by Invincible Ink. This is a card game of bird-watching, with each player laying cards to create a 'path' which shows off a particular family of birds to its best advantage.

As the paths develop, players can sabotage each other's efforts, and eventually this may lead to ... Murder!
The game is inspired by Agatha Christie-type mysteries where rivalries within a harmless and innocuous hobby lead to death.

Problems aside, the game occupied us happily for a chunk of Saturday afternoon, and that's really what you want out of a game.
On Sunday I was presented with this as a gift:

The Cat Game is basically a cat-themed variant on Pictionary. Players have to draw film-titles, people, activities and so forth for the other players, who have to guess what it is. The only real twist is that there are a pile of cut-out cat images included with the game, and these have to form part of the picture being drawn. That's it.
It's a stupid game with a stupid gimmick. We loved it. I can't say it'll see much time on our table, but it was ridiculous fun. A party game.
It's a stupid game with a stupid gimmick. We loved it. I can't say it'll see much time on our table, but it was ridiculous fun. A party game.
Sunday, 1 September 2019
Napoleonic Rebels & Patriots
Rebels & Patriots is written with the Americas from 1750 to 1860 in mind, but the mechanisms and troop types are easily transported elsewhere. So on Thursday we gave it a go with Austrian and French Napoleonics. The figures were 28mm, from Daniel, Ralph and Caesar's collections.

The scenario was a modified version of one in the book, with both sides fighting for control of a ruined farm in the centre of the table.

We played with two players on each side, each controlling a 24pt force.

The French made a deliberate advance on the objective, so Caesar and I sent the Austrians in quickly; victory is about which side controlled it unopposed for the longest, and we were aiming to rack up plenty of time on the objective as soon as we could. A group of skirmishers grabbed it. They were not expected to survive any longer than it took for the line infantry to move up.


The French remained cautious as the Austrians consolidated control of the objective (despite the lack of direction from their drunkard of a commander).

There was plenty of action on the flanks as well.


The French finally began their assault, and against all expectation the skirmishers held them off.
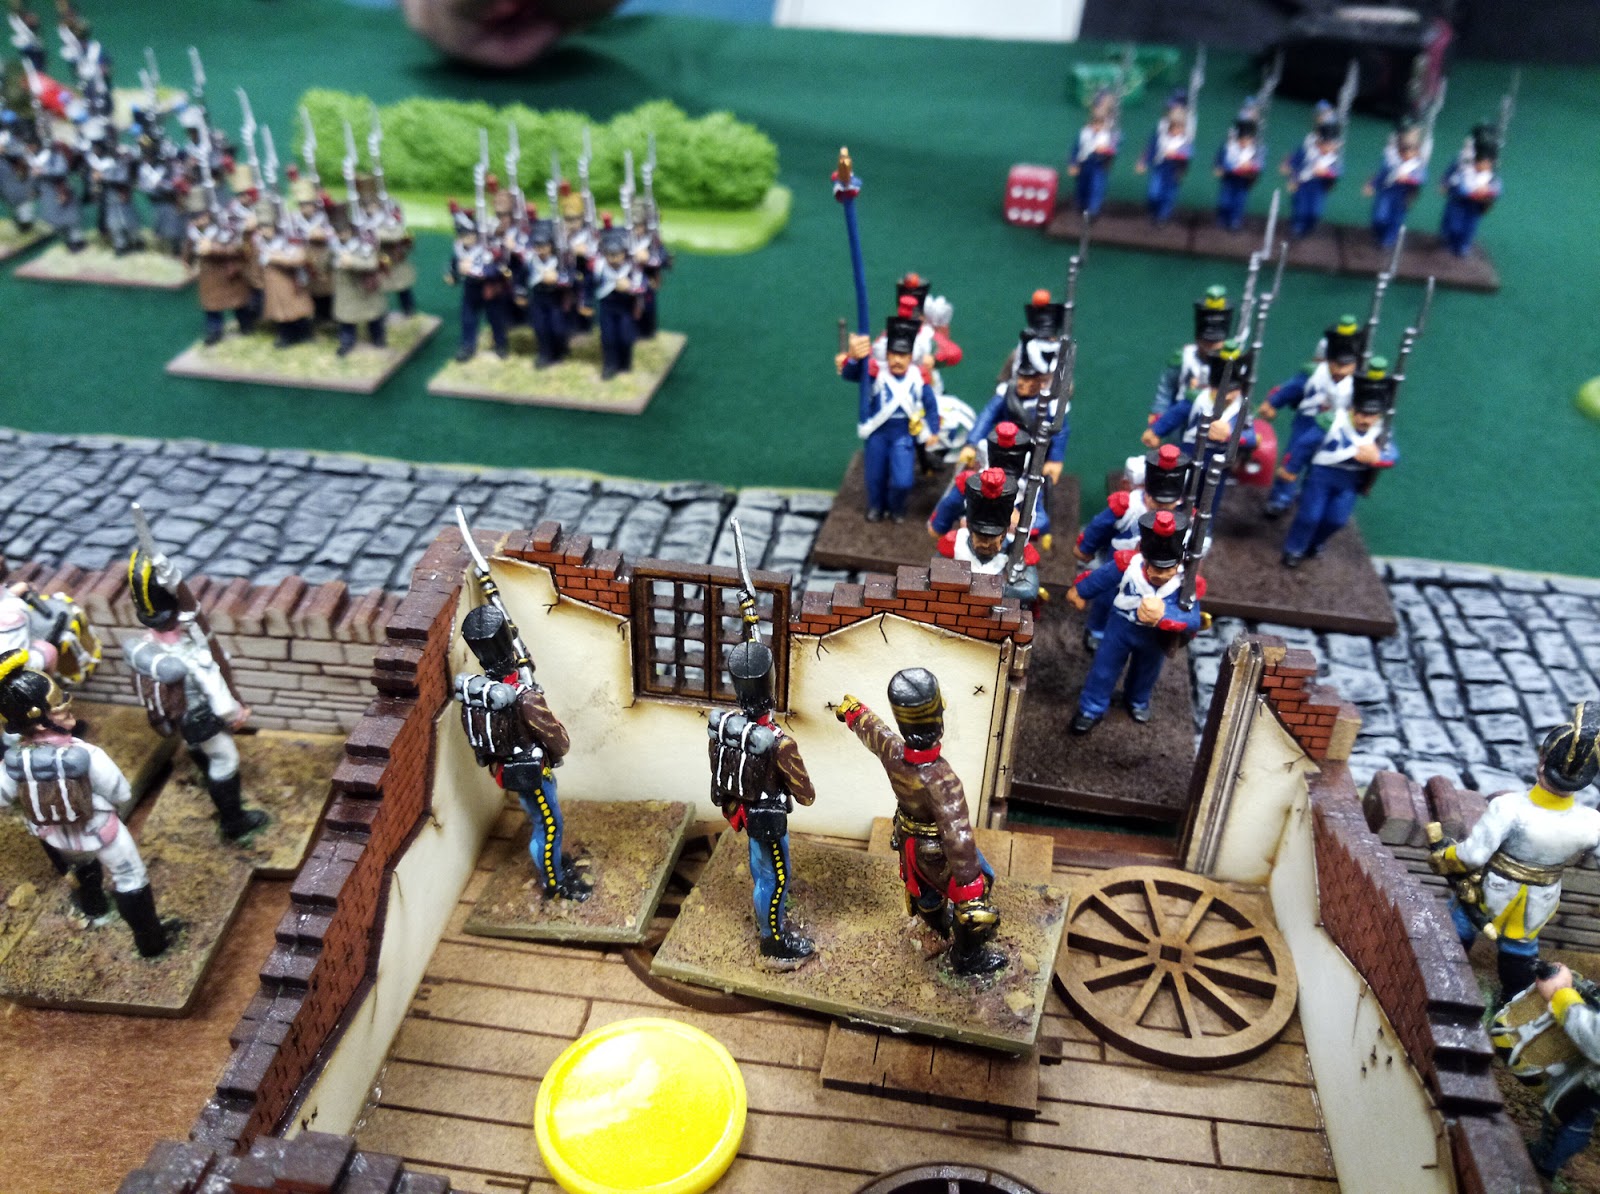
But the French attack was relentless, and their light troops had driven off the Austrian right. As the action ticked towards its time limit, Austrian control of the objective became more tenuous.


At the end the Austrians had taken a lot of casualties, but not enough to break their force. They'd inflicted enough on the French to achieve some honour, but the French had managed to even p control of the objective. The battle went down to honour achieved through random events dues to activation, and in that the French had edged slightly ahead, with their officer being considered heroic, and ours a hopeless drunk. So the French clinched a minor victory, albeit from a long way behind.
Thanks to all involved in putting on a fun game.
Subscribe to:
Posts (Atom)
