Last night Gary and I tried out Regimental Fire & Fury. Some twenty years ago I was a big fan of the original brigade-level Fire & Fury, but we played it less and less at my UK club, and I never really got the chance to play it in Australia. So this was, in some ways, a trip down memory lane to visit a new version of an old friend.
As the name suggests, Regimental Fire and Fury takes the regiment as the base unit, so is scaled down one level from the original game. This means that it includes details which are abstracted out of the original game; weapon types, for example, and more detailed troops classifications. For our first game we kept things simple, though, making all troops trained and reliable, with rifled muskets. We had ten eight-stand regiments each, and three pieces of artillery, and I set up a simple terrain.
I didn't really take pictures with a view to a detailed narrative of the game, so I'll just let them sit between various comments. Here's the Confederates advancing down a road towards the defending Union troops. Formations are similar to the original game.
Union troops. Command and control is different in this game, with a single roll being used for all regiments within command radius of a particular officer. Only one officer can affect a given unit. This single roll does speed up movement a lot. There are some additional modifiers to create extra command tension, however; units take a penalty if their side has sustained a certain level of casualties, if key objectives are occupied by the enemy, or if they are outflanked.
As with the original game, movement distances and firing ranges are generous, and the game rattles along. We used troops on 20mm square stands, with each stand actually representing two stands in a supported line. We tracked odd casualties with markers. It wasn't too hard to keep track of.
Firing is the same as the original rules, with the only major change being that the number of fire points is now simply a modifier to a die roll, rather than there being a large matrix to cross-reference them against. Again, this speeds up play. The firing results are a little more detailed, with the score affecting whether charging units make contact, and some results scoring hits on units which are already disordered, instead of just inflicting redundant extra disorders.
Our game saw the Confederates on the offensive, pushing across a stream and into a farmstead, as they drove down the road towards a Union-held church. But a lot of the game is about inflicting casualties on the enemy.
Charge combats are the same as in the original game, which will disappoint some, as the wide range of results possible from an opposed D10 roll seemed to be a sticking point with some. I liked it. There is the option to charge in with cold-steel at this level; you have more chance of completing the charge, and get a bonus in combat, but don't get to fire as you go in. A useful thing to use against an opponent who is shaken, or if your own firing is limited in some way.
Going low on ammunition in this game is more of an issue, since you can't just replenish with a simple withdrawal. Both sides had an ammunition train, and a unit must perform a movement action within a certain radius of it in order to remove the out of ammunition status. On the plus side, going low on ammo isn't quite so easy to achieve.
Supporting units are still a thing in this game, but are at more risk from adverse results, both in charge combat, and from firing where they take a reduced version of any damage the front unit receives.
Anyway, we blazed away at each other, charged back and forth and both armies took roughly the same level of casualties. I was happy to concede, however, when one of my charges was repulsed with heavy casualties, seriously compromising my centre, and adding to the discomfort of my already wobbly right.
It was fun to play Fire & Fury again, despite the work of having to deal with the changes to core mechanisms, and the addition of regimental-level chrome. Apparently a new edition of the brigade-level game is out as well; it will be interesting to see what changes have been made to that. I'm certainly looking forward to playing one or other of the games again.
Friday, 23 June 2017
Monday, 19 June 2017
Blucher At Waterloo - Again
Last year we did a big all-day refight of Waterloo using Blucher. This year we did it again. We had our usual room at the University as well, so got the plus of familiar surroundings, whilst losing the sea-view.
After the game last year there was a lot of discussion about how it could be improved, and these changes were applied to the game we played. Firstly we made the table narrower so troops got into action more quickly and so that the Allied strongpoints weren't so far from their main line that their defence was futile. Secondly we removed the separate Plancenoit table we'd used last year. To adjust for this we also ditched one French and one Prussian corps, and had their activities off-table and outside the scope of the game.
Here's the table set up ready for the battle. In the foreground is Hougoumont, beyond it La Haye Sainte and in the far distance the settlements of Papalotte and Frischermont. All of these were held by the Allies, but worth victory points to the French; 2VP each for the first two and 1VP each for the latter two. There were also 2VP up for grabs for holding the crossroads on the Allied ridge. As you can see, there were 8VP on the table, and the Allies held them all at the start. Victory would go to the side that held a majority at nightfall. An army could also win by breaking the enemy army.
The Allies.
The Prussians.
The players. We all seemed to have decided that blue was the colour of the day.
Take a moment to marvel at Caesar's Blucher movement measuring device, converted from some scrap sprue. I won't give the training course that we had.
Here's the initial setup around Hougoumont, before the units were revealed. At this stage the game looks like the opening credits of Dad's Army.
A view along the ridge. Daniel was commanding Rielle's troops, tasked with taking Hougoumont.
D'Erlon's Corps advanced to take Papelotte and Frichermont.
The advance on Hougoumont.
The Allies revealed.
Caesar alternated between commanding D'Erlon's Corp, and keeping us on the straight and narrow with his knowledge of the rules.
An early combat - Allied light cavalry attacked some advancing French infantry.
Another view along the ridge, with more figures on the table.
The attack against Papelotte and Frichermont developed slowly. Time was of the essence, though, because the Prussians would be turning up soon.
On the other flank Rielle was engaging the Allies along the line, whilst trying to take Hougoumont.
To the right of them, the Guard were advancing on La Haye Sainte. We reasoned we could secure a win by taking and holding all of the objectives in front of the ridge, leaving the Allies with the crossroads.
The fighting intensified around Papelotte. The cards on the table are the French cavalry, which had been assigned from the reserve to this flank in order to counter any sneaky Prussian moves.
Meanwhile, in the centre, the Guard advanced on La Haye Sainte.
The Prussians arrived!
They were quickly revealed. The French cavalry charged in, to stop them attacking the two settlements, one of which was now in French hands.
On the other flank the French were taking heavy casualties, but managed to take Hougoumont. All they now had to do was hold it until nightfall. Despite massive casualties, they did so.
The latter part of the battle, with all of the figures on the table, and fierce fighting around all of the key objectives. By this stage the French controlled everything but the crossroads, but were going to have to fight to hold their win.
The Allied cavalry appeared to try and win the day for Wellington in the centre.
With only a couple of turns left, the Prussians took Papelotte.
The Prussians were putting D'Erlon's troops under a great deal of pressure, whilst the French cavalry did what it could to help. Which wasn't much. Incidentally, I was running the French cavalry.
Fighting was fierce around La Haye Sainte, but the French held the objective.
The Prussians captured Frichermont as well. The game was now tied. Caesar tried to retake Papelotte, but failed. There was one French turn left.
Enter Napoleon ...
Napoleon is fairly inactive in this scenario, and could only use his leadership ability every three turns. But we'd saved him up, and used him at the end to order a series of attacks on the two Prussian-held objectives. Any attack ordered by Napoleon in this way gets a bonus, and it was used to great effect. The Prussians were thrown out of both objectives by the French, giving us a 6-2 victory as night fell.
Vive L'Empereur!
The scenario worked really well, and we played it to a conclusion well within the day at a fairly relaxed pace, which just goes to show the strength of Blucher for gaming battles of this size. We tried a method of speeding up the allocation of MO, where each side only got a single D6 worth of points (rolled secretly by the other side), but with each command (player) being able to make their moves using the whole score. It seemed like we wouldn't have enough to do anything, but in fact with careful planning of moves all players generally got to do a decent move each turn, and keep the battle moving.
Thanks to Ralph for organising the scenario, and various others - Gary, Ralph and Caesar - for providing figures and terrain.
Update: Ralph's report includes more photos, more information on what was happening in the centre and around Hougoumont, and information on the actual setup of the game and the commands.
After the game last year there was a lot of discussion about how it could be improved, and these changes were applied to the game we played. Firstly we made the table narrower so troops got into action more quickly and so that the Allied strongpoints weren't so far from their main line that their defence was futile. Secondly we removed the separate Plancenoit table we'd used last year. To adjust for this we also ditched one French and one Prussian corps, and had their activities off-table and outside the scope of the game.
Here's the table set up ready for the battle. In the foreground is Hougoumont, beyond it La Haye Sainte and in the far distance the settlements of Papalotte and Frischermont. All of these were held by the Allies, but worth victory points to the French; 2VP each for the first two and 1VP each for the latter two. There were also 2VP up for grabs for holding the crossroads on the Allied ridge. As you can see, there were 8VP on the table, and the Allies held them all at the start. Victory would go to the side that held a majority at nightfall. An army could also win by breaking the enemy army.
The French.
The Allies.
The Prussians.
The players. We all seemed to have decided that blue was the colour of the day.
Take a moment to marvel at Caesar's Blucher movement measuring device, converted from some scrap sprue. I won't give the training course that we had.
Here's the initial setup around Hougoumont, before the units were revealed. At this stage the game looks like the opening credits of Dad's Army.
A view along the ridge. Daniel was commanding Rielle's troops, tasked with taking Hougoumont.
D'Erlon's Corps advanced to take Papelotte and Frichermont.
The advance on Hougoumont.
The Allies revealed.
Caesar alternated between commanding D'Erlon's Corp, and keeping us on the straight and narrow with his knowledge of the rules.
An early combat - Allied light cavalry attacked some advancing French infantry.
Another view along the ridge, with more figures on the table.
The attack against Papelotte and Frichermont developed slowly. Time was of the essence, though, because the Prussians would be turning up soon.
On the other flank Rielle was engaging the Allies along the line, whilst trying to take Hougoumont.
To the right of them, the Guard were advancing on La Haye Sainte. We reasoned we could secure a win by taking and holding all of the objectives in front of the ridge, leaving the Allies with the crossroads.
The fighting intensified around Papelotte. The cards on the table are the French cavalry, which had been assigned from the reserve to this flank in order to counter any sneaky Prussian moves.
Meanwhile, in the centre, the Guard advanced on La Haye Sainte.
The Prussians arrived!
They were quickly revealed. The French cavalry charged in, to stop them attacking the two settlements, one of which was now in French hands.
On the other flank the French were taking heavy casualties, but managed to take Hougoumont. All they now had to do was hold it until nightfall. Despite massive casualties, they did so.
The latter part of the battle, with all of the figures on the table, and fierce fighting around all of the key objectives. By this stage the French controlled everything but the crossroads, but were going to have to fight to hold their win.
The Allied cavalry appeared to try and win the day for Wellington in the centre.
With only a couple of turns left, the Prussians took Papelotte.
The Prussians were putting D'Erlon's troops under a great deal of pressure, whilst the French cavalry did what it could to help. Which wasn't much. Incidentally, I was running the French cavalry.
Fighting was fierce around La Haye Sainte, but the French held the objective.
The Prussians captured Frichermont as well. The game was now tied. Caesar tried to retake Papelotte, but failed. There was one French turn left.
Enter Napoleon ...
Napoleon is fairly inactive in this scenario, and could only use his leadership ability every three turns. But we'd saved him up, and used him at the end to order a series of attacks on the two Prussian-held objectives. Any attack ordered by Napoleon in this way gets a bonus, and it was used to great effect. The Prussians were thrown out of both objectives by the French, giving us a 6-2 victory as night fell.
Vive L'Empereur!
The scenario worked really well, and we played it to a conclusion well within the day at a fairly relaxed pace, which just goes to show the strength of Blucher for gaming battles of this size. We tried a method of speeding up the allocation of MO, where each side only got a single D6 worth of points (rolled secretly by the other side), but with each command (player) being able to make their moves using the whole score. It seemed like we wouldn't have enough to do anything, but in fact with careful planning of moves all players generally got to do a decent move each turn, and keep the battle moving.
Thanks to Ralph for organising the scenario, and various others - Gary, Ralph and Caesar - for providing figures and terrain.
Update: Ralph's report includes more photos, more information on what was happening in the centre and around Hougoumont, and information on the actual setup of the game and the commands.
Saturday, 17 June 2017
Supanova 2017
Catherine and I have just got back from Supanova in Sydney, an annual expo of all that is good and nerdy. Aside from the obligatory cosplay, there are artists, guest from the world of film, TV, comics, video games and beyond, traders selling all kinds of goodies and ... more cosplay. There's even some games.
The expo has expanded from previous years, moving into a second hall at the Sydney Olympic Park site. This also had the effect of opening up a large outdoor space within the ticketed area as well, which meant there was a lot more space to move, breathe and to take photos. A great improvement.
I didn't take as many photos as I should have done, and what I did take were all cosplay. Here's some individual outfits which caught my eye.
I loved this classy Snow White look. If I did Snow White I'd want a frock like that.
Marvel Girl is on my to-do list as well, but I certainly won't carry it off as well as this. I had a nice chat with her about where she got the boots.
This Lego Batman was a highlight.
But I think this was my favourite single costume - The Thing.
The bravery award went to Ultra Boy and his skimpy outfit.
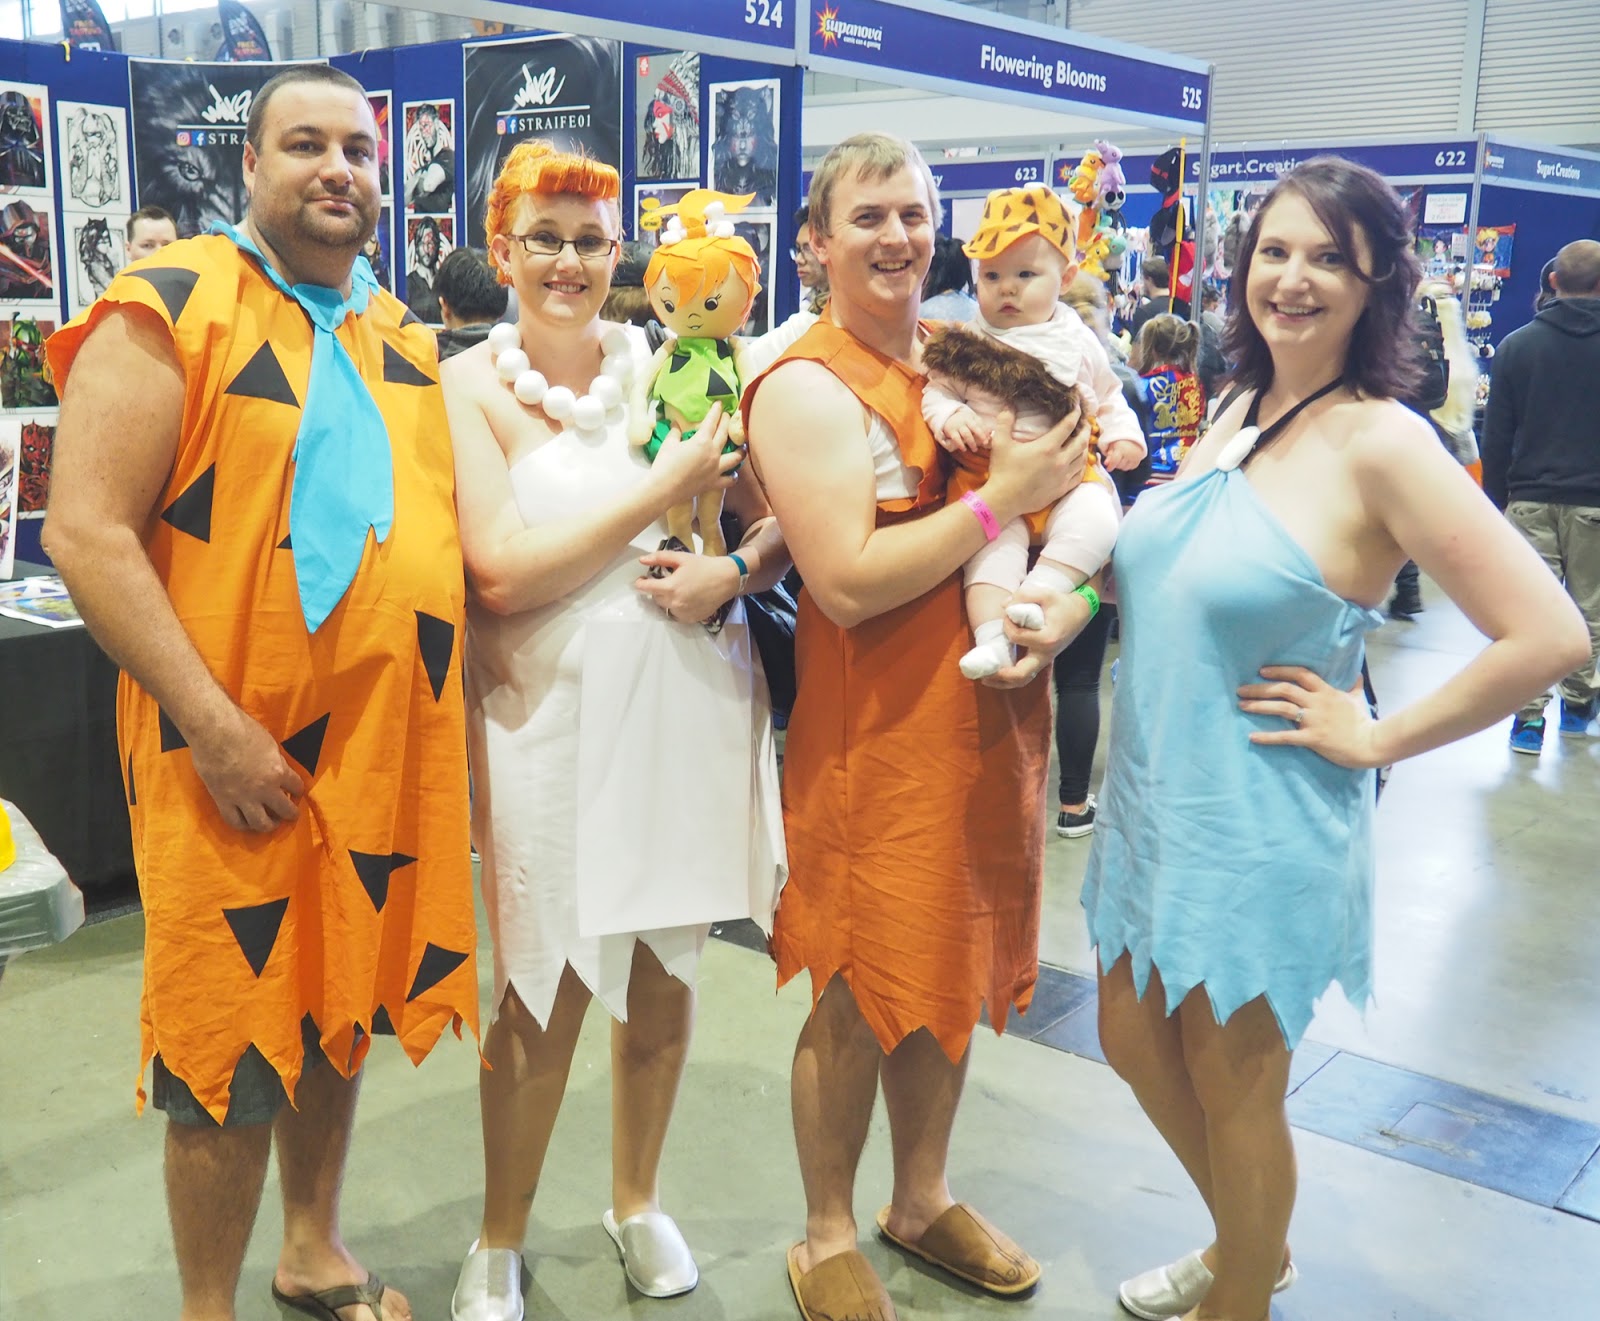
This was my favourite group. Simple but effective.
And here's the obligatory Disney princesses (plus Peter Pan). One of the many groups of Disney princesses (including the one my daughter was part of). I took a photo of this one because one of the ladies had come as Megara (from Hercules) and I don't think I've ever seen her done before. The photo doesn't show it, but her hairpiece was magnificent (you'll have to look up a side view of the original character to see what she was aiming for, and achieved).
Once again Catherine and I did Jessica Jones and Kilgrave (but not in that order). We hoped we'd get more recognition than we did at Comic Gong back in May. We didn't, really. I think most people thought I was just a transvestite on a day out, which strictly is true, but wasn't the only effect was going for. And certainly wasn't true for Catherine who went full purple and watched a 20 minute tutorial on how to do hair like David Tennant's.
I say we didn't get much recognition; we did get asked for photos by one of the professional photographers who do the rounds at these events; the first time this has happened in the four years we've been going.
We trawled a lot of stalls, had a great time chatting to random strangers, and bought very little; some cheap steampunk goggles because ... well, always useful, and a few prints. But we had a fantastic day and will be back there next year with new costumes.
Subscribe to:
Posts (Atom)