Thursday, 27 February 2025

Song Of Blades And Heroes

I'm playing the new fantasy skirmish game 'Sword Weirdos' at the club this week. This means that I've dragged out my fantasy skirmish figures (or, at least, the ones I can find; there's a box missing somewhere, hidden in the garage untouched since we moved to this house nearly two years ago). But I have everything I need for tonight's game. However whilst I had the figures out I thought I'd like to try Song Of Blades And Heroes again. It's been a while. And I realised that I'd never taught Mrs Kobold how to play it. So last night I did.

I put together two warbands - Dwarves and Uruk Hai. They were both similar in structure but with some differences in traits to add a little variety:

Dwarves

1 x Chief - Q3 C4 - Heavy Armour
4 x Warriors - Q3 C3
2 x Armoured Warriors Q3 C3 - Heavy Armour
2 x Gunners - Q3 C2 - Shoot (M)
All of the Dwarves had Short Move and Steadfast.

Uruk Hai

1 x Leader - Q3 C4 - Savage
4 x Warriors - Q3 C3
2 x Pike-armed Warriors - Q3 C3 - Long Reach
2 x Archers - Q3 C2 - Shoot (M)
'Long Reach' was lifted from Advanced SoBaH. I find that too fiddly and complicated, but some of the traits can be ported across.

We just played a straight head to head fight, since Catherine didn't really know the mechanisms. She took the Dwarves.

Here's my Uruk Hai ready to go. I put the warriors in two groups, with two swordsmen backed up by a pike each.


The Dwarves. The heavy foot were on one flank and the ordinary warriors in the centre.


Obviously activation failures saw the formations of both sides broken up. I got an archer on Catherine right and fired a few speculative, but ineffective, arrows.


We got into a fight in the centre, but the pike support failed to come up when I wanted it to. This allowed three Dwarves to gang up on one of my warriors ...


... and that was him dead.


Catherine brought up more of our force leaving one of my warriors, and his tardy supporting pikeman, looking very lonely. However them managed to score a kill.


Out on the other flank my other warrior group were fighting the armoured Dwarves. They killed one.


Catherine had her leader in action, but he wasn't achieving much. I brought mine up as well


He killed Catherine's chief. And it was a gruesome kill too, thanks to the Savage trait, so that saw the Dwarves take a morale test. With their Steadfast trait they'd only be failing on a '1', but it was enough to break up their formation.


And that was it for the Dwarves. They broke up and became isolated figures, which proved easy pickings for the Uruk Hai leader and some supports.


The Dwarves lost five of their nine figures. The Uruk Hai had just the single initial casualty.


I did feel that, for 3pts, the Long Reach trait was extremely useful. It allows you to 'gang up' on enemy figures from behind a friendly figure, and I made great use of that to give myself the advantage in numerous combats. That, on its own, would merit the cost, but you can also choose to attack from such a position as well, and it also negates some bonuses from other traits. All in all it's very useful. I don't think my issues with it are entirely due to it being imported from a more detailed game; it's simply a good trait.

Anyway, it was good to play SoBaH again.

Wednesday, 26 February 2025

More Brutes

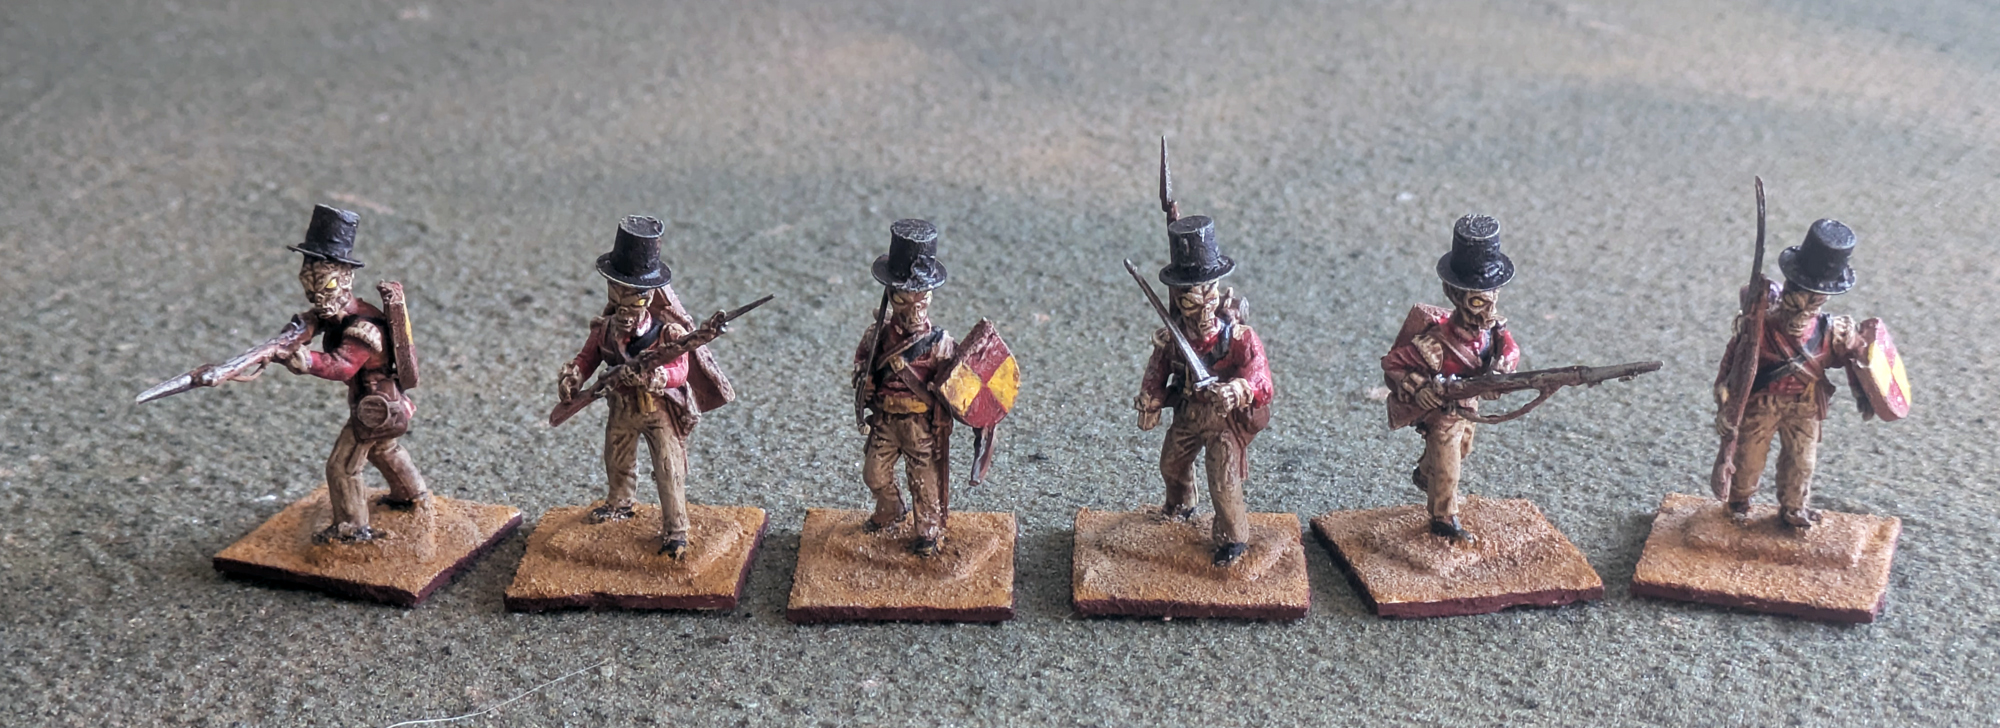
I've been away on a short holiday (celebrating my wedding anniversary in Central NSW), so haven't done much painting or gaming over the past week. However when I got back I finished off another unit of Brutes for Turnip 28. This now gives me three completed units, plus one Snob.


As with the previous unit, these are armed with black-powder weapons.


However when I was assembling the twelve figures I gave some of them shields, and ended up lumping the ones I'd done that to into one unit. They also have a couple of sword-armed figures, so at a pinch I'm happy to run them as melee-weapon figures (they have no powder for their muskets).


I have two Snobs waiting to be painted, and then I need to put together a fourth unit. I have the figures to do some cavalry (which will have the same top-hatted Martian vibe), and might also make a Lump as an alternative. The fourth unit slot is something I can feel can be played with and varied from game to game.


Monday, 17 February 2025

Pirates Of Earthsea

I've been reading through Ursula Le Guin's Earthsea books over the past couple of weeks. I'd started on the original trilogy* then, part-way through, found out that many years after she wrote those she did three more books. I found a lovely complete hardbound volume online and bought it, and have read the fourth to sixth books for the first time**. It's quite a journey.

There are better descriptions of Earthsea online than I could ever write, but basically it's set on an archipelago about the size of Europe. There are lots of islands with trade between them and, it is suggested, some conflict. This is not a fantasy series that dwells too much on warfare though (the only real battle, if it can be called such, is in the first chapter of the first book, and Le Guin has some things to say about how wargamers have usurped fantasy in her afterword to one of the other books). But there obviously is a degree of conflict. The world is very much one of ships and boats, and there are frequent mentions of pirates and raiders. To the north-east of the archipelago are four large islands that make up the Kargad Empire, the closest thing the series has to an antagonist nation.  They certainly engage in raiding behaviour.

A primary feature of the books is magic. This is a fantasy series where magic exist and is, to come extent, commonplace. Every village has a witch who knows a few charms and spells, there are sorcerers who have the gift of magic too, and some individuals with particular skill travel to the island of Roke where there is a school for wizards and become properly trained. They then go out into the world and many tows, or wealth individuals, have their own wizard. Of relevance to this post is the fact that wizards often seem to work on ships, mostly to mitigate against bad weather or provide favourable weather, or to repair the vessel even. However there is no magic in the Kargad Empire.

I thought that this would be a chance for me to explore the one area of Galleys & Galleons I hadn't really looked at to any great degree; the magic system. The way it works is oddly reminiscent of the books, so I thought that an Earthsea-based game would be a great chance to try it out.

There's not detailed descriptions of ships in the books. It's suggested that most are smallish single-masted affairs with square sails (although there's at least one reference to a fore-and-aft rig). There's several mentions of galleys, with twenty, forty or sixty oars, with the latter being something impressive. These seem to undertake longish journeys, and the book suggests that a lot of the time they are rowing. This didn't sound that practical and, after chatting with my wife (who is also reading them) we concluded that some ships are sail only whilst others (called galleys) have oars (and a full set of rowers) but also use sails because it's more practical. There's no gunpowder weaponry or mention of any arms on ships aside from what the crew has. So in Galleys & Galleons terms we're looking at low C value vessels that are unarmed and probably square-rigged. Some (indeed many) would have the Sweeps trait to represent their being 'galleys'

So I set up a simple game.

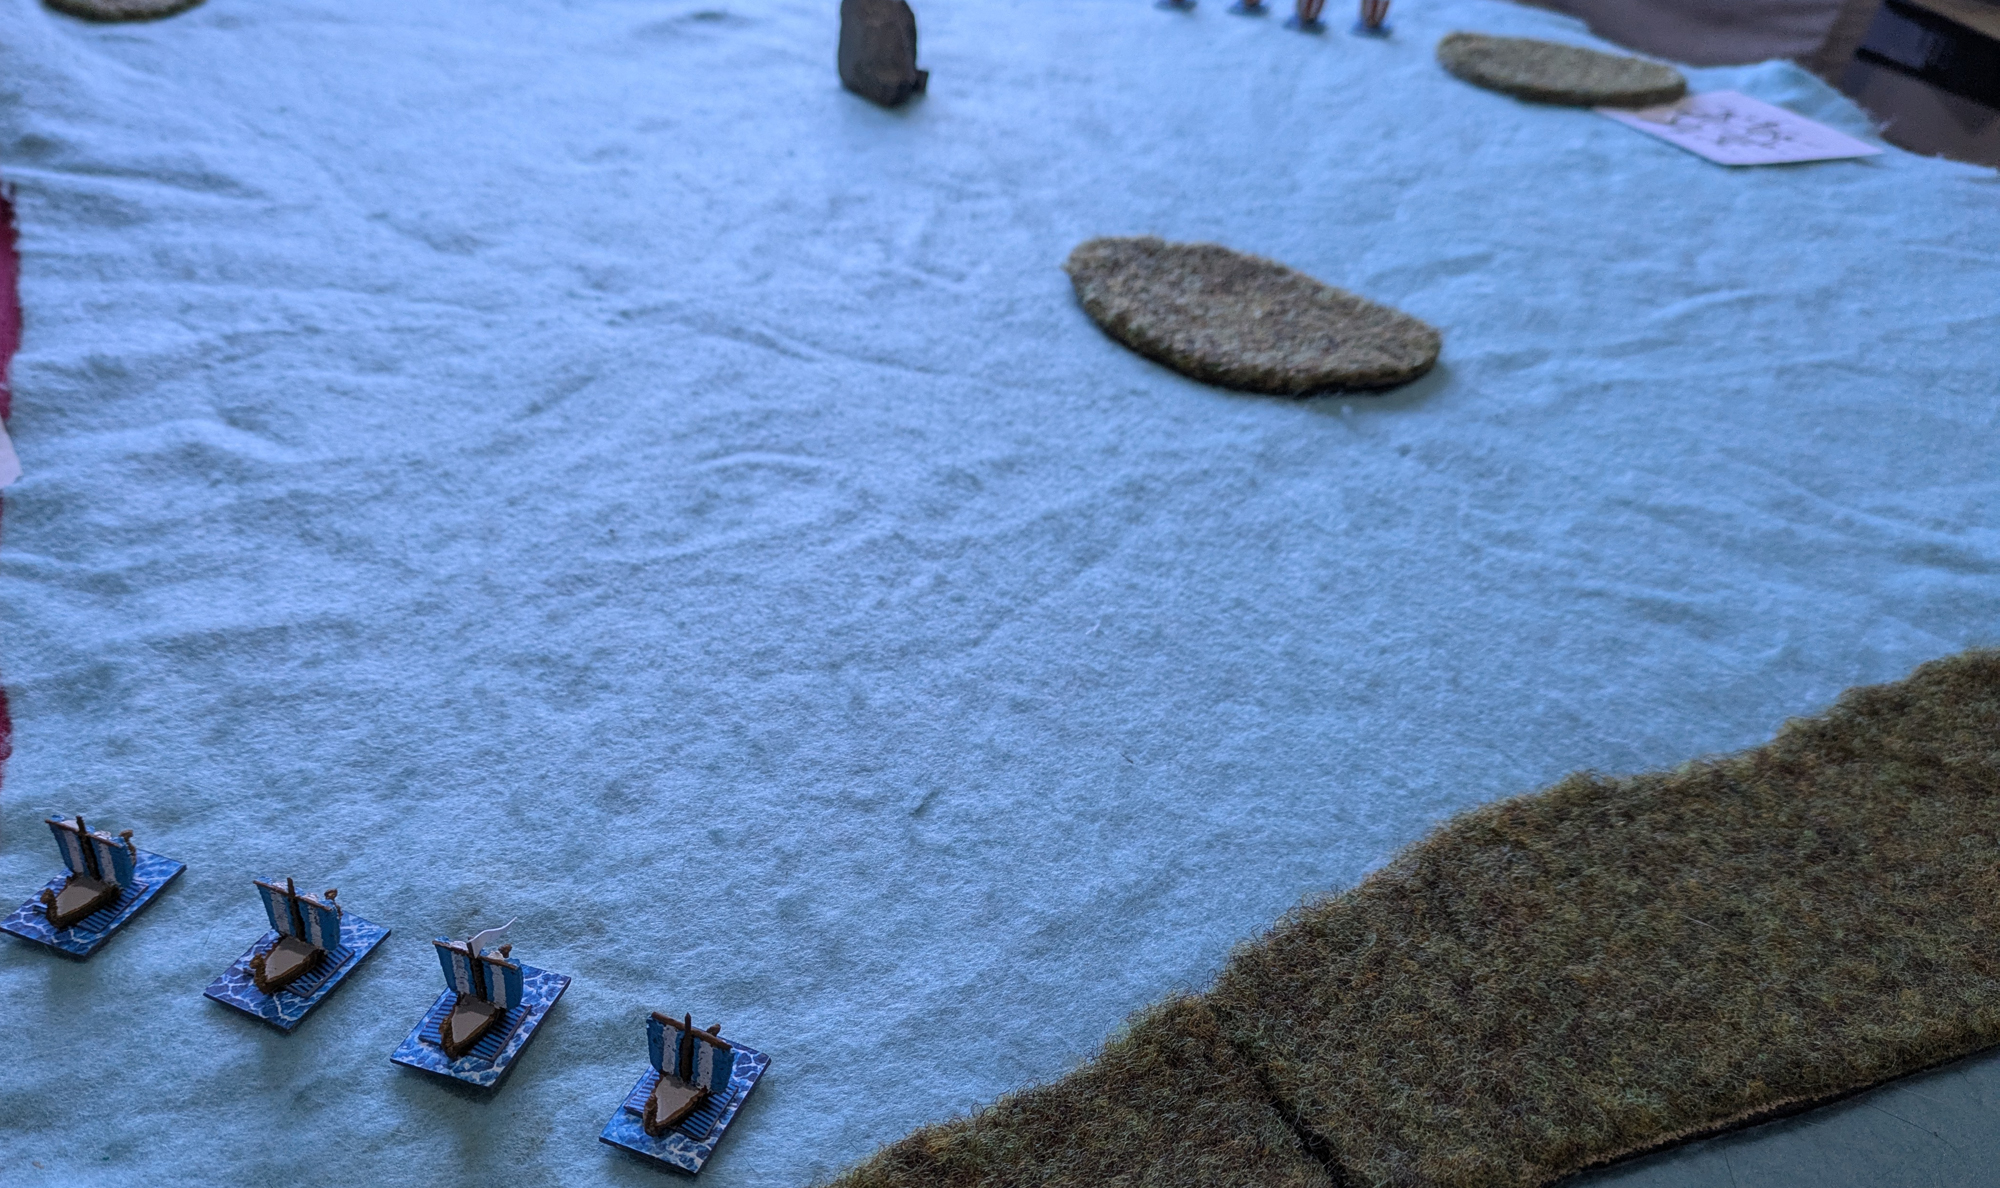
Off the east coast of the island of Torheven four raiders from the Kargish lands appear out of the mist.


The local pirate-lord has assembled a flotilla of four vessels to intercept them. Their crews are not as well armed as the fierce Karg warriors, but they do have a mage skilled in the manipulation of the wind on board one of their ships.


So the stage is set. Each side has four ships and is looking to eliminate or drive off the other side. The stats are as follows:

Karg Raiders
Q3 C2 - Square Rigged, Unarmed, Shallow Draft, Sweeps, Drilled Soldiers

Torheven Pirates
Q3 C2 - Square Rigged, Unarmed, Sweeps, Shallow Draft

Torheven 'Flagship'
Q3 C2 - Square Rigged, Unarmed, Shallow Draft, Sweeps, Yare, Magic User (Wind Whisperer)

The points are even. The basic ships are the same, whilst the Drilled Soldiers on the Karg ships offset the magic-user and Yare trait on the Torheven flag. In a battle that will be decided by boarding, having an edge will help the Kargs. But the magic-user allows the men of the archipelago a chance to dictate how the fight unfolds.

The wind was from the north-east (the right of this picture). The pirates held back waiting to see which way the Kargs would go around the island in the centre of the board. They opted to go to the north-east of it.


As the Kargs approached the magic-user used his ability to change the direction of the wind, leaving the Kargs between the two islands but in irons and reliant on their sweeps. This gave the men of Torheven the initiative.


The men of Torheven took the initiative and threw it away, blundering about like amateurs and coming close to a collision. 


The Kargs closed up their line as the pirates cut across their front, aiming for the end of the Karg line. A sudden rush would allow them to attack whilst the men of the archipelago were vulnerable.


A failed initiative roll meant that the Kargs were paralysed into immobility. Neither side was doing well so far.


The ships from Torheven swooped on the Kargish ship on the far right of their line and grappled it.


But the Kargs seized the initiative, despite being outnumbered. The next ship in like grappled on of the pirates. The Kargs' Drilled Soldiers trait helped offset the outnumbering and a blinding 6:1 die roll saw one of the Torheven ships boarded and swiftly overpowered.


The men of Torheven fought back and gave the Kargs a bloody-nose in return. The white pennant on the ship to the right indicates that it has the wizard on board.


The damaged Torheven ship surrendered ...


... swiftly followed by the Kargish vessel.


The other Karg vessels had been rowing into the fight and one attacked the fourth, isolated, Torheven ship, inflicting casualties.


The initial action was breaking up as ships detached from the two surrendered vessels. Archers on the Torheven flagship scored some casualties on a Karg ship.


But the Kargs scored a greater success when a second Torheven ship surrendered.


With the Torheven flagship isolated, the Kargs turned, grappled and boarded it. The fight was a close one though, with both sides taking heavy casualties.


The two other Kargish ships were having trouble turning back into the fight though. Their initiative rolls were terrible (although the ships of Torheven weren't exactly covering themselves in glory either).


With the boarding action getting dangerous the Torheven flag (top of picture) cut grappled and then used the magician to give the ship a boost of speed into the wind to get away from the Kargish ship. To the right a second Karg ship was coming up in support, whilst to the bottom-left the other Torheven vessel was returning to the fight.


The magician came into his own again, getting an excellent activation roll that allowed him to call lightning down on the pursuing Karg vessel. It was badly damaged and caught fire, putting it out of the action.


And things continued to go well for the men of Torheven. As the second Karg ship came up the Torheven flag turned and moved closer. This allowed their magician to cast a wind-gust ...


... that wrecked the Karg vessel on an island.


The Kargs had one ship remaining and it was well out of the fight. They wisely decided to flee.


The men of Torheven celebrate their victory, which was won thanks to their wizard. He actually did really well with his activations (given that magic-users activate with a Q of 4), which enabled him to turn the tide of battle. Things can go badly wrong for a magician that doesn't make his activations.


The Kargish soldiers showed that had they managed to take the initiative early on they could have defeated the men of Torheven. But magic prevented them from making an effective early attack and they were really unlucky in the last couple of turns.

I was really satisfied with this game. It had a nice Earthsea vibe and rattled along nicely with several exciting reversals of fortune.

Of course for the next game I should try a fight between two forces from the archipelago, where both sides have a magician.

*'A Wizard Of Earthsea', 'The Tombs Of Atuan' and 'The Farthest Shore'

** 'Tehanu', 'Tales From Earthsea' and 'The Other Wind'

Sunday, 16 February 2025

Brutes

As seen in our most recent game of Turnip 28, last week I completed a unit of brutes and a Toff.

Brutes are the elite infantry of the game. They only have six figures, but are tough to shift.


Mine are armed with black-powder weapons.


As with the chaff they are mostly plastic Napoleonic British infantry, with plastic Martian heads and scratch-built top-hats.


The Toff is the overall commander of a Turnip 28 regiment. He is assisted by one or more Toadies; I have a couple of them to paint along wit the other units that will make up a regiment I call 'The Gentleman's Gentlemen'

This is The Gentleman. The figure is from Ex Manus and came with a choice of three heads. I used a martian head instead.


The regiment so far. There's another unit of brutes being painted at the moment and then I need to consider what the fourth unit will be. Probably some cavalry.

I still haven't decided what to do with the bases.

Friday, 14 February 2025

Crossing The Drudge

June and I played another game of Turnip 28 last night. We moved onwards and tried the third scenario, 'Crossing The Drudge'. This has the two sides on oppisite sides of a marshy river, represented by several patches of dangerous terrain. In the centre is a defensible obstacle, for which we used a building but which actually represents a stone bridge. In each terrain piece is an objective. If it's near the edge then it can be grabbed without going into the terrain. If it's in the middle then you have to take the risks for entering dangerous terrain. 

Here's the terrain. We scattered a few rock walls around as cover.


I now have a second unit painted - brutes with black-powder weapons - as well as a Toff to lead them. I used both of them and then filled out the rest of the force with June's goblins. I ran one group of melee fodder (because they did so well in the last game) and one group of fodder with regular missile weapons (bows).

Here's my top-hatted chaff and brutes in the position of honour right and centre.


My new brutes, led by The Gentleman.


June ran a unit of brutes, one of chaff, some black-powder fodder and a cannon.

The first turn was spent grabbing objectives. My melee fodder set off to drive away the chaff on June's right flank, and picked up an objective on the way. They look very intimidating heading down the causeway.


I also occupied the building in the centre with my brutes, grabbing the objective there. June's melee brutes tried to charge but didn't get the distance (charge and march moves are partially randomised). My chaff grabbed a third objective.


The end of the first turn. There'd been a few casualties from shooting but otherwise it had all been movement. My archers had taken a shot at June's brutes and failed to score a single hit.


On the second turn we made a huge mistake. June's fodder had moved close to the table edge in pursuit of an objective. I shot at them and forced them to retreat. This time we remembered that they are Fearless if they have eight or more figures; they still failed. But when they retreated they fled off the board-edge. Try as we might we couldn't find in the rules what should happen. We just assumed that any figure that went off was lost. The reality is that the table-edge counts as impassable terrain (and is mentioned as such in the section on Impassable Terrain) so the unit should stop and take casualties based on its panic.

This cost June pretty much the whole of her fodder unit when it should have just cost it a couple of figures.


My melee fodder charged Junes chaff. The melee went on for ages (you fight multiple rounds until one side scores more casualties then the other) and saw the chaff wiped out and the fodder severely depleted.


June charged he melee brutes into the building. This fight also went on for a bit, and cost us both a lot of brutes. My guys held their ground though - with Fearless brutes can fall back only a short distance even if they lose a melee.


My left-flank fodder also retreated off the table. Only one figure went off, but in fact because of the unit's high panic most of the unit should have been casualties.


The fighting in the building continued. But June's brutes were now flanked by my chaff and the bow-armed fodder (who had moved into dangerous terrain to grab the fifth objective). She decided to pull them out, but they got shot down. The survivors fled into an impassable rock-face, at which point we discovered the actual rule. So they were destroyed.


One of June's toadies attacked one of mind and killed him.


But June's leaders worried me not. She only had one mobile figure left that could take objectives - the fodder survivor - and my chaff shot him down. This meant that June could no longer capture or contest objectives. I had four and she had one. So it was game over.


I think that even if we hadn't made the mistake with the fodder it would have been hard for June to come back on this one. The single fodder unit would probably have taken one of my objectives but would have been hard-pressed to take a third. She simply didn't have enough effective moving parts to win. Although maybe targetting my two surviving Snobs might have worked; a side loses if all of their leaders are killed.

So another game and, again, only one rule messed up. We're getting better. We'll try cults next time.
Related Posts Plugin for WordPress, Blogger...