Saturday, 8 August 2020

Saturday Afternoon Dogfight

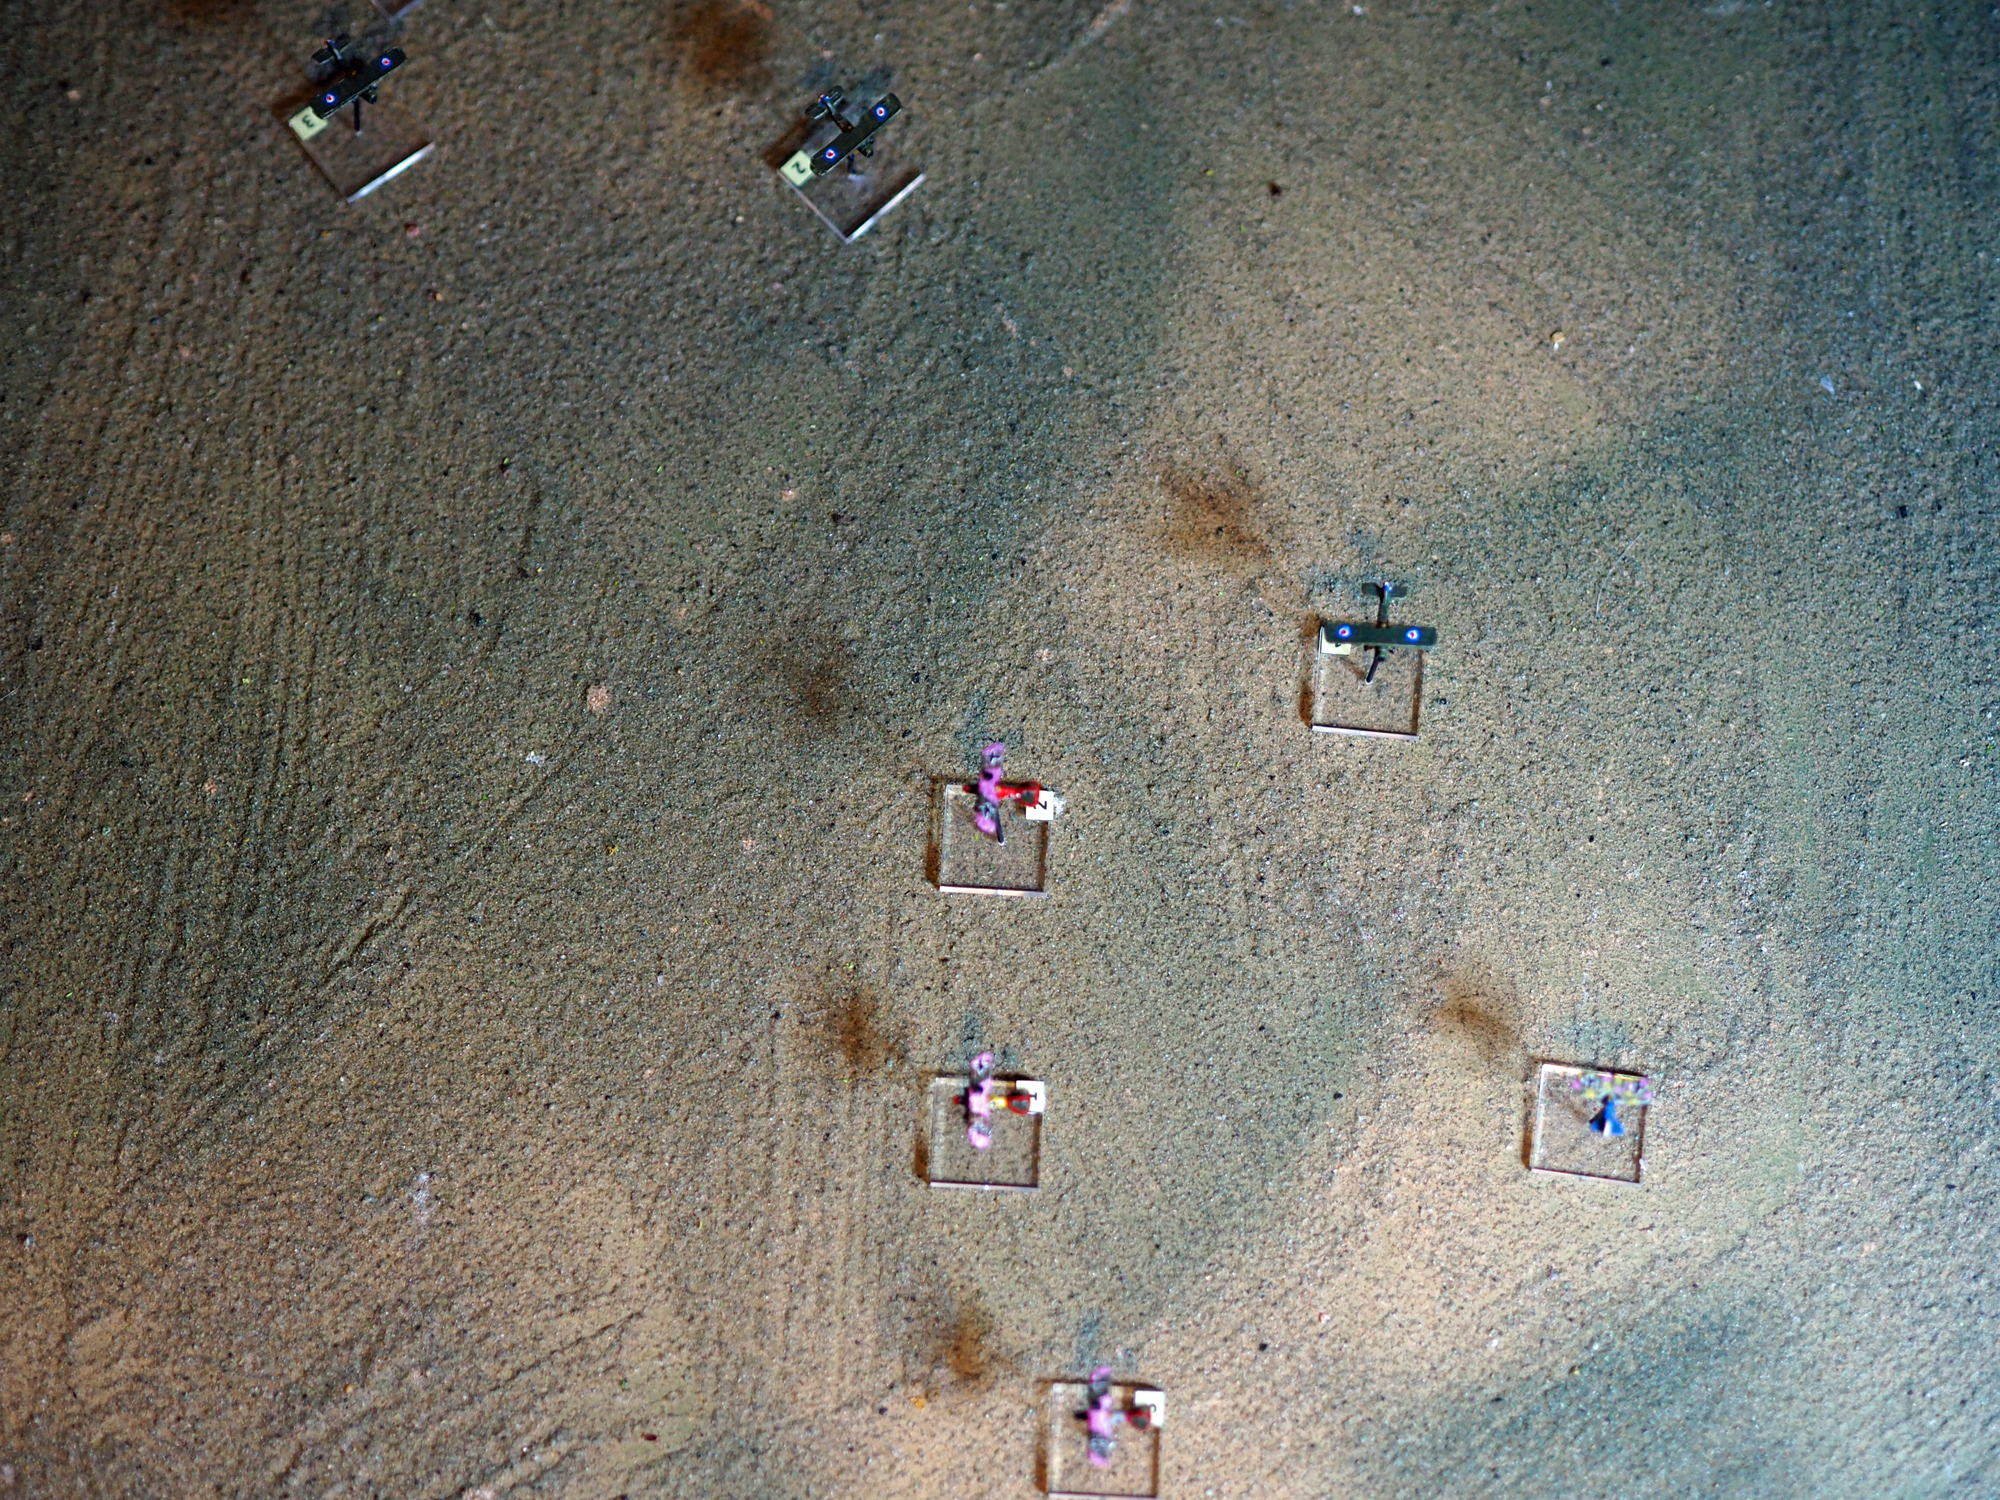
With more time to spare, it being the weekend and all, I set up a larger game of  'Spandau and Lewis' in order to see how my small changes to the gunnery system worked, and was more than pleased by the results. This game saw eight planes on the table - four Bristol F2Bs, against three Albatros DIIIs and a single Fokker Triplane. I gave both side one ace and one novice pilot/crew.

Two F2bs started in the centre of the table, with the other aircraft appearing in pairs at random points around the edge.

In fact the four German planes came in from roughly the same point.
Both groups of planes swung around to the left, looking for an opening.

(Apologies for the quality of some of these early photos; I had the wrong lens on)
(Mind you. It takes great close-ups)


(Really nice)
As they circled the rear-gunner in the lead F2b scored a lucky hit on an Albatros and saw it drop out of the fight, its engine on fire.
Only a couple of turn in, and the Germans were on the back-foot and a plane down.
The British made the most of the numerical advantage, hemming in German planes where they could. The Germans struggled to bring their guns to bear without exposing themselves to fire.
The German ace locked onto the tail of his British counterpart, but failed to score any significant damage before the British crew shook him off.
The Fokker Dr1 was suffering especially badly, having taken damage from an early burst. The British pilots kept it sorely pressed, despite its significant advantage in mobility.
A reversal of fortunes saw the British ace crew tail the German ace, but again little significant damage occurred.
The Dr1 fought desperately in an attempt to break free of the British around it.
The German ace found himself sorely pressed as well.
A head-on pass saw the German ace's guns jam. In fact there were several gun jams in the game, but with two seperate guns on their planes the British could, with a little manoeuvre, keep fighting with one whilst they cleared the jam in the other.
The German's novice pilot had fought well early in the action, but damage to his plane left him disorientated. He departed the fight and disappeared somewhere over no-man's land. The wreckage was never found.
At the same time the rear-gunner on an F2b finally finished off the Triplane.
The Germans now had one plane left - their ace - and he had four Bristol Fighters gunning for him and a gun-jam to clear. The position was hopeless so he made a run for home, closely followed by the British. He managed to clear the jam as the British closed in, and opted to turn and fight his way off rather than simply be shot down from the rear as he ran for it. A burst damaged the British aces' plane, but a shot from another F2b ended the German's career.

The British had shot down three German planes, each of three F2bs accounting for one. Only the novice crew failed to score a kill, but it was, in fact, their dogged pursuit of the German novice that had contributed to his leaving the fight, so they could almost claim him. The Germans had scored a few decent hits on one British plane, but otherwise the F2bs were relatively unharmed, aside from some jammed guns. 

I felt that the gunnery factors worked quite well, but will try some more tests. I may simplify gun jams as well. At the moment clearing a jam requires remembering what a plane did earlier in the turn, and I have to confess I couldn't always remember. I may scrap the idea of it being a roll to repair and simply assume it knocks out the gun for one turn but with a test to see if the jam is permanent.


Friday, 7 August 2020

Lunchtime Dogfight

When I wrote 'Spandau and Lewis' I deliberately kept the gunnery simple - twin-guns and single-guns was the extent of it. I didn't want to mess around with the subtleties of drum vs belt ammo, or overwing vs synchronised. One set I used to play even factored in the difference between synchronised and interrupted guns (the former was slightly more efficient).

But the games of the past few weeks have suggested to me that observer guns - usually a single drum-fed gun on a pintle mount, are probably too effective, being the same as a single fixed forward-firing machine-gun. The problem was that I didn't want to downgrade them too much, and there's only so much granularity on offer in the game.

However pondering it this morning I came up with an idea. My solution was to make use of the mechanism I use for gun jams of rolling one different coloured dice when shooting. When a plane fires it gets, as its base, one red dice and one white dice, needing a 5+ to hit if a single gun and a 4+ if a twin gun. The red dice is a possible jam if a 1 is scored. Bonuses add more white dice. Penalties subtract white dice. But you always roll that red dice.

I decided that I could class guns as fixed (which will generally be the pilot's gun, if any) and pivot (observer guns). I calculate the number of dice firing as normal, but the scores to hit vary:

Twin Fixed - 4+ on any dice scores a hit
Single Fixed - 5+ on any dice scores a hit
Twin Pivot - 4+ on the red dice scores a hit. Other dice hit on a 6
Single Pivot - 5+ on the red dice scores a hit. Other dice hit on a 6

(A twin pivot is little better than a single. From reading a few accounts, they didn't seem to be that popular with cews, who would remove them and just use single guns. You got more firepower, it's true, but it was heavier to swing around in the slipstream of a moving plane)

Put another way:

Fixed Gun White Dice or any Red Dice: 5+ to hit (4+ if twin)
Pivot Gun White Dice: 6 to hit

This lunchtime I put it to the test with a straight dogfight between a couple of Bristol Fighters and a couple of Albatros DIIIs. This gave me all three main types of gun (twin guns for the Germans, and a single pilot gun plus observer gun for the British), but on planes that were relatively evenly matched. The Bristols have all-round firing, and are faster, but the Germans have more power to recover from manoeuvres and greater firepower to the front.

Inevitably the fight started with a head-on pass.
The Germans failed to turn as tightly as the British, and found themselves with no targets. The Bristols always had a target, albeit with their less-effective observer guns most of the time. The Germans took a few hits but also ended up with a gun jam on one of their planes.
The Bristols initially chased after the German that could still shoot, safe in the knowledge that his companion wouldn't be able to support him. But eventually the fight split into two, with a Bristol pursuing each German machine. With one machine unable to fight, the Germans had got badly out of position, and the British were soon all over them.

The German with a working gun was chased all over the board, but steadily shot to pieces by the Bristol's single Vickers gun, and eventually crashed.
The other German failed to clear his jam - unable to fly straight because of a close pursuit he only had a 1 in 6 chance each turn of clearing it. But the pursuing Bristol couldn't shoot straight, and the Albatros escaped serious damage. Eventually, with time running out, the Albatros ran for home. The Bristols got in one last ineffective burst before the German escaped.
The observers did score hits in this game, but they didn't feel so deadly. Their firing is annoying, and might score the odd point of damage, but it's the front-firing guns you want to avoid. More importantly there's less of a feeling of equality of firepower between a fighter's armament and the defensive guns of a two-seater. I might run this again with a couple more planes on each side, before trying some games with proper two-seaters and see how they fare.

Thursday, 6 August 2020

Spandaus On A Thursday

There was some discussion on our club's Facebook page about wearing masks at our meetings. Most people seemed to be in favour of it. Looks like I was the only one to follow through. 

Anyway, it was the debut of this bold purple one which my daughter made for me yesterday.
Leaving aside the masks, Geoff and I played a couple of games of 'Spandau and Lewis'. The first was the Louis Strange scenario I put together last week, where an Avro 504 with  lashed-up machine gun takes on a rifle-armed German two-seater. I played the RFC and Geoff the German.
Geoff brough his Aviatik in on the target as I managed to get in a couple of shots. He chose to hold off on taking the photo he needed in order to evade and get a few shots back.
The German plan was to loop back over the village and take the photo on the run for home. I brought the Avro round as quickly as I could to line up a shot as the Germans were preoccupied.
I inflicted damage on Geoff's plane, but couldn't turn back fast enough to move in for a third attack as he left the area of the target.
Geoff flew at top speed for his baseline, and I managed one last burst before he fled to safety. It score no damage, and the Germans escaped with their photo.
The second game was my Australians Over Sinai scenario, with an AFC Martinsyde and BE2 taking on two Fokker EIIIs in order to cover the escape of some BE2 bombers.
A head-on pass saw the Martinsyde inflict some damage on one of the EIIIs
As the EIII and Martinsyde passed, the BE2 took a shot as well, but failed to score any hits.
The Martinsyde turned slowly back into the fight, whilst the EIIIs turned sharply onto the tail of the BE2. A single burst from the damaged EIII disabled its engine, forcing it to land in enemy territory.
With an Australian plane down,  all the EIIs had to do for a win was exit one plane off the Australian edge to chase the bombers. This they did with ease, as Geoff was unable to steer the lumbering Martinsyde around in time.
There were three other game on the go this evening. Caesar and Daniel played Lasalle 2.
Peter and Dave also played Lasalle 2.
And Bryan and Colin played Flames of War.

Monday, 3 August 2020

Hawker's Disaster

A lunchtime quickie! I set up and played my Hawker's VC scenario for 'Spandau and Lewis' today. This is similar to the Louis Strange one I ran the other day, with a plane fitted with a lashed up gun taking on two-seaters. In Hawker's case, though, he has three to deal with, coming on steadily over a few turns, but all needing to be shot down. And his gun fires sideways rather than backwards.

It's a scenario which relies on spotting, but I didn't have the rules to hand (most of S&L can be played from memory), so I made up some quick and dirty rules on the fly. Here's Hawker stalking his first opponent.


He got this close before the German spotted him, sadly ruining the bonus he was hoping to get on his first shot.


The German recce'd their target, whilst Hawker tried to get in a decent shot. But the dice weren't with him and his first two bursts inflicted precisely zero damage.


Hawker gamely plugged away at his target, and by flying really close managed to score some hits, but took some back from an observer now unburdened from the actual task of observing.


Two other German planes were on table by now. Despairing of bringing down the first plane, Hawker switched to one of the ones that hadn't seen him yet, lined up a great shot and then alerted it by missing with every single bullet.


To be honest it was a mercy when the second plane shot him down


So, a complete failure for Hawker there.

The third German plane flew down the table unrecorded by the camera, messed up the post-recce turn and flew off the board. I used my new 'Going Off The Board' rules and it was lost somewhere over the British lines. So the Germans lost a plane today, but no thanks to Major Hawker.

I have the gun on his Scout firing directly to the left. Looking at pictures of it, and having played this scenario three times now, I think the answer is maybe to be more conventional; have it as a front-firing gun (the effect he was trying to achieve), but with the Restricted Arc modifier applied to account for it firing off-centre.

Sunday, 2 August 2020

HOTT 52 - Week 31 - Orcs vs The Necromancer

I went for another pair of classic HOTT armies for this week's game, with both being based around a mass of hordes.

The Necromancer's undead hordes defended against an attacking Orc horde. The battlefield was restricted by a couple of areas of thick brush, whilst just forward of the Necromancer's position were  couple of low hills.


The Necromancer massed his cavalry on his right, used soe archers to cover the brush on his left and put the hordes in the middle.


The Orc commander also massed his hordes in the middle, with wolf riders and trolls on the left and some wolves on the right to clear the skeletal archers from the brush.


The two armies advanced. The Necromancer's just enough to occupy the hills whilst the Orcs to launch a rapid attack before the Necromancer could make any serious adjustments to his line.


Jst before the attack.

(The photos really aren't very good this week; there was far too much bright winter sunshine coming through the window)


The wolves on the Orc left attacked the skeletal archers, destroying one element, but being driven back by the other.


Meanwhile on the other flank, the Necromancer forced the trolls to flee, putting them out of the fight for a couple of bonds.


This exposed the Orc general's flank, something the skeletal cavalry were quick to exploit. Things were hairy for a couple of bounds, but the Orc general threw back his opponents, and extricated himself from a nasty position.


Meanwhile the skeletal archers continued to hold off the wolves.


The Orcs continued to press their attack, helped by some abysmal PIP rolls by the Necromancer.


The hordes approach each other.


And charge!


The Orcs won the first round, destroying or driving back the first line of skeletons.


On the other flank the Necromancers Knights of the apocalypse were pushing back the wolf-riders.


By this stage the Necromancer's army was taking some serious casualties; they had now lost both elements of cavalry, and unseen by the photographer, their surviving archers fell too. The Knights pushed forward, but the wolf-riders broke off, drawing one group of Knights into the returning trolls.


The skeleton hordes slowly gained the upper hand against the orcs.


The trolls destroyed the Knights facing them.


They then turned on the flank of the other Knights, leaving the Necromancer in a near no-win situation; if the Knights lost, his army would break from their destruction. If the Knights won, then the trolls would recoil - straight over the top of the Necromancer.


The Knights won, and the Necromancer was crushed by a gang of retreating trolls, to give the win to the Orcs.


The Necromancer's position looked a pretty tough one to crack and the Orcs were up against it early on, but they inflicted casualties steadily, and were able to exploit a couple of bad PIP rolls by their opponent to open up holes in the enemy line and push forward for the win.

Related Posts Plugin for WordPress, Blogger...