
Now Elenderil's post took an article on randomising threats in land-battles and adapted it for WW1 air-combat. I shall try them out for my own 'Spandau and Lewis' rules at some stage. But I wondered if I could apply a similar idea to Galleys & Galleons.
My idea was to run a pirate ship on a cruise. Other ships might appear, either merchant ships ripe for the taking, or warships looking to protect the merchants or rid the seas of a pirate. And this is how I thought I could run it:
(i) I worked out some simple ship designs, trying to keep the points about equal for each type (with one exception). These would be for the Pirate, Merchant Ships (small and large) and Warships (small and large). I then set up a table of possible encounters:
1 - Small Merchant
2 - 2 x Small Merchant
3 - Large Merchant
4 - Small Warship + Merchant (1-3 Small, 4-6 Large)
5 - Small Warship
6 - Large Warship
(I have Small Merchants at half the points cost of the other ships)
Obviously you can set this up to suit your own collection.
(ii) Set up a table with a few bits of terrain. Place the Pirate in a random corner, and three differently coloured counters in each of the three other corners.
(iii) The Pirate chooses the wind direction.
(iv) Take three more counters, each corresponding to the colours of the counters in the corners, and place them in the centre of the board. Roll a red and a white D6 for each counter. It is moves in the same direction as a line running from where the white dice falls to where the the red dice falls. The distance it moves is based on the die rolls:
White Dice - 1-2 Short 3-4 medium 5-6 Long
Red Dice - 1-2 1x 3-4 2x 5-6 3x
eg The dice fall so a line from the white to the red runs roughly NE. So the counter is moved in that direction. The white dice is a 3, so use a Medium stick, and the score on the red dice is a 4 so it is moved 2x Medium.
(v) There should now be three different coloured counters scattered across the board, each corresponding to a corner. If one is placed in impassable terrain then roll its position again.
(vi) Start the game as normal, except at the moment there's no opposing side. The Pirate moves first in each turn, however.
(vii) Whenever the Pirate passes within Short of a counter, it is resolved. Roll a D6:
1-3 - Nothing. The counter is removed, and so is the counter in the corresponding corner
4-6 - Sail Ho! Roll on the Encounter Table in Step (i). The ship or ships are placed within Long of the corner corresponding to the counter's colour and start moving on the opposing player's next turn.
Each encounter table roll can only appear once. If you roll a duplicate then roll again. If the first two counters are Nothing, then the third must be Sail Ho!, but randomly determine which corner the encounter appears in.
(viii) All opposing ships are treated as the same player, so if one fails two activations it ends that side's turn.
What do the opposing ships do? Merchant ships will always attempt to sail to the opposite corner than the one they entered from. Warships I would play with common-sense and some random decision-making. Their aim is to protect Merchant ships, but can also take the fight to the Pirate
And the objective? As the Pirate you certainly win if you can capture a Merchant ship and sail it off the board (or simply be in control of it if there are no opposing ships on the board after all counters are resolved). If you only get Warships, then a win is simply escaping them, by exiting from the same corner you started in. If you can sink or capture one, then that's really good. The Pirate loses if it is sunk or captured.
Obviously you should adapt the Encounter table to your own ship collection and how challenging you want to make the game. I am still considering how to add third-party forces - natives, other pirates or similar.
Let's try it for real ...
I will use the following ship profiles (nice and simple for a first game).
Pirate - Q2 C2 - 48pts - Square Rig, Razee, Swashbucklers
Small Merchant - Q3 C3 - 24pts - Square Rig, Merchant, Pilot
Large Merchant - Q3 C4 - 40pts - Square Rig, Merchant, Pilot, High Castles
Small Warship - Q2 C2 - 43pts - Lateen Rig, Drilled Soldiers, Master Gunner
Large Warship - Q3 C3 - 44pts - Lateen Rig, Drilled Soldiers, Master Gunner
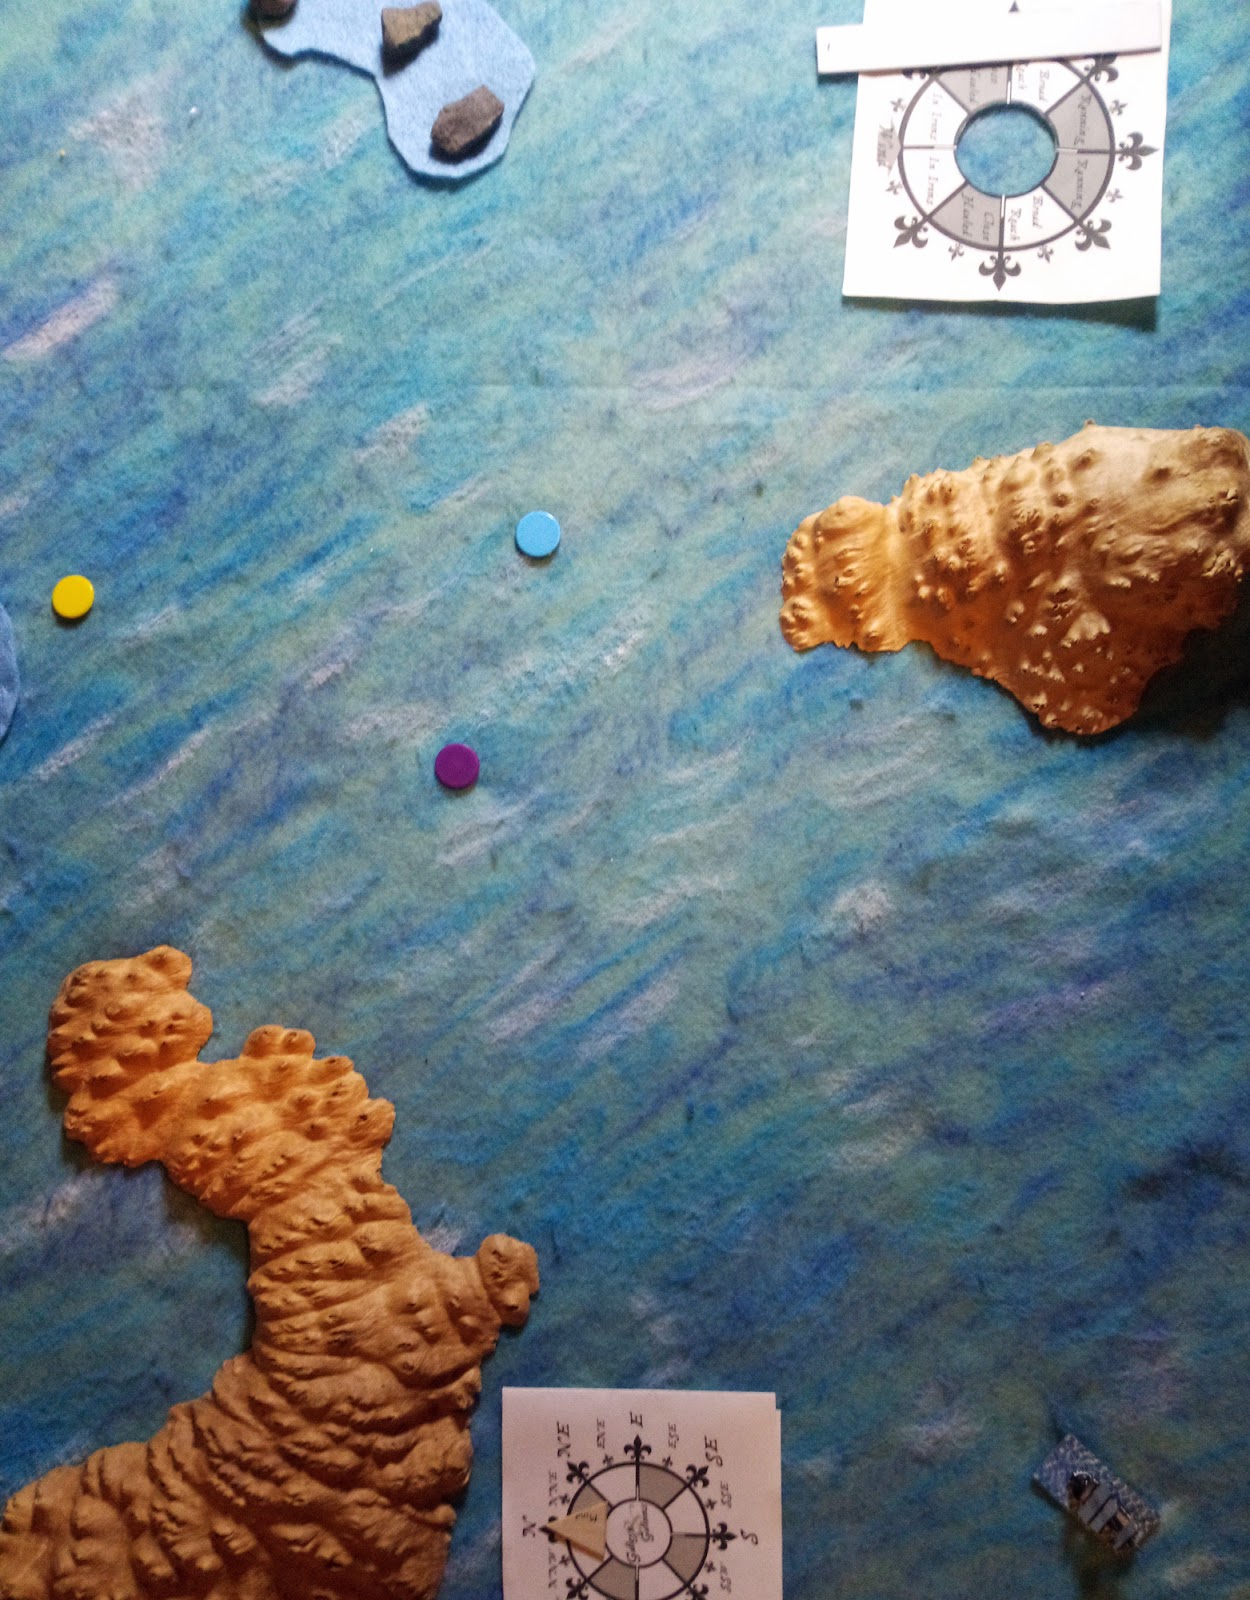
I set up this terrain - the entrance to a bay, so two peninsulas and some shallows off the end of each. I started my ship - the Tortuga - in the bay, and set the wind. In each corner you can see a coloured counter, and each has a corresponding counter in the centre of the board.

I rolled for the blue counter. The line from white to red determined the direction, the roll of the white dice told me I was using a medium stick and that of the red dice dictated that it would be two medium stick distances.

I did the yellow counter next. The direction is towards the top left of the image, the white die showed that I should use the short stick and the red that, again, I should use two of them.

Finally the purple counter. The direction was bottom left, stick was medium and distance two sticks.

The encounter trigger counters in position.
I sent the Tortuga straight down the middle, aiming for the purple counter. With hindsight I should have gone for the yellow one first, as any ship that generated would have to come straight down into the confines of the bay to reach the opposite corner.

The roll. A 4 on the white dice indicated that it was a ship, whilst the 3 told me that it was a single large merchantman.

And here it is - the Pride of Bristol.

I headed toward the entrance to the bay, aiming to cut across the course of the Pride of Bristol. Although a merchantman, I felt a few shots, with the chance of a critical, would be in order before attempting to board.

I cut across the bow, but failed to score any damage. The Pride of Bristol failed to fire a shot in return.

We passed, and I fired another shot with no effect.

However a third broadside damaged the merchant's tiller. This forced it to expend most of its limited actions trying to turn to safety, as a shift in the wind saw it veering dangerously close to the shallows.

The Pride of Bristol set a course for safety, whilst I turned the Tortuga in pursuit.

The Tortuga had lost ground, but with the razee trait would soon make it up.

However the Pride of Bristol was now set on a course for safety, so the crew could concentrate on defending the ship rather than sailing it. They ran out their guns, and their first broadside damaged the Tortuga.

The Tortuga proceeded more cautiously, but managed to position itself for another rake which did no significant damage. The Pride of Bristol was now set to escape, and I let it go. There were two more counters and maybe they would provide easier prey.

I triggered the yellow counter ....

... and got a large warship, the Nimrod.

With one hit on my vessel already I didn't feel secure in engaging a warship, and triggering the final counter could just add to my woes, so I decided to run. The razee trait gave me an edge, but I had to risk sailing close to land to make a clean getaway; the wind direction meant that heading further out would involve tacking, and the Nimrod was coming up fast with its fore-and-aft rig.

A close shave ...

... but I made it, and escaped.

Not a great first outing - I ended up damaged with nothing to show for it. I moved the terrain a little and set the game up again.

Looking at the counters I decided that the blue one offered the best possibilities. but I had to take a roundabout route to get there, as heading straight towards it would take me too close to either the yellow or purple counters.

The blue counter was a dud.

I went for the yellow counter next, and sighted the sails of a small merchant vessel, the Pamela.

The wind was such that I had the weather-gauge. The Pamela either had to come straight up to where I was, or take a risky detour through the shallows. It chose the latter option.

I headed it off, firing a broadside as I did so.

The Pamela veered away, and I fired again. It started a fire.

The fire spread. Amazingly the Pamela didn't explode, and the crew efficiently extinguished both fires.

The Pamela was damaged now, so at risk of striking off a bad activation roll. I stayed close, but she was taking to make a run back to the main channel, and I had to tack to follow her.

I fired again, hoping to inflict some more damage and increase the chances of the Pamela striking, or cause enough hits to make taking her by boarding a foregone conclusion.

I rolled rather too well, inflicting enough hits to cripple the Pamela, but also a critical, which saw her holed below the waterline. Her crew took to the boats as she rapidly sank.

I made the long trip upwind to round the shallows, and bear down on the purple counter. It was nothing.

So both of my cruises were failures. I shall try again another day, maybe with some changes to the Tortuga's configuration.
The random generation of encounters worked fairly well, I thought, although it's relatively easy to trigger only one at a time. However the idea was that with ships mostly having to cross the centre of the board, I'd be forced to run past other counters in pursuit. I shall see if this is what actually happens in later games.
And maybe that title (chosen before I played either game) should be 'How Not To Be A Pirate'.
No comments:
Post a Comment