Sunday 31 January 2021

The Battle Of Derevni-Bliznetsy

I played another game of 'Simplicity in Practice' this afternoon. Once again I used my GNW armies; I randomised the forces (each side got three close-order foot - one elite - and one heavy cavalry, and then diced for the remaining four units), and set up a random terrain for a straight head to head fight. I also applied some changes and 'clarifications' to the rules:

(i) Close combat is resolved by each side rolling a D6 and getting a +1 for each tactical factor which applies. The highest score wins and you do a 50/50 dice-off for a draw. (This achieves the designer's goal of unpredictable close combat)

(ii) If a unit loses a close combat it turns to face its opponent, then retreats 10cm to its rear. If there are any enemy units within that area the unit is destroyed. Friendly units and impassable terrain also block the retreat unless there is a lane half a base width or more for the retreating unit to pass through and the unit can complete its retreat such that it is not overlapping such a unit or terrain. (This allows a unit to be supported to the rear without losing its ability to retreat, so long as the supporting unit is offset such that there's room.)

(iii) When calculating close combat support, count any friendly unit within 10cm of the fighting unit as a support, regardless of its facing and status (it could even be in melee itself). Both sides count how many such supporting units they have, and the one with the most gets the bonus. (This makes support quick and simple to calculate)

(iv) The player whose turn it is resolves firing and close combat one unit at a time, and applies the results at each step. This may influence the target and factors for the next unit to shoot and melee. (This just clarifies the sequence and does't require remembering anything)

(v) Elite troops with DPs count as having one DP fewer than that actually do (effectively this means that they are destroyed at five DP, but the rule also affects the calculation of relative DPs for lose combat). Poor troops start with  one DP.

(vi) If artillery loses a close combat then it is destroyed. 

In addition I added random events, based on the cards in OHW, but actually via a die roll. I'll outline the mechanism below.

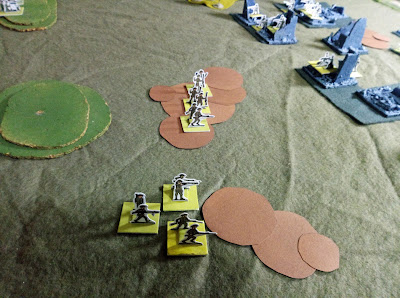
This was the setup, with two small villages in the main part of the table, a line of hills towards the Swedish side and some woods on the Russian right flank. The Russians are closest to the camera, with three close-order infantry, two artillery, one heavy cavalry and two dragons. I gave them a heavy cavalry to start with but automatically made all of their other cavalry dragoons. The Swedes had five close-order infantry and three heavy cavalry. The villages were considered objectives.


A view from behind the Russian lines. They deployed two infantry to capture and hold the nearest village, whilst their artillery and elite infantry were deployed to bombard and attack the village closest to the Swedes. Their cavalry was on their left.


The Swedes massed infantry in their centre to take the village closest to the Russians, whilst a couple of units were tasked with holding the village closest to them. Their cavalry was on their right, facing that of the Russians.


Dragoons can shoot, so it was in the best interest of the Swedes to attack, avoiding being shot at and giving them the combat advantage their heavy cavalry enjoys over dragoons. 


The Swedish charge!


Mixed results - some dragoons fell back, whilst the Russian heavy cavalry forced the Swedes back.


The melee continued, with the Swedes aggressively pushing forward, and the Russians doing their best to hold them.


The Russians occupied the nearest village, and halted, setting up a strong position covered by artillery. Again, this meant that the Swedes were obliged to push forward; anything else would simply allow the Russians to bombard them.


The Swedes occupied the village closest to them.


In fact the Swedish advance was made with a degree of caution, whilst they waited to see if their horse would prevail. The fight moved closer to the Russian lines, giving them more support options and offsetting the Swedes' combat superiority.


In order to support their cavalry the Swedish centre advanced towards the Russian-held village.


An overview of the battle. To the bottom left some Swedish horse was now on the outskirts of the village. On the other side of the battlefield the Swedish infantry occupying their village had moved forward - simply sitting in defence was inviting a slow battering by the Russian artillery.


The Russians seemed to have the upper hand on their left flank, with just one Swedish cavalry unit left.


As the Russian dragoons moved along the ridge to threaten the Swedish centre, the surviving Swedish horse turned about and crashed into the rear of their Russian counterparts, destroying them.


Musketry from the village destroyed one of the attacking Swedish infantry units. It was obvious a firefight wasn't going to win the day, so the Swedes attacked.


They engaged the Russian infantry supporting the village, whilst their elite infantry came up in support.


The Russians fell back, shattered, and the Swedes swung onto the Russian artillery. They fared less well here, and fell to a close-range cannonade.

The Swedish cavalry routed the final unit of Russian dragoons. They now had the only cavalry on the table, but the rest of their force was suffering badly.


The Swedish elite infantry attacked the village and drove the Russians back. 


The Russians counter-attacked, driving the Swedes back from the outskirts.


On the other flank the Swedes were suffering badly from the Russian artillery, so again they attacked. The Russian Guard infantry destroyed them. If the Swedes had won then the Guards would have broken.


With only two Swedish units left I called it a Russian victory.


This was even more fun than the previous game, with the slight differences in the makeup of the two armies having an interesting influence on the tactics and battle-plans.

One thing I did feel might be needed is some kind of advance after combat, even if it's just to occupy terrain such as taking a village by assault, or attacking an enemy on a hill. The trick is coming up with something simple within the spirit of the game.

As for the random events, they had a steady, but subtle influence - the Swedes suffered some unwanted DPs early on, whilst the Russians saw one of their units unable to shoot at a critical juncture and one of their cavalry unable to move when threatened by the enemy.

These are the rules I used for the random events. At the start of their turn a side roll a D6.

If the score is 1-2 then there is no event. On a 3-4 there's a negative event and on a 5-6 a positive event. Roll a D6 to see what the event is.

Negative

1-2 - Command Paralysis - D3 unit cannot move this turn.
3-4 - Ammunition Shortage - D3 units cannot shoot this turn
5-6 - Panic! - A single unit takes 1DP

Positive

1-2 - Initiative - A single unit may either move twice, move and then shoot, shoot twice, or get a +2 in close combat.
3-4 - Rally - D3 units each recover 1DP
5-6 - Intimidation - An enemy unit receives a DP

Units are always determined randomly. In this game I rolled a D8 (since a side had eight units), but if that gave a unit that had been destroyed then I simply discarded the effect in that case (so as you took casualties random events were less likely to happen).

Saturday 30 January 2021

Simplicity In Practice

I had a yen to get Neil Thomas's 'Simplicity In Practice' out again, so set up a quick game yesterday afternoon using my GNW Risk armies. I used one the the OHW scenarios - Pitched Battle (2) - as it has minimal terrain and it a simple fight to get me used to the rules again.

On the right are the Russians and on the left the Swedes. Both sides had four close-order infantry and three heavy cavalry (or dragoons - it doesn't matter because they're all the same). The Russians rounded out their force with some artillery, whilst the Swedes fielded some ally Cossack light cavalry. I used eight units a side instead of six.


The objectives are the hill ...


... which the Russians quickly seized ...


... and a crossroads, which the Swedes soon had under control.


The first fighting was at the crossroads with the Russians quickly advancing into musketry range.


The Swedes attacked the hill with their cavalry, in a risky venture ...


... which didn't pay off. One unit of cavalry was destroyed by the artillery, although the other did drive back its Russian counterparts.


Cavalry units fought on the other flank by the crossroads, with the flanks of the enemy infantry being the prize.


An overview of the early stages of the battle. The lack of small white stones shows that casualties so far have been light.


Both sides now had three of their infantry units fighting for the crossroads.


On the hill the Cossacks were skirmishing with the guns, whilst the Swedes pressed home another cavalry charge.


The Swedes were driven back, and the Russians brought up their reserve cavalry behind the hill.


The fight for the crossroads continued, with the Swedes looking strong having inflicted some hits on the Russians.


Infantry were now also engaged at the hill. I gave both sides one elite infantry unit, which always counted as having  one DP less than it actually had. And they faced each other at the hill.

The Swedish cavalry had driven off the first Russian cavalry unit, but now faced the reserve.


The Russian cavalry charged on their left, routing the Swedes and opening up the flank.


The Russians followed up with an infantry charge, which broke the Swedish infantry opposite them.


The Swedish right was now collapsing. They did destroy a Russian foot unit in return, though.


Fighting continued at the hill.


But at the crossroads two more Russian charges saw the last of the Swedish units there routed.


The Russians regrouped, leaving the battered cavalry to guard the crossroads, and sending an infantry unit to help defend the hill.


With nothing left to lose the Swedes threw their remaining units into an attack on the defenders of the hill - if they won both combats then they would control it and could possibly detach cavalry to retake the crossroads.


But the artillery saw off the attacking cavalry ...


... and the Swedish elite infantry was driven back as well.

At that point I called the battle for the Russians, since I couldn't see the Swedes surviving much more than a turn, let alone taking either of the objectives.

'Simplicity In Practice' rattled along nicely and gave a fun game. Timing of attacks is important, since melee advantages can be critical and winning a melee decisive. A few fights were won or lost by careful positioning of units to create supports.

I played with one change. The original rules have a Buckets Of Dice approach to melee, which means that a side with even one advantage has about a 90% chance of winning. I went with a single opposed die roll, with each modifier providing plus or minus one. This makes melee more unpredictable which is actually one of the author's stated design aims.

One of the melee modifiers is for having more friendly supporting units within 10cm of the melee than the enemy does, but it doesn't clarify what counts as support of from which point the 10cm is measured. So I adopted a simple approach - I count any friendly unit within 10cm of the fighting unit as a support, regardless of its facing and status (it could even be in melee itself). Both sides count how many such supporting units they have, and the one with the most gets the bonus. It's quick, simple and unambiguous.

Thursday 28 January 2021

Delaying Action

It's 1918 and the Germans are falling back. A platoon has been tasked with holding a ruined village in order to cover the retreat, before falling back across a canal to safety.


Meanwhile a reinforced British platoon has been ordered to seize the village, and the bridge, as rapidly as possible.

The Germans are defending. They must hold the village but, before the end of the scenario, withdraw at least 50% of their squads across the bridge. The British must drive the Germans out of the village as quickly as possible. At the end of each player turn I rolled 2D6, and noted down how many sixes were rolled. If this total reached five then the scenario would end, so both sides were on a random ticking clock.

The Germans had two rifle squads, one squad with an MG08, an HMG and a sniper. The latter didn't count as a squad, so the Germans needed to withdraw at least two squads by the end of the game.

The British had a standard platoon (rifle, bomber, Lewis and rifle grenade squads), plus a Vickers MG and an attached squad of specialist assault troops.

Both sides had one officer, and the British had a sergeant as well.

Terrain was randomly placed. The British mustered for their attack behind two undulations.


On their left they sent a rifle squad wide, with the sergeant in support. The rifle grenadiers and Vickers moved to the crest of the undulation to provide covering fire.


The Germans held their rifle squads in reserve, and covered the front of the village with the HMG and the MG08 squad. 


The main British attack was to be on the HMG position. The bombers rushed forward to the cover of some shell-holes, whilst the Lewis squad moved on their right-flank ready to set up a covering fire position.


British covering fire was abysmal - the HMG and rifle-grenades hit nothing. The Germans were more effective; a crossfire from the HMG and the MG08 wiped out the bombers.


Emboldened the Germans moved one of their rifle squads to cover the approach to the right flank of their position through the woods.


With no bombers to provide covering fire for, the Lewis squad worked its way around the left flank of the village. The clock was ticking, and they were looking to get into a position where they might be able to hinder the German withdrawal.


On the other flank the British attacked, but were easily repulsed after a fierce fight in the woods. They fell back to regroup.


With no serious threat to their defences, the Germans began their retreat.


The British assault squad moved up. Short of time they adopted the same bull-headed plan as the bombers, but managed to make use of the cover more effectively and survived the incoming fire. The British officer fell to the sniper, however.


The assault squad attacked the HMG, and wiped it out (I used an optional rule from Squad Hammer Core that if one side rolls a '6' and the other a '1', then the low-roller is automatically destroyed regardless of factors. Guess what happened.)


With four of the necessary five sixes in the bag, the Germans picked up their withdrawal. 


And as they completed it they rolled the final '6', ending the scenario.


The Germans had won, with a squad still happily ensconced in the village, and 50% of their force withdrawn. The British had inflicted little damage on the Germans - their only success was taking out the HMG. Their cover from their heavy weapons had basically been non-existent, and their flanking moves simply ran out of time.


Related Posts Plugin for WordPress, Blogger...