Wednesday 31 May 2017

Forgotten Heroes - Slaymaster - Part 1

Those of you who follow this blog will remember that last June I took part in an event called Forgotten Heroes in which a number of us committed to producing a 25mm superhero/villain miniature for a character that doesn't currently have a figure. This could be either through conversion, or scratch-building. The link above will take you to the blog in which our efforts were recorded.

I produced two figures: Captain UK and Jenny Everywhere.

Having now done Heroclix conversions for two of the characters from the 1980s UK run of Captain Britain, (I made a figure for The Fury a few years ago) I felt fired up to try a third. This time I decided to do what another of the Captain's nemeses - Slaymaster

Slaymaster actually first appeared during the US-style run in the 1970s, when the Captain had the staff and amulets and a lion on his chest, but was basically a US-style character with UK backgrounds. He was a mercenary/assassin, and pretty similar to a whole range of Marvel characters of the time. However he was reinvented during the Alan Moore/Alan Davis era, and appeared three times. This version was a more sophisticated character; cunning and cruel to the point of sadistic, but with a certain degree of honour. It's this version I have decided to create a figure for, specifically based on his first appearance when he battles Captain Britain in the Denmark Street branch of Forbidden Planet.


I do like the claw device he has in this costume.


For the record here are his other look. This is his 1970s appearance


And here he has just emerged from his disguise as Alice in Wonderland's Caterpillar. I prefer the hair of this version, so will probably model it like this.


And this is his final appearence, where her wore a costume which amplified his abilities to superhuman levels and fought Betsy Braddock (the X-Men's Psylocke) during her brief appearance as Captain Britain.


And if you ever wondered why she had artificial eyes ...

My base figure is this one of Daredevil, mostly because it's a duplicate in my collection and the pose is relatively interesting.


To be honest I haven't entirely decided how I will approach this conversion yet. One advantage I have is that Slaymaster doesn't really have a set costume during the era I'm covering, so I can afford myself some artistic licence, so long as I capture the essence of the character. I'm as interested in seeing where this goes as you are.

If I manage to finish Slaymaster by the end of the month, then a have a couple of possible bonus characters to try. But let's get one done, shall we?

Sunday 28 May 2017

The Battle of Midsomer Barrow

In my previous post I gave the rules for my proposed ECW campaign using a modified version of the OHW Pike & Shot rules. This is the first battle.

It's 1642, the country erupts into civil war and many of the great and powerful rush to declare their allegiance to either King or for Parliament. In the county of Midsomer the two most powerful notables are Sir Thomas Barnaby and Lord Standing. The former declares for Parliament, whilst the latter declares for the King. The county is divided. Both men set about raising troops to secure the county for their chosen faction and, as the year drew to a close, their armies met at Midsomer Barrow.


I rolled 'Pitched Battle 1' as the scenario, which is a straight fight on an open plain. Parliament got lucky with their quality rolls and ended up with:

2 x Pike and Shot (Shot-Heavy, Elite)
1 x Pike and Shot (Elite)
1 x Horse (Dashing)
2 x Dragoons


Lord Standing's Royalists were less enthusiastic. He got:

2 x Pike and Shot (Pike-Heavy)
2 x Pike and Shot (Raw)
1 x Horse (Dashing)
1 x Horse


With an emphasis on close combat, Lord Standing elected to attack, with his horse pushing forward on his left. With a strong position on one flank he hoped that the horse could then support his out-matched infantry.


Both commanders led their horse into the attack.


The Royalist foot advanced as well. The better quality pike-heavy foot was in the centre, tasked with taking the hill the bulk of the Parliamentarian foot was defending. On their right the raw foot regiments were assigned the task of driving off the dragoons.


An initial disaster for the Parliamentarian forces saw Sir Thomas Barnaby wounded, leaving his forces in charge of Colonel Thomas Nelson.


The two lines closed and exchanged musketry. Both commanders moved to rally their foot, as the cavalry melee continued on the flank.


The Parliamentarian cavalry broke, and the Royalists pursued.


Their pursuit crashed straight into the Parliamentarian infantry covering that flank.


Sir Thomas Nelson rallied the dragoons, who were wavering under fire from the Royalist foot.


In the centre, ammunition was running low, and the Royalists were obliged to push their pikes up the hill.


Casualties were mounting on both sides.


The dragoons continued to hold on the Parliamentarian left, and Lord Standing tried to order his foot to cease the firefight which his men seemed to be losing, and advance. Some of his troops were not enthusiastic about the idea.


On the other flank, the Royalist horse were held off by a wall of pikes.


Parliament also held firm on the hill.


The raw troops facing the dragoons had enough, and both broke on the same turn.


Lord Standing tried to order an advance in the centre, but couldn't get his men to move.


The dragoons now moved to compromise the Royalist right, although they were only a theoretical danger at this stage, since they can't move into close combat, or fire into an ongoing one.


Another attempt to advance the Royalist centre failed, and another unit of Royalist foot broke under fire from the shot on the hill.


On the Parliamentarian right the foot finally broke under continuous attack from the Royalist horse ...


... but one unit of horse pursued them out of the battle.


The Parliamentarians turned to meet the threat to their flank.


Dragoons moved up in support. The Royalist horse fled under heavy fire.


This just left a lone Royalist pike and shot unit fighting to take the hill in the centre.


The result was inevitable; it routed, and the day was lost for the Royalists.


With this victory, Causton declares for Parliament, who now become the defenders for the rest of the campaign. The campaign moves into Phase 2, and Lord Standing tries to gather support for an attack on the town.

The Royalists were certainly the underdog in this fight, with a serious difference in quality between the two armies. Their advantage in horse couldn't swing things their way either. To be honest I made a mistake in their plan; really the raw foot should have covered the Royalist centre, leaving the better-quality pike-heavy foot to drive off the dragoons on the flank. Yes, the raw foot would have suffered in the firefight in the centre, but the odds were very much in favour of Parliament's foot running low on ammunition, forcing their commander to intervene or requiring them to advance off the hill. Placing or replacing out of ammunition markers is key to managing foot in these rules, and the Royalist commander consistently botched the rolls to do so. In addition, Parliament seemed well-supplied with ammunition, and none of their units ran out at any stage, which is pretty remarkable, all things considered.

6x6 - Game 2.3

Saturday 27 May 2017

The Campaign For Causton

In a previous post I raised the possibility of playing an ECW mini-campaign using my paper ECW armies and my (now heavily modified) version of the rules from One Hour Wargames. During the week I sketched out some ideas, and thought I'd share them in this post, before starting the actual games.

Not All Villages Shown
I decided to run it in the fictional county of Midsomer, since my early game reports were set there. Once again the Royalist Lord Standing will take the field against his Parliamentarian rival, Sir Thomas Barnaby against a backdrop of colourfully-named villages. 

Here's how I see it working. One side (the Defender) holds Causton for King/Parliament. The other side (the Attacker) is campaigning to take the town. The campaign will consist of at least four battles, fought in four phases. 

Phase 1 consists of a single battle. The fickle town of Causton will declare for whoever wins this battle. That side will become the Defender. The losing side becomes the attacker.

Phase 2 will cover a series of  initial skirmishes, as the Attacker attempts to gather supplies and build support for their advance on Causton. If the Attacker wins a game in this phase, the campaign advances to Phase 3. If the Attacker loses three battles in this phase, then the whole country will declare for the other faction, the campaign is over and the Defender wins.

Phase 3 covers the advance on Causton itself. If the Attacker wins a battle in this phase, then the campaign proceeds to Phase 4. If the Attacker loses two battles in this phase, then their army is scattered, and they conceded Causton to the opposition. The Defender wins.

Phase 4 is the siege of Causton. This phase consists of one battle, based around an attack on part of the town's defences. The winner of the battle controls Causton, and wins the campaign.

Each Phase will have a number of specific scenarios assigned to it from ‘One Hour Wargames’. Each scenario will only be played once. If you roll one which has already been played, roll again, unless all scenarios have been played already.

Phase 1 - The First Battle

Pitched Battle 1
Pitched Battle 2

Causton declares for the winner of this battle, who becomes the Defender for the rest of the campaign.

Phase 2 – Initial Skirmishes

Escape
Encounter
Fighting Retreat
Defence In Depth
Infiltration
Control The River

Phase 3 – The Advance on Causton

Bottleneck
Counterattack
Flank Attack 1
Surprise Attack
Double Delaying Action
Take The High Ground

Phase 4 – The Siege of Causton

Fortified Defence
Botched Relief
Twin Objectives

As you can see, that the campaign will consist of a minimum of four battles. Assuming every game is a win for one side or the other then it will run to a maximum of seven games, but some scenarios do allow for the possibility of a draw. In the event of a draw, neither side counts as having won or lost, and another scenario is played.
At the start of each battle. Roll basic forces for each side assuming six units. Then roll for for unit traits (see below).

Both sides then roll a number of dice equal to the number of units they have in the scenario to determine unit quality (see below), and choose which of their units will receive which quality, subject to a few restrictions (again, see below).

In Phase 1 decide who is the Red player and who is the Blue player randomly. In Phases 2 and 3, the last side to win a battle decides which side they want to be. In Phase 4, the Defender will be be the one defending the town/villages. Some scenarios give a side only four units. In this case the player may choose which two of their units are dropped, except that they must drop one unit of Pike and Shot  and one of Horse/Dragoons/Artillery, and can only opt to drop more than one raw unit  if it is not possible to reduce the force otherwise.

Unit Traits

Roll a D6 for each Pike and Shot, Dragoon and Horse unit as below, adjusting the score as necessary.

Pike and Shot – 1-2 Pike Heavy 3-4 Balanced 5-6 Shot Heavy (+1 Parliament, -1 Royalist, +1 Game 5 onward, +1 Defender in Causton)

Horse – 1-2 Dashing 3-4 Normal 5-6 Disciplined (+1 Parliament, -1 Royalist, +1 Game 5 onward)

Dragoons (First rolled unit only) – 4-6 Replace with Artillery (-1 Royalist, +1 Defender in Causton)

Quality

Roll a number of dice equal to the number of units the side has in the scenario. Assign each to a unit, subject to the restrictions below.

1-2 Raw 3-5 Regular 6 Elite 

Parliament: The first Raw quality assigned must be a Horse if one is present. 

Royalist: The first Elite quality assigned must be Horse if one is present. The first Pike and Shot graded Elite must be Pike-Heavy if one is present. 

Both: Dragoons and Artillery cannot be graded Elite unless no other units are available. 

After all quality is assigned, the loser of the previous battle determines a random unit. Unless it is already Raw, that unit is downgraded one quality level. If it is a Raw unit, the other player may upgrade a random unit, unless that unit is Elite, in which case no changes are made.

Notes

I have made a few assumptions in the campaign, some of which may not be based on fact, since I'm no expert on this period. I have assumed that Royalist horse tends towards impetuosity, and that Parliamentarian horse behaves itself, with both sides becoming more controlled as time advances. The Royalist foot is assumed to have less access to firearms, so tend towards higher pike ratios, whilst Parliament has more shot. Again, the number of shot increases for both sides as time advances, and in the final scenario access to the armoury of Causton gives an advantage in both possession of shot and of artillery. The timeline reflects a possible timeline for local forces in the war; both sides meet in an enthusiastic early 'it'll be over by Christmas' clash. One side consolidates their position, and the other side campaigns to oust them from their county town until either they capture it, or perform so badly that they give up.

It's always a struggle in any campaign to avoid the 'death spiral', where a losing side becomes increasingly less likely to win battles, thus perpetuating a cycle of loss. But there should be some reward or penalty which carries over from one game to the next. In this campaign the winner of a scenario gets to choose which side they will be. Since this is done after forces are decided, they can pick the side which offers the most advantage to the troops they have. In addition there is a small quality penalty given to the losing side, but not enough, I hope, to seriously hinder their chances.

Anyway, at the time of writing I have actually played the first game in the campaign. But that will be the subject of a future post ...

Blucher 1814

We played Blucher for the first time in ages on Thursday. Unfortunately, a storm a few days before took out out internet access, and it's taken a few days to get reconnected, so you've had to wait for this report. In fact Ralph beat me to it, with a lovely write-up for his blog HERE, which not only features better pictures of the game than I managed to achieve, but also shows you a rare glimpse of me playing (something you rarely see here for obvious reasons). I suggest you look through Ralph's report, which is mostly correct, then come back here for what is really a supplement.

Off you go!

...

Back? Great.

So you understand the position now; our Russians were attacking the French, who seemed to be made up of enthusiastic, but brittle, conscripts.

Here's the Russians, ready to be deployed.


As the other report stated, we opted for a holding action, since the positioning of the objectives, and the fact that the French left one of the ones in their zone undefended allowing us to grab it with cavalry, shifted the onus of attacker from us to them. This was our position in the centre, with some reliable infantry (good in defence) backed up with a bit of artillery and cavalry.


Our cavalry holding one of the French objectives. Having taken it, we left a couple of brigades to hold it, just in case the French tried something sneaky with their cavalry, and then the rest moved to cross the stream and compromise the French rear.


Ralph pointed to some hidden units. In the foreground, both Russian and French units remained unengaged and unobserved. On the hill in the corner can be seen the objective marker the Russians were defending.


With both sides revealed in the centre the battle began in earnest. The French attacked, and had some initial success, but their infantry, whilst numerous, lacked staying power, and the Russians steadily absorbed their attacks.


The French advanced on their left, hoping to rush the Russian objective.


The Russians swung into action, and deployed to meet the threat with elite infantry.


The action in the centre was fast and furious now, and a bit of a mess, to be honest. But despite their numbers, the French were coming off worse, with casualties steadily pushing their army to breaking point.


One Russian unit discovered that the bullet was as wise as the bayonet with shooting like this. A single turn of firing devastated a fresh French brigade.


On the Russian right some of their infantry held off an attack by two French cavalry brigades. As the cavalry fell back they were subjected to musketry and artillery fire from other Russian units, and shattered.


Russian cavalry charged the French in a flank attack that proved less decisive than we'd hoped.


In the centre our one unit of militia charged the French grand battery, who were so surprised that they fired high, caused virtually no casualties at all and then bolted, abandoning their guns to the attackers.


By this stage the evening was drawing to a close, Ralph was commencing his weekly transformation into a pumpkin, and it was obvious that the day was lost for the French; a number of their units were close to breaking, and the Russians were still full of beans, borscht and blinis. Ralph and Dave conceded.


Given how rusty we were with the rules, we got through it pretty rapidly - I think we were playing 200pts a side, which gives a pretty decent-looking game, and certainly playable within a relaxed evening. As the Russians we were fairly lucky, getting some good shooting and, as far as I can recall, never having a turn where we ran out of initiative points before we'd done everything we wanted to do for the turn.

And don't those massed 15mm figures look lovely?

Tuesday 23 May 2017

An Unfortunate ECW Oversight

I've stated here before that 'An Unfortunate Oversight' is one of my favourite scenarios in 'One Hour Wargames', and you'll find a couple of write-ups of it here. I was quite pleased, therefore, when it came up as the random scenario for trying out the few tweaks I needed to make to my OHW ECW adaptation.

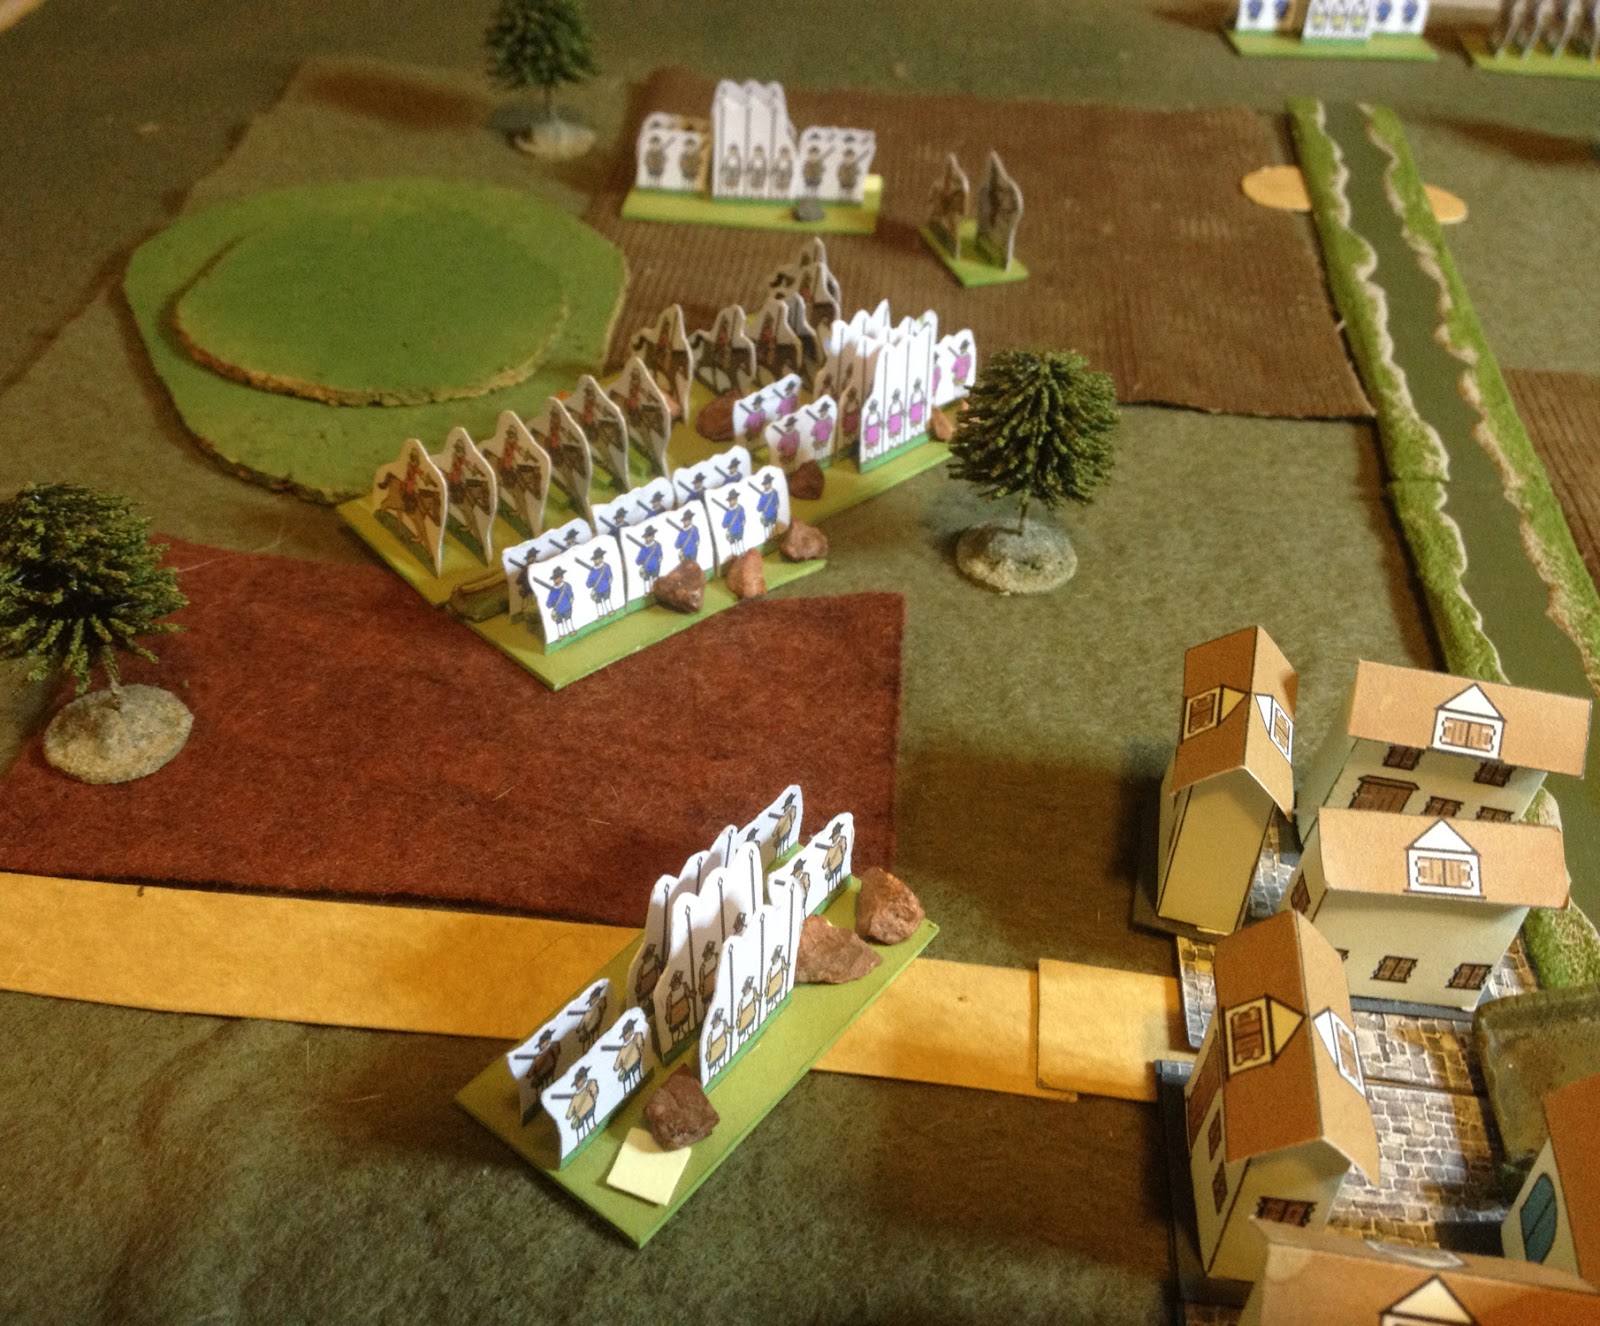
So what do we have in this scenario? Well, we have a village by a river, defended by some supported Royalist foot. The Parliamentarians  are lined up ready to attack.


But wait! The bulk of the Parliamentarian force is actually further upriver, ready to cross by a ford which the Royalists didn't know about.


Both sides rolled four units of foot. I made one elite and one raw. All of the Parliamentarian foot was shot-heavy, whereas their Royalist opponents were pike-heavy. The Royalists rolled one unit of horse (Automatically dashing) and one of dragoons, whilst the Parliamentarians has two units of horse (both disciplined).

The Parliamentarian horse led the way, crossing the stream and heading for the hill, which is the actual objective in this scenario.


The Royalists turned the bulk of their force to meet them. The dragoons were left in reserve, whilst a couple of units of foot stayed to defend the village. Whilst not an objective, loss of the village would allow the Parliamentarians to launch a two-pronged attack.


The Parliamentarian leader began attached to one of the foot attacking the village. I kept a leader's ability to add or remove out of ammunition and impetus markers, but removed their ability to rally off hits. Instead I allowed a leader to attach to a unit which had taken hits and give that unit a cover save. This fits the Neil Thomas OHW ethos better, by maintaining attrition and not having hits tracked in both directions. If any of the save rolls were a '1', then the leader would be killed or wounded; lost to the controlling side for a turn whilst someone else took over.


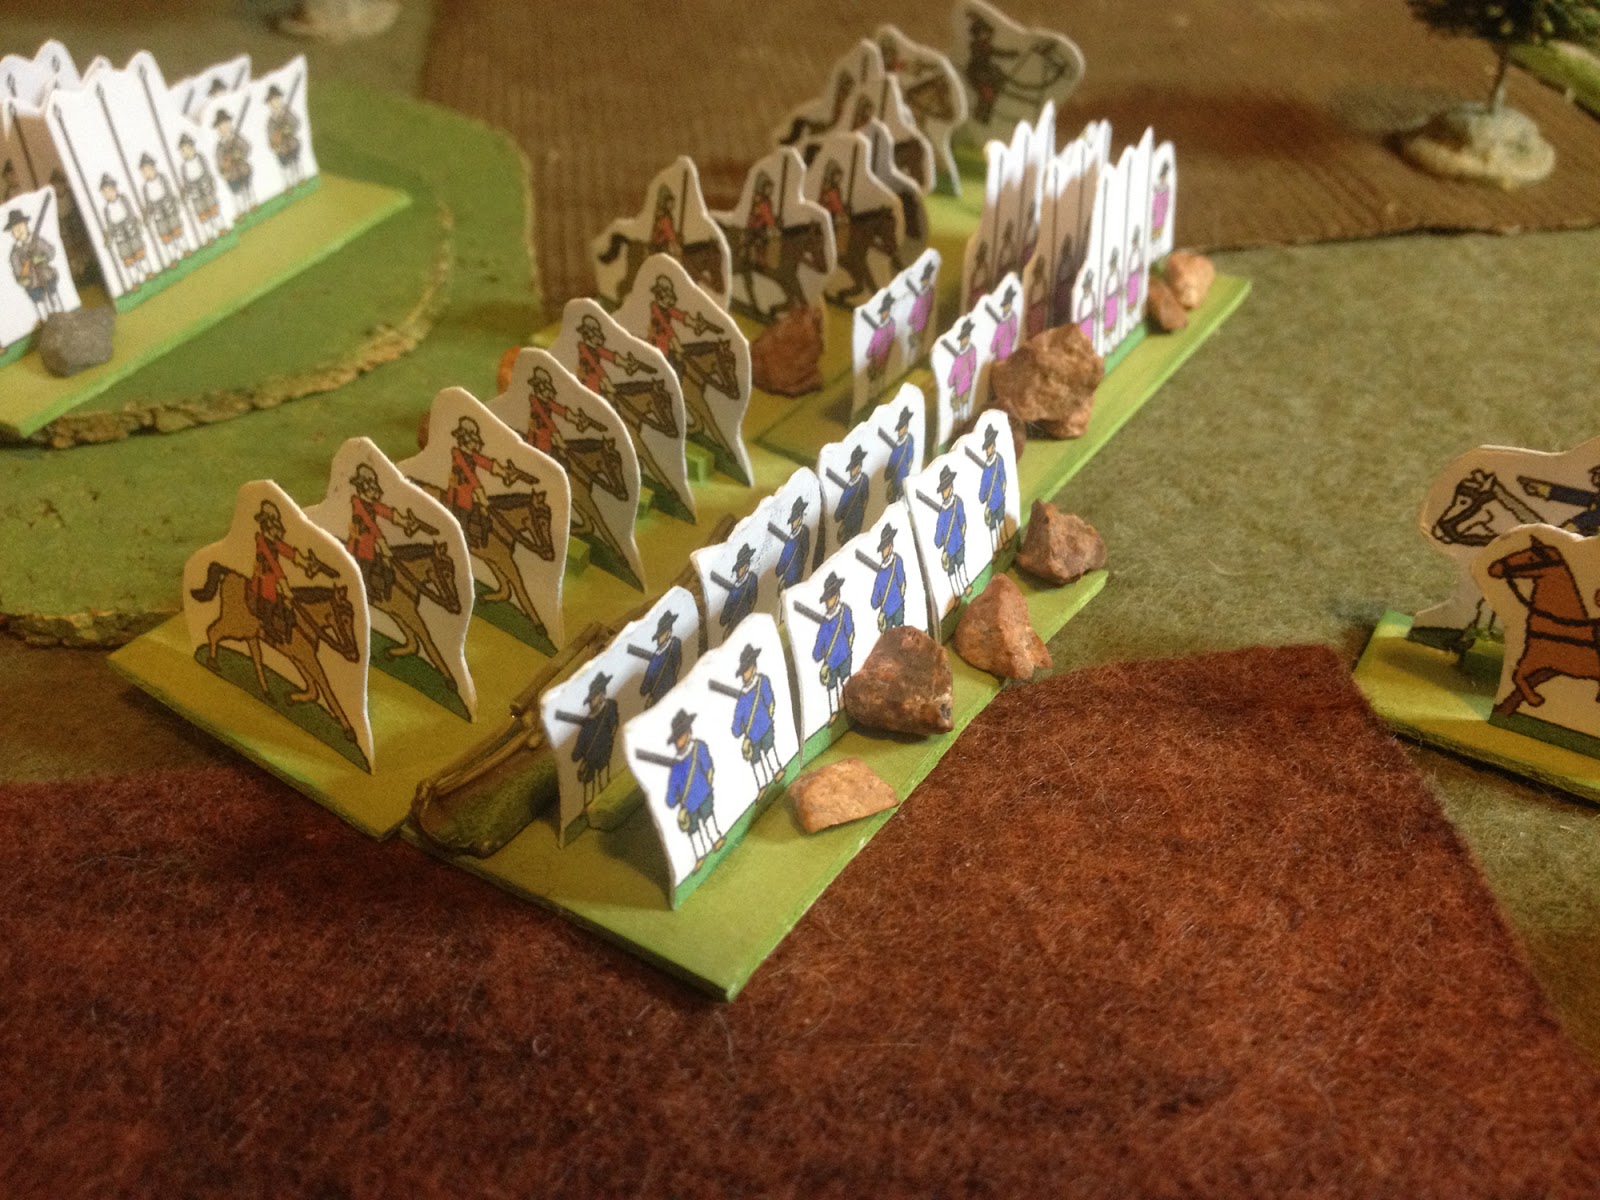
Meanwhile the Parliamentarian horse took the hill. The outnumbered Royalist horse moved to oppose them.


Their uphill cavalry charge was about as effective as you'd expect it to be. But the supporting foot below the hill started inflicting hits on the horse.


The Royalists were taken in the flank.


An attached leader helped stave off defeat.


At the ford, the foot of both sides were exchanging volleys. Or salvos. Or whatever they exchanged in those days.


The Royalists now had a handy little firing line set up from the ford to the hill. Its only downside was that it wasn't really inflicting much in the way of casualties.


Out of ammunition, and with their leader busy elsewhere, Parliamentarian foot surged across the bridge to assault the village. It was only defended by militia; how long could they hold out?


On the hill the Royalist commander fell, and the horse routed not long after.


An overview. Parliament still held the hill. A push of pike was happening at the ford, and another in the village as Parliament tried to cross the bridge.


The horse on the hill redeployed, ready to charge. Against pike, and dragoons behind a wall, this wasn't the best move, but it would buy time for some Parliamentarian foot to get onto the hill.


But the reinforcements weren't going to come from the village any time soon; the raw Royalist infantry held firm.


The Parliamentarian commander prepared to lead his horse into the attack.


But at the same moment the lead unit attacking the village melted away in defeat.


The horse attacked! Amazingly they began to inflict a steady stream of casualties on the Royalist elite foot.


The other unit of horse attacked the dragoons.


The Royalist commander moved to the village to inspire the defenders.


They were inspired enough to drive off the second attacking unit, and were able to leave the village in order to move on the hill. But Parliament had won at the ford and a unit of their foot was moving to the hill as well.


Parliament got there first.


The fired at the Royalist foot, and even the leader's exhortations were insufficient to keep them on the field. The Royalists fled.


They were closely followed by the dragoons ...


... and finally the elite Royalist pike and shot.


Parliament controlled the field!


The battle was decided on some terrible saving rolls by the Royalist foot, and some lucky rolls by the Parliamentarians.

The changes to the leader rules were mostly OK, and any adjustments I make will just be down to the timing of when things happen. Having them give a save roll felt more in keeping with the original rules, and added in a suitable level of risk. I'll try and write things up properly at the weekend, if not before.

What I thought I might try, now that I have a set of rules I'm fairly happy with is maybe a mini-campaign. Some of my earlier game reports have featured a campaign set in the fictional country of Midsomer; maybe it's time to do that properly. But whilst I have a couple of possible campaign structures for such a campaign, I need to work out the chrome.

6x6 - Game 2.2
Related Posts Plugin for WordPress, Blogger...