Monday, 17 April 2017

Railway Rivals - Isle of Wight

I enjoyed our game of Railway Rivals so much the other day that I hunted the 'net for some new maps to add to my collection. On this page I found a whole pile of them, all done up in a very nice style, some of them from original game maps and others seemingly originals.

I was quite attracted to the map for the Isle of Wight, since it has no map-specific special rules and actually prints out in a playable for onto a sheet of A4. Apparently it was originally published in an issue of Railway Modeller magazine. Anyway, we have a soft-spot for the Isle of Wight, having spent a few holidays and long weekends there prior to our emigration.

Its size means that it gives a quick game; the build phase is short, and so are most of the races, owing to the short distances between town. So we were able to give it a quick play this evening.

We had three players (which is fine; it's a 3-4 player map): myself, Maya and Catherine. Catherine took an early lead, but for a brief period in the middle I pulled in front. Catherine came back at the end, winning a couple of races pretty much unopposed. Maya was never really in the running; she dominated one part of the board, but by the time the towns on that section came into play, Catherine and I had also extended our networks into it as well.


Here's the map at the end of the game - my track is in orange, Catherine's in green and Maya's in purple/blue.


(If you download this map for your own games you'll notice that town 21 is nameless. I checked the original magazine version of the map, and it's actually 'Haven Street'.)


Saturday, 15 April 2017

Murder And The Orient Express

We had another get-together with our friends the Perrys on Friday. We'd tried a couple of murder mystery evening with them over the past year and, having enjoyed them, Catherine wanted to have a go at writing and running one of her own.

The mystery went well; it's not an easy thing to design something like that and Catherine rose to the occasion providing an entertaining couple of hours for all involved, even if most of us guessed the identity of the killer. It was the journey to the solution which was fun, not necessarily the destination.

And, talking of journeys and destinations, we finished the evening with a game of Railway Rivals. This game has been released in a boxed form at some stage, but my version is one of the early cardboard tube editions purchased directly from the designer at a games con in the mid-eighties. I have four maps in my set, and we ran with France, since it's one of the two I have that suits six players.

Railway Rivals is, as the name suggests, a game of building railway systems and then (in an abstract form) operating them. This is, of course, a whole genre of games now, but Railway Rivals was one of, if not the, first.

Half of the fun of the game is that you get to draw on the laminated map. Here's the game in its early stages, as each player expands their network from one of the starting towns around the map.


Once the map has a mostly complete network the game shifts into an operations phase, which is run as  series of  races between randomly determined towns on the map. Players win more points with which to expand their network, and the races are punctuated by chances to expand your system.

We had one player team race ahead in the operations phase, and pretty much hold their position, but there was a lot of shifting around for the other five places. My network was the green one, which started in the south of France. I managed to create lines which at least pushed to the edges of some other areas, and had some lucky races come up which  made use of track I'd just built, but only managed to get a fourth place at the end. The most exciting races were a short one which ran from Rouen to England, and consisted of three ferries racing across the Channel, and another race which saw three players steaming across the whole country from Bayonne on the Spanish border to Belgium.

This was the map at the end, with additional player doodles.


This was the first time I've had this game out in possibly twenty years, and everyone seemed to enjoy it. sadly I don't think you can buy new maps for it anymore.

Friday, 14 April 2017

Fraustadt Twilight Again

Having badgered the authors of 'Twilight of the Sun-King' with questions over the past week, Gary and I fed the answers and clarifications back into the rules, and replayed the Fraustadt scenario, At Gary's request we left off the Saxon fortifications, on the hope it would make the infantry centre and little more active and give us a chance to try out firefights and infantry charges.

As before the Swedes attacked with their cavalry on both flanks first.


However their infantry also advanced.


Cavalry melees developed on both flanks, with the Swedes at a distinct advantage. All the Saxons could really do was hope to reduce the morale of some of the Swedish units, and delay the attacks for as long as possible on the hope that their artillery and infantry could do something nasty to the Swedish centre.


On the Saxon left, one of their units chased off some Swedish cavalry, routing it into the woods.


The infantry met in the centre - the determined thin, blue Swedish line against the double line of the Saxons.


The Swedes charged, and one Saxon unit in the centre collapsed and fled immediately. However the Saxon artillery took the attacker under close-range fire, and slowly whittled it down. The other Saxons held firm, and a long infantry melee ensued. However Swedish cavalry was firmly in the Saxon rear, having eliminated the Saxon right.


On the Saxon left the last of their cavalry units routed.


The infantry battle in the centre reached its height. The Swedish units were close to breaking, but the Saxons cracked first and started to break.


However with a second line they could keep up the fire, and the Russian allies on the Saxon left also moved into action. The resulting musketry broke the whole Swedish infantry line.


The Swedish cavalry in the Saxon rear attacked the artillery, with inevitable result, but both armies were now wavering on morale.


It boiled down to which army would fail its command morale tests first. It was the Saxons. But it was a very close game.

It was also a very smooth game. We hit one or two minor issues, but they were easily resolved on the spot. The clarifications we'd elicited covered all of the major problems we'd had in the last game, and we were free to concentrate on outwitting each other or staving off disaster for our armies.

It appears that an official errata/clarification sheet will be forthcoming. We're looking forward to trying this set for a bigger battle now.

Monday, 10 April 2017

Budget Fraustadt

In my first 'Scum of the Earth' game for the Six by Six Challenge I tried and ECW game. For my second I decided to make use of the figures I had handy from out Fraustadt refight last Thursday (which we're doing again this week, if you fancy knowing what's coming up here) and play a GNW game. And, I thought, why not refight Fraustadt?

Now, one of the design philosophies of 'Scum of the Earth' is that its supposed to give a game which looks like a low-budget black-powder battle from a 70s/80s TV series, where they only had 200 extras to fight Waterloo with. So I scaled the game right back in terms of units. Here's the setup:


This is the defending Saxon/Russian army (all looking suspiciously Russian, as before. We know they're behind everything at the moment, so it's only appropriate.)

Right Wing
1 x Cavalry (Stalwart)

Centre
1 x Infantry (Stalwart)
1 x Infantry
1 x Infantry (Riffraff)
1 x Gun

Left Centre (Russians)
2 x Infantry (Riffraff, Pikes)

Left Wing
2 x Cavalry


The attacking Swedish force was smaller, but I stacked on some extra traits to try and offset this.

Right Wing
1 x Cavalry (Stalwart, Knee-to-Knee)
1 x Cavalry (Knee-to-Knee)

Centre
1 x Infantry (Stalwart, Pikes, Veteran)
1 x Infantry (Pikes, Veteran)

Left Wing
2 x Cavalry (Knee-to-Knee)


Most of the traits can be found in the rules. 'Knee-to-Knee' gives Cavalry a +1 when in melee with other Cavalry. 'Pikes' gives the unit a +1 in melee, but their firing is capped at 4.

I gave units a 6" musketry range, as for the ECW, but had them roll a DAV as normal.

The Swedes moves forward aggressively, with their cavalry sweeping forward to attack their Saxon opposite numbers. The brown area on the Saxon right is a frozen marsh (the battle was fought in Poland in February, so it was a bit chilly).


The Saxon left came out to meet the Swedes. No point in standing around really.


The Swedes charged, and cut through the first Saxon unit, which fell back.


On the other flank the Swedes worked their way through the marsh with no difficulty.


The Saxon artillery started up a deadly fire on the Swedish infantry in the centre, who advanced to just outside of canister/musketry range, ready to charge once their cavalry had made a breakthrough.


The Saxon cavalry on the left was now fairly well smashed up, but they had put up a magnificent defence, forcing one Swedish unit to rout and the other to fall back.


On the other flank, however, the Saxon cavalry pretty much fled the field after the first Swedish attack.


This put Swedish cavalry well into the Saxon rear.


Ga Pa! The Swedish infantry marched forward.


An overview of the battle.


One of their infantry units faltered in the attack, already shaken from the earlier artillery fire. The other, though, pressed home its attack on the Saxon defences.


It was repulsed, but now the Swedish cavalry was coming up in support.


An attack from both sides!


And still the Saxons triumphed.


On the other flank the shattered Saxon cavalry was sheltering behind some wavering but fresh Russian infantry.


 The Swedes charged again ...


... and the Russians broke, although they rallied rather than flee the field.


The Saxon cavalry counterattacked, and broke the Swedes, who fled.


In the centre a Saxon unit fell back from the defences as the Swedish infantry pushed forward. However other infantry drove off more Swedish cavalry with some brisk musketry.


At that point I called a Saxon win. The Swedes still had a little bit of fight left in them, but really there wasn't any momentum left in their attack, and much of the Saxon line was still fresh.


This is a difficult battle to balance, with the outnumbered Swedes on the offensive and, historically, pulling off a win. Twilight of the Sun-King seems to manage it OK without it looking too much like the Saxons have been hamstrung and the Swedes turned into supermen. With these rules I suspect it's the best approach; add more bonuses to the Swedes, and dump some more disadvantages on the Saxons. It was true that the Saxon cavalry on the left was lucky early on; they managed two Courage tests where they rolled a '1', allowing them to keep fighting, but really they were a tough nut to crack for the Swedes.

6x6 - Game 3.2

Friday, 7 April 2017

Fraustadt with Twilight of the Sun-King

My copy of the newest edition of the Twilight of the Sun-King rules came a few weeks ago, but it too us until yesterday evening to get ourselves organised for a game. The rules cover the period from roughly 1680 to 1720, with two game scales  of either 1000/500 or 2000/1000 infantry and cavalry respectively per unit. They allow big battle to be fought fairly quickly with a simple mechanism in which all firing and close combat are absorbed into a single morale test per unit per turn.

Caesar and I had played one game of an earlier edition a couple of years ago, and I had played some other games at home, so we weren't totally unfamiliar with the system. Gary joined us, but hadn't played before at all. The new edition expands on the previous version in part by including various special traits which can be added to units, including variations in size, unit quality and enthusiasm, and adding differences in weaponry such as matchlocks and pikes.

There is a scenario booklet available, covering some of the campaigns of Louis XIV, but the introductory scenario in the book could have been written for me - the 1706 battle of Fraustadt, from the Great Northern War. This features a Swedish army outnumbered two-to-one attacking an entrenched Saxon army with Russian allies. This rash action was prompted by the presence of a Polish force in the area, forcing the Swedes to deal with one army before the two joined up and outnumbered it any further. On the day the Swedes swept to victory. How would it play out on the table?

This is the setup, with the Swedes on the left and the Saxons on the right. We played at the brigade scale, so units represent 1000 cavalry or 2000 infantry if normal-sized. Support, especially rear-support is essential in the game, so even with the small number of units, both armies were deployed in double lines where possible. The Saxon/Russian line was anchored on two villages, and their right flank was covered, in part, by a frozen marsh.

Since Caesar and Gary were less experiences they split the Swedes between them, whilst I played the more static Saxons, which allowed me to look up rules and explain the game as we played.


The Saxon/Russian line. In fact the figures were all Russians from my Risk-figure GNW collection. In fact one of the cavalry units was Swedish as well.


The Swedes. They are heavily outnumbered in this battle, but the enthusiasm of their troops is outstanding, giving them quite an edge in the meat-grinder morale test combat that is a feature of the game.


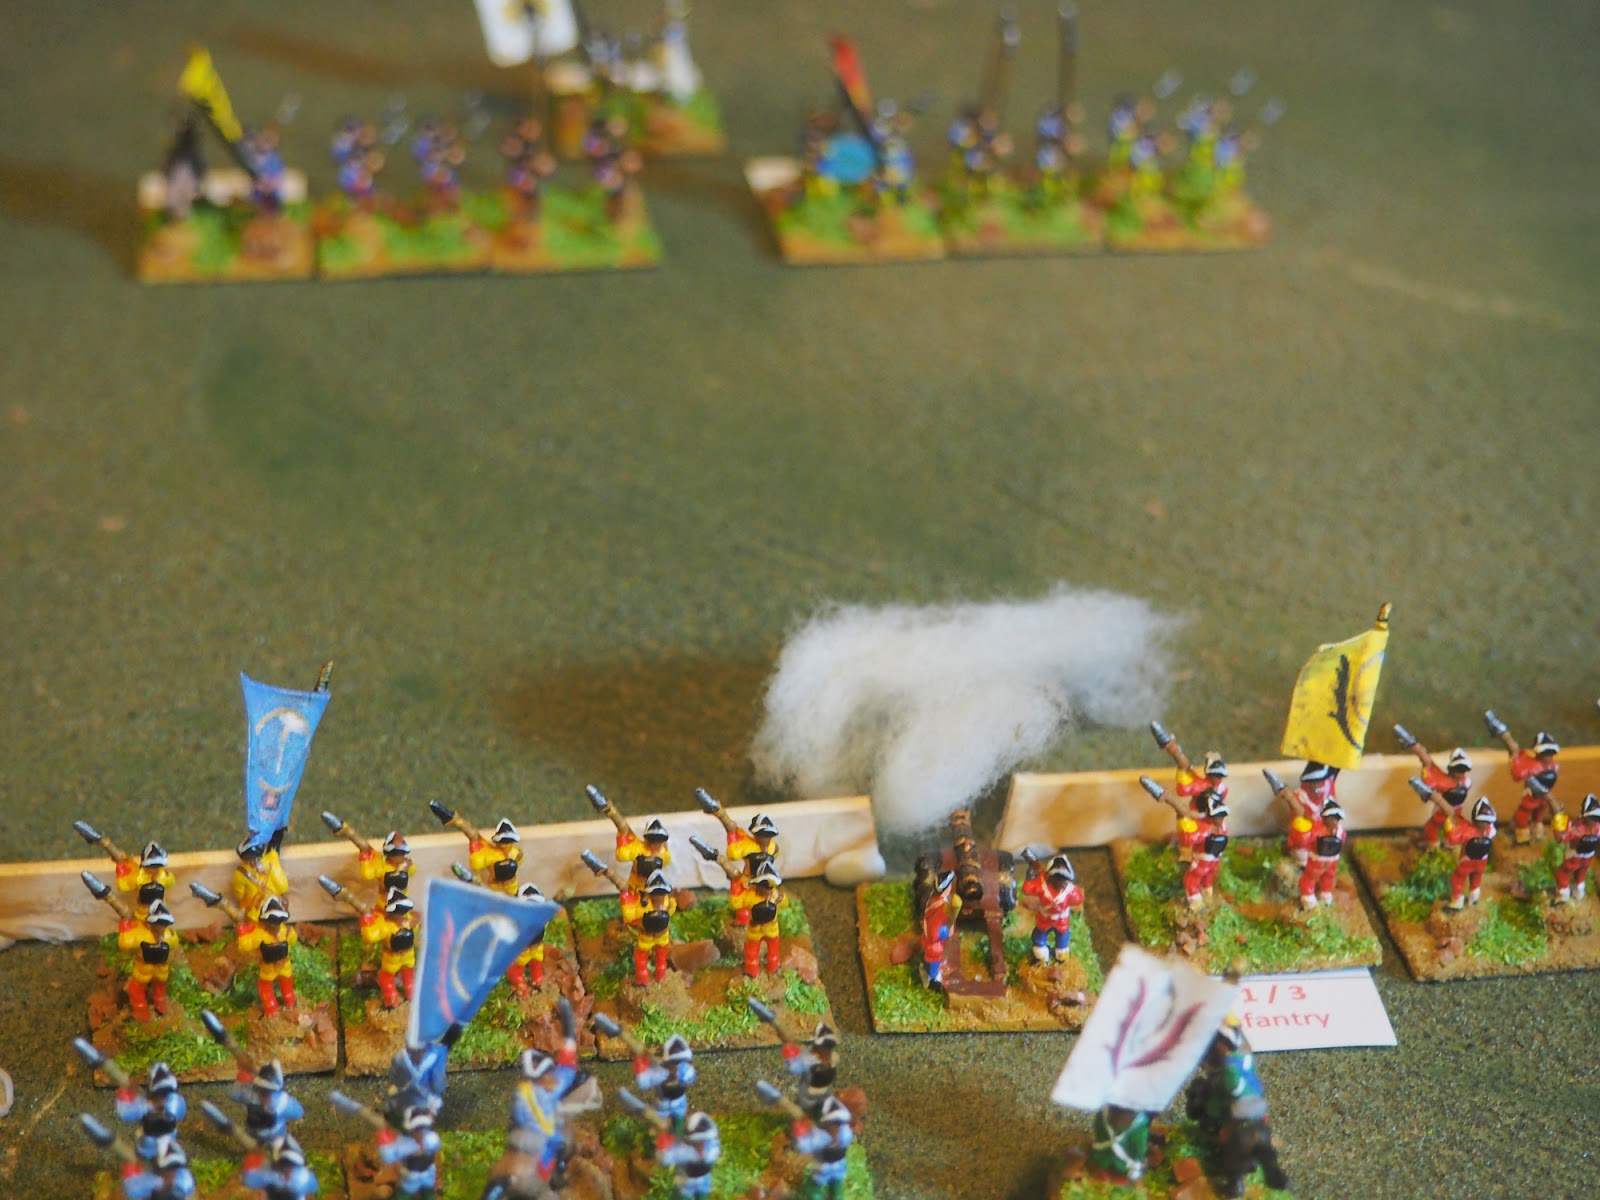
The Swedes had a small amount of artillery which could arrive as reinforcements, but the Saxons had a couple of units deployed as part of their line. In Twilight, artillery can fire through friendly units; an abstraction which assumes that the units are, in fact, numerous regiments with gaps and firing lanes between them, and that the artillery could be sited on low rises not shown on the table.


The artillery started to bombard the Swedish infantry. This puts the pressure on the Swedes to attack. Their infantry, whilst good, cannot easily take the Saxon position, but neither can they afford to stand and take fire. In order to turn the battle in their favour they need to deploy their other arm ...


... the cavalry.

In this battle the Swedish cavalry have the edge in both numbers and quality. They attacked on both flanks, looking to cutting in on the Saxon flank and rear as quickly as possible, either breaking their army from that, or allowing the infantry to make a final, battle--winning, push.

This is Gary's force, attacking the Saxon right.


This is Caesar's force, attacking the Saxon left.


There was no point in holding back. In order to force morale tests on the Swedes, I counter-attacked with my horse. On my left this cost the Swedes a unit straight away.


It also held Gary's attack in check as well.


A view of the battle.


On the Saxon right, things went badly for Gary. His cavalry were pushed back and then botched a couple of activation rolls; in Twilight, any movement by a unit that is not just a simple move straight-ahead, is subject to a test to see if it takes place. Gary failed two rolls in succession, leaving his two units of cavalry disorganised and unsupported as the Saxons pressed their attack.


On the other flank the melee settled into a series of charges and countercharges, but the quality of the Swedish cavalry enabled them to overcome their initial reverse, and the Saxons were methodically eliminated.


In the centre the Saxon artillery forced some of the Swedish infantry to rout, after a sustained bombardment lasting several turns.


Russian allied infantry were redeployed to try and delay the victorious Swedish cavalry on the left.


Both armies were actually on a morale knife-edge. The Saxons had taken a few casualties and were close to breaking, but the handful of Swedish casualties were enough to put them in jeopardy as well. Looking to achieve a decisive finish I went on the attack, with my infantry surging forward from their defences, five units to the Swedish two.


Another view of the whole battle. On the right Gary's cavalry have been pushed well back and were trying to regroup. On the left Caesar's cavalry was also reorganising. In the centre the infantry prepared to engage.


Swedish infantry are at a disadvantage in a firefight, so Gary counter-attacked. Or tried to; one unit refused to advance, but the other hit the Saxon infantry opposite it hard. The Swedes are better in close combat, and all the needed to do was break one Saxon unit to force an army morale check and break them all.


As it was, the lost of a final Saxon cavalry unit on the left was the clincher. This forced that flank to test morale, and it failed, routing the whole wing. This , in turn, forced an army check, which they also failed. The Swedes had won.

The game was closer than it looked; because their army is so small in terms of number of units, Swedish cavalry losses had put both of their wings close to their breakpoint as well. Had the Saxons survived into their own turn, it could well have been the Swedes taking the army morale test. A close result is always good for any scenario.

So how was the game? Well, there's no denying that the basic mechanisms of Twilight of the Sun-king are excellent. They give a quick game which seems to encourage historical tactics and deployments with, theoretically, the minimum of mental effort. We had an enjoyable evening, really we did.

But ...

The rules themselves are a problem. Gary put it best when he said that he felt that the rules book we were working from was only part of the game, and that the rest of it was still in the authors' heads. We certainly have a list of questions (which I will try and put together and send to the helpful Yahoo Group this weekend), but they weren't on obscure or unlikely situations; they were issues with what you would call basic game-play and which should have been covered at the playtesting or editing stage. A lot of gamers talk about how the spirit of a game means that two sensible players should be able to fill in the gaps in a ladylike or gentlemanly way but, really, if you've paid for a game you shouldn't be having to do this for issues like 'What happens if I'm forced to retreat and there's an enemy unit in the area behind me?' or 'Can I wheel as part of a charge?'. We found having to look up such basics frustrating.

And, on a pedantic note, if misuse of apostrophes grates on you like fingernails on a blackboard, this isn't a set of rules you'll want to be reading.

In terms of what it sets out to do, Twilight scores 5/5 from me. In terms of how it's implemented, especially since it's essentially the third iteration of this set, I can't give it more than a 3/5.

Update: One useful thing I did do was give each unit a label. This obviously had things like whether it was pike-armed, Ga Pa or galloping horse on it, but it also included two number - the Morale Test modifier and the number of Morale fails required to break the unit. Traits such as Elite, Determined, Small, Wavering and Raw all affect these numbers, so having them factored together and attached to the unit saved a certain amount of factor checking and looking up information.
Related Posts Plugin for WordPress, Blogger...