
With a lovely new campaign map, and a simpler random army generator I thought that a quiet Saturday morning (the second in a row) would be a great time to try out my English Civil War campaign again. Once again I would use Dominion of Pike & Shot to fight the battles.
As stated in my previous post the new map adds a tenth area - North Midlands, and renames Midlands to South Midlands. The Royalists control South Midlands and South West at the start, whilst Parliament controls the South East and East Anglia.
To go with the nicer map I also switched to using wooden blocks (from a 1950s copy of Risk) as markers.
So here's the setup at the start of the 1642 turn.

In the 1642 turn the sequence is that two random uncontrolled areas are selected, and a battle fought for each. Years from 1643 onward use a different system.
With ten areas and four controlled at the start of the campaign this makes selection of the other two areas easy. I simply assigned each a number from 1-6, then rolled 2D6 until I got two unique results. The areas selected for the opening actions of the campaign were North Midlands and South.
The first battle was fought in the North Midlands.

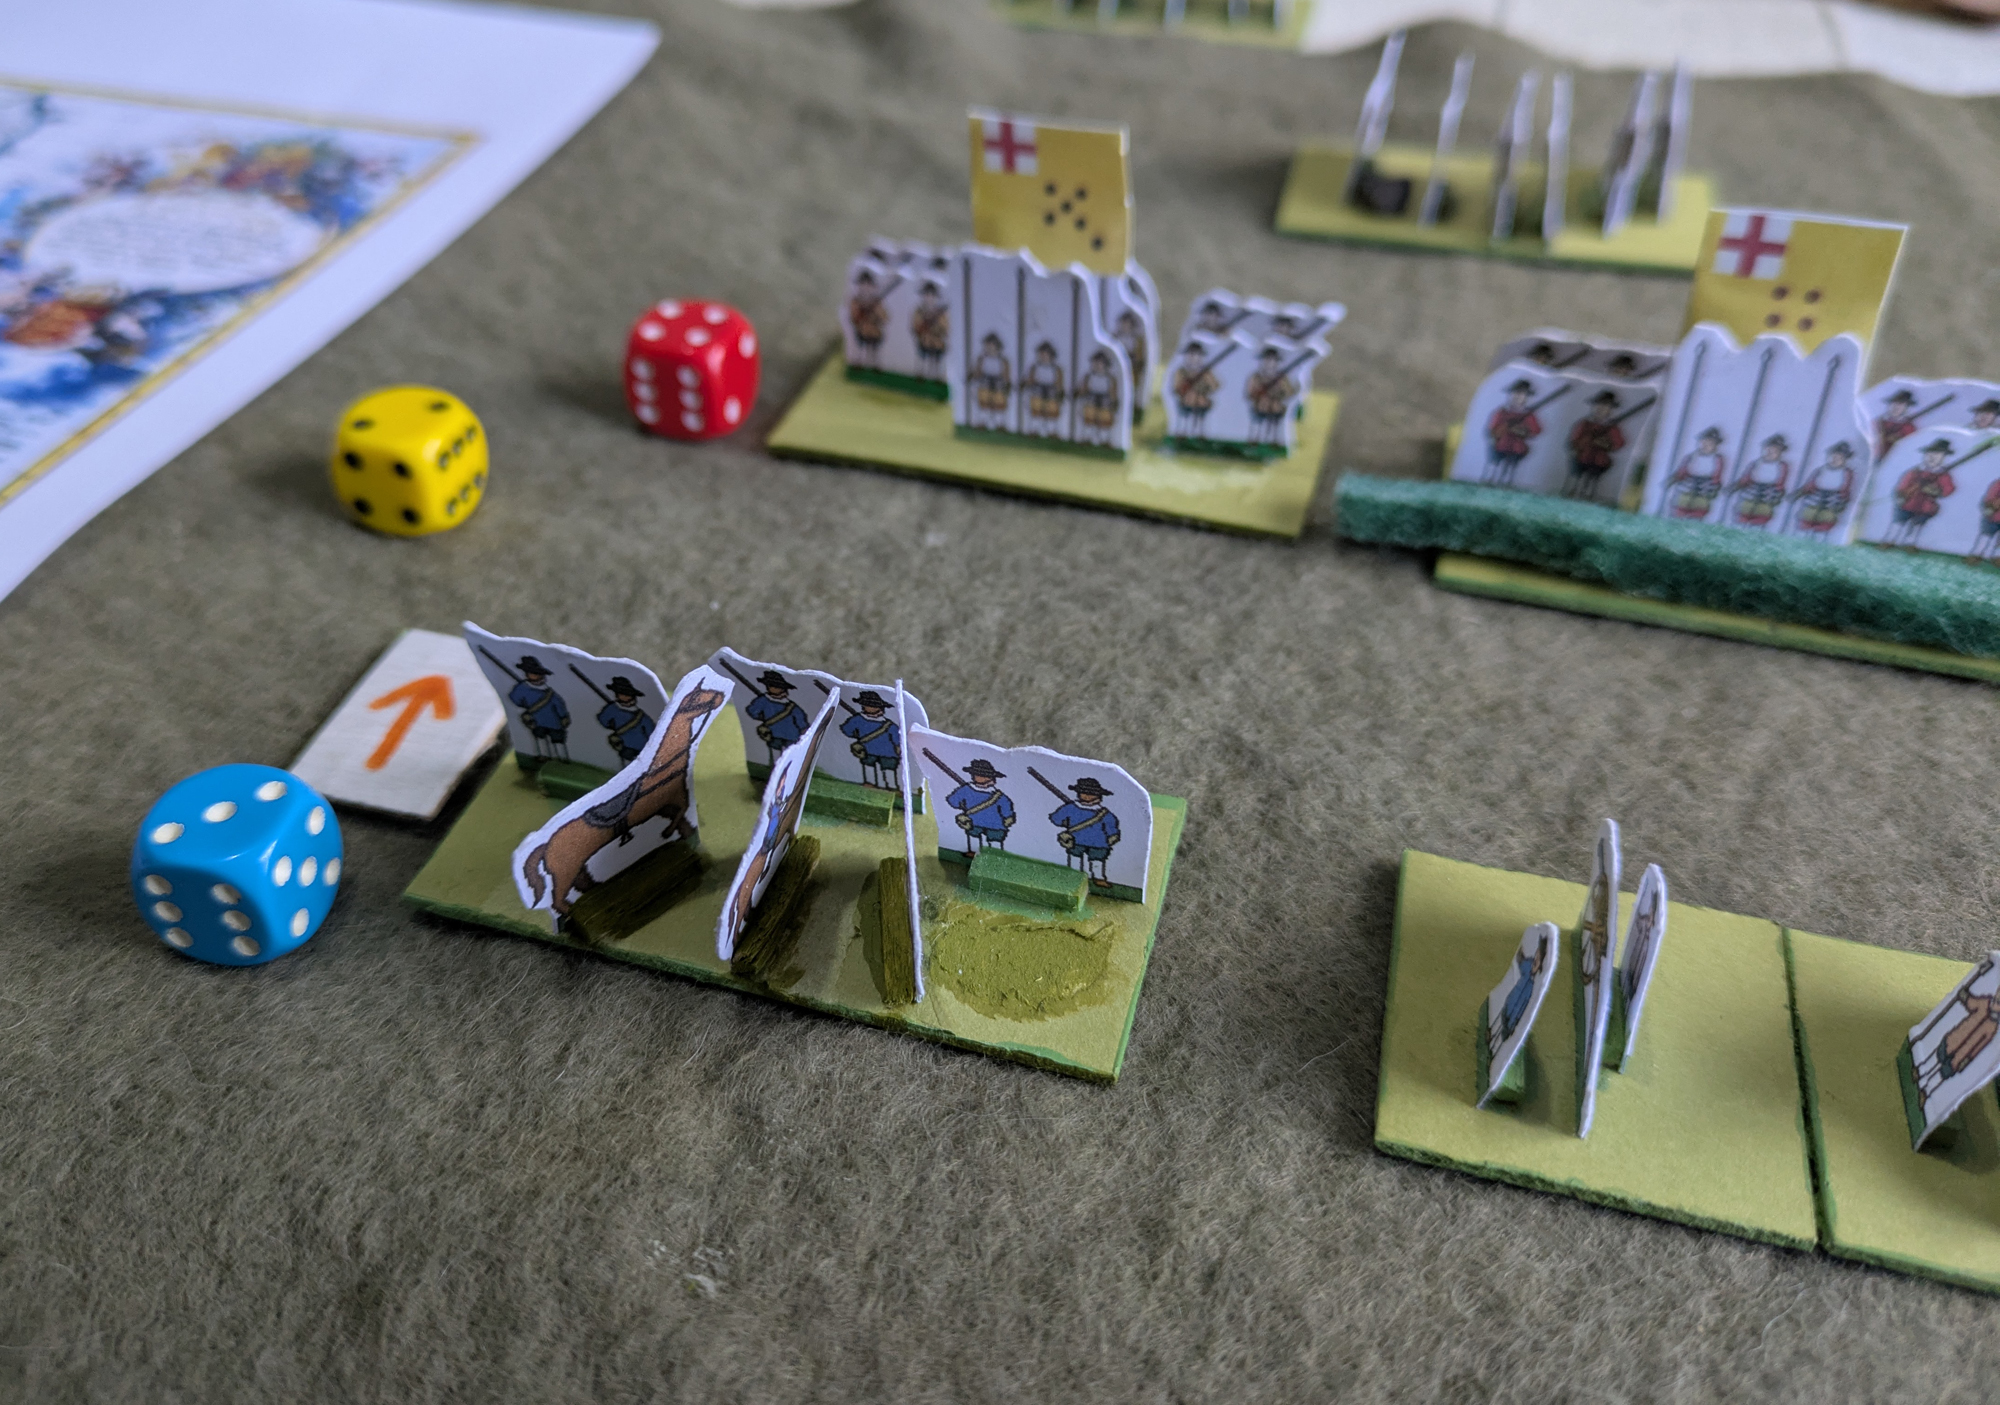
Game 1 - The Battle of Bingham
Royalist troops looking to occupy Nottingham were blocked near the village of Bingham by an equivalent Parliamentarian force.
Royalists (Attacker) - 2 x Horse, 1 x Melee Foot, 1 x Shot, 1 x Dragoons, 1 x Artillery
Parliament (Defender) - 2 x Horse, 1 x Armoured Horse, 1 x Missile Foot, 1 x Missile Foot in Defences
NB: All Melee and Missile Foot are assumed to be Mixed pike and shot. Pike are ordinary Melee Foot whilst Shot are ordinary Missile Foot. Dragoons are Missile Mounted. Horse are Melee Mounted.
NB: All Melee and Missile Foot are assumed to be Mixed pike and shot. Pike are ordinary Melee Foot whilst Shot are ordinary Missile Foot. Dragoons are Missile Mounted. Horse are Melee Mounted.
All battle pictures are taken from behind the attacker. Left and Right are always from the attacker's point of view. The yellow die shows the turn number whilst the red and blue dice show combat rolls for parliament and the Royalists respectively. The arrow shows who is attacking.
Parliament deployed horse to the left and right, with that on the left being cuirassiers. In the centre some pike and shot defended a series of enclosures. The Royalists opposed the cuirsasiers with dragoons, the other horse with horse and artillery in the centre.
Parliament deployed horse to the left and right, with that on the left being cuirassiers. In the centre some pike and shot defended a series of enclosures. The Royalists opposed the cuirsasiers with dragoons, the other horse with horse and artillery in the centre.
The pre-battle artillery bombardment for both sides was ineffective.

Turn 1 - Royalists chose the right flank with Horse against Horse. The Royalists won and Parliament moved up more Horse from their reserve.

Parliament responded on the left flank as the cuirassiers advanced on the dragoons. But they were shot down. Parliament moved their missile foot from the reserve.

Already two units down, Parliament attempted to rally the cuirassiers, and succeeded.
Turn 2 - The Royalists activated the Dragoons on their left. The exchange of fire with the Parliamentarian foot was inconclusive.
Parliament's foot moved through the enclosures under fire from the enemy guns.

Turn 3 - The Royalists kept up the artillery fire in the centre and drove off the Parliamentarian foot. Parliament moved up the newly rallied cuirassiers to cover the retreat. I forgot to take a picture of this.
Parliament's horse kept up the attack on the right, with the horse of both sides becoming bogged down in a swirling melee. (both units were defeated). The Royalists moved up horse from their reserve, swinging the fight in their favour and driving off the Parliamentarians.
The Royalists rolled to rally their lost horse and got it back.

Turn 4 - Firmly in control on the right the Royalists moved to outflank Parliament's centre, which held.

Parliament's foot advanced on the left attempting to drive back the Royalist dragoons, but simply got caught in a firefight.

Turn 5 - The Royalists kept up the pressure on the right and Parliament's army broke.

So the Royalist victory meant that they soon controlled Nottingham and therefore the North Midlands area.

The second action of the year took place in the South.

Game 2 - The Battle of Kingsclere
Parliamentarian forces under Sir Thomas Fairfax were moving through Basingstoke towards Salisbury. The Royalist army under Ralph Hopton marched quickly from Newbury and the two forces met at Kingsclere.
The Royalists were attacking again
Royalists - 2 x Horse, 1 x Pike, 1 x Missile Foot, 1 x Dragoon, 1 x Artillery
Parliament - 2 x Horse, 3 x Missile Foot, 1 x Dragoon
Fairfax deployed Horse on both wings and foot in the centre in the approved style. Hopton deployed his guns to the fore with horse on their left and dragoons on the right.
(Note that one assumption of the Dominion series is that troops represent a dominant type in that zone. So the dragoons can be assumed to be supported by small numbers of horse whilst the guns probably have the backing of some foot.)

One again the pre-battle artillery was ineffective.
Turn 1 - The Royalists advanced their dragoons and opened fire on Parliament's horse. The horse responded by charging down the dragoons. The Royalists moved up horse from their reserve to counter this.

Parliament's horse kept up the pressure and a series of inconclusive charges and counter-charges took place.

Turn 2 - The Royalist artillery kept up a steady fire on the Parliamentarian centre, causing the foot there to fall back. Fairfax moved up more foot to replace them.

However a continued advance by the foot was met by more artillery fire, and was also driven back. Fairfax was forced to commit his final foot reserves to the centre, and things were not looking good for the Parliamentarian army
(Two lucky rolls by the Royalist artillery saw them destroy two Parliamentarian foot units)
(Two lucky rolls by the Royalist artillery saw them destroy two Parliamentarian foot units)
Parliament tried to rally one of the lost foot units but failed.

Turn 3 - The Royalists kept up the pressure in the centre, but the Parliamentarian foot held.

Fairfax personally led a charge that finally drove off the Royalist guns. The Royalists moved up their Pike unit as a replacement.

Turn 4 - The Royalist pike counter-attacked in the centre and routed Parliament's foot. This left dragoons covering the shattered Parliamentarian centre.

The dragoons successfully halted the advance of the pike and things stabilised in the centre.
(I made a mistake here; with a roll of 4 the mounted missile dragoons would have destroyed the Royalist pike since they get a +1 vs pure melee infantry. However it wouldn't have affected the result of the battle.)

Turn 5 - The Royalists attacked on the left, and their horse quickly drove off the Parliamentarian horse. With no reserves Parliament now had an exposed flank.

Parliament responded by redoubling their efforts on the other flank, but the horse of both sides simply became too exhausted to continue.

With only the dragoons left in play, Fairfax's army was forced to withdraw,

A second Royalist victory meant that they now controlled the South as well.

So at the end of 1642 the Royalists are looking strong, with plenty of scope for expanding control into the north, or for striking at the Parliamentarian forces in the east.
To be continued ...


