
I used my modified version of the Pike and Shot rules, with some additions:
(i) I added in troop quality. This is pretty simple; all units fight the same, but Raw units can only take 4 hits, whilst Elite can take 6. The default for units is Trained, taking 5 hits.
(ii) Added in a new phase. At the start of each player's turn is a Command Phase. During this the player will firstly test their Army Morale to see if it continues fighting. If it does, the game is over. If it doesn't then their commander can attempt a number of Command Actions. Both of these are outlined below.
Army Morale - If, at the start of a player's turn, their army has lost half or more of its units, roll a dice. The army needs a 4 or better in order to continue fighting.
Command Actions - Each army has a commander, who can influence the units under his control. He may remove hits from units and/or change their ammunition status. The player picks a unit and rolls a D6. on a 4+ the commander can do one of the following:
(i) Remove one hit from the unit. However the last hit cannot be removed; one a unit has taken hits it can never be returned to full strength.
(ii) Change the status of the unit from out of ammunition to being able to fire, or vice versa.
If the roll fails then the Command Phase is over. If it succeeds then the player may roll again, for the same or a different unit.
If the unit is in close combat and the player rolls an unmodified '1', then the commander has been killed, wounded or captured. The current Command Phase ends. In the next Command Phase the player cannot make any Command Actions, but receives a new commander. This replacement makes all Command Action rolls at -1. If the replacement is lost in a subsequent turn then their replacement makes rolls at -2, and so on.
A Good commander gets +1 to their Command Action roll. A Poor commander gets -1 to their Command Action rolls. Regardless of modifiers a roll of '6' is always a success.
Like Jonathan, I based my game on this scenario for a set of rules called 'Warr Without An Enemie'. I simplified the map, losing the hedges as I think the granularity of the OHW rules doesn't really merit them. The two forces were:
Royalist
Earl of Northampton (+1 commander)
Earl of Northampton's Foot - Pike and Shot (Trained) x 1
Sir William Saville's Dragoons (Dismounted) - Shot (Raw) x 1
Wilmot's and Carnarvon's Horse - Gallopers (Trained) x 1
Legge's and Clarke's Horse - Gallopers (Raw) x 1
Compton's and Northampton's Horse - Gallopers (Elite) x 1
Saville's and Middleton's Horse - Gallopers (Raw) x 1
Artillery (Raw) x 1
Total - 7 units
The artillery was considered a small unit. It could take the same hits as a regular unit, but any unit taking casualties from it got a save roll.
Parliamentarian
Lord Brooke (+0 commander)
Colonel John Hampden's Foot - Pike and Shot (Trained ) x 2
Lord Brooke's Foot - Pike and Shot (Raw) x 1
Colonel Denzil Holles' Foot - Pike and Shot (Raw) x 1
Right Wing Cavalry - Trotters (Raw) x 1
Left Wing Cavalry - Trotters (Raw) x 1
Artillery x 1
Total - 7 units
I arrayed the armies roughly according to the historical deployments. The observant will notice that Lord Brooke forgot to turn up at the beginning.

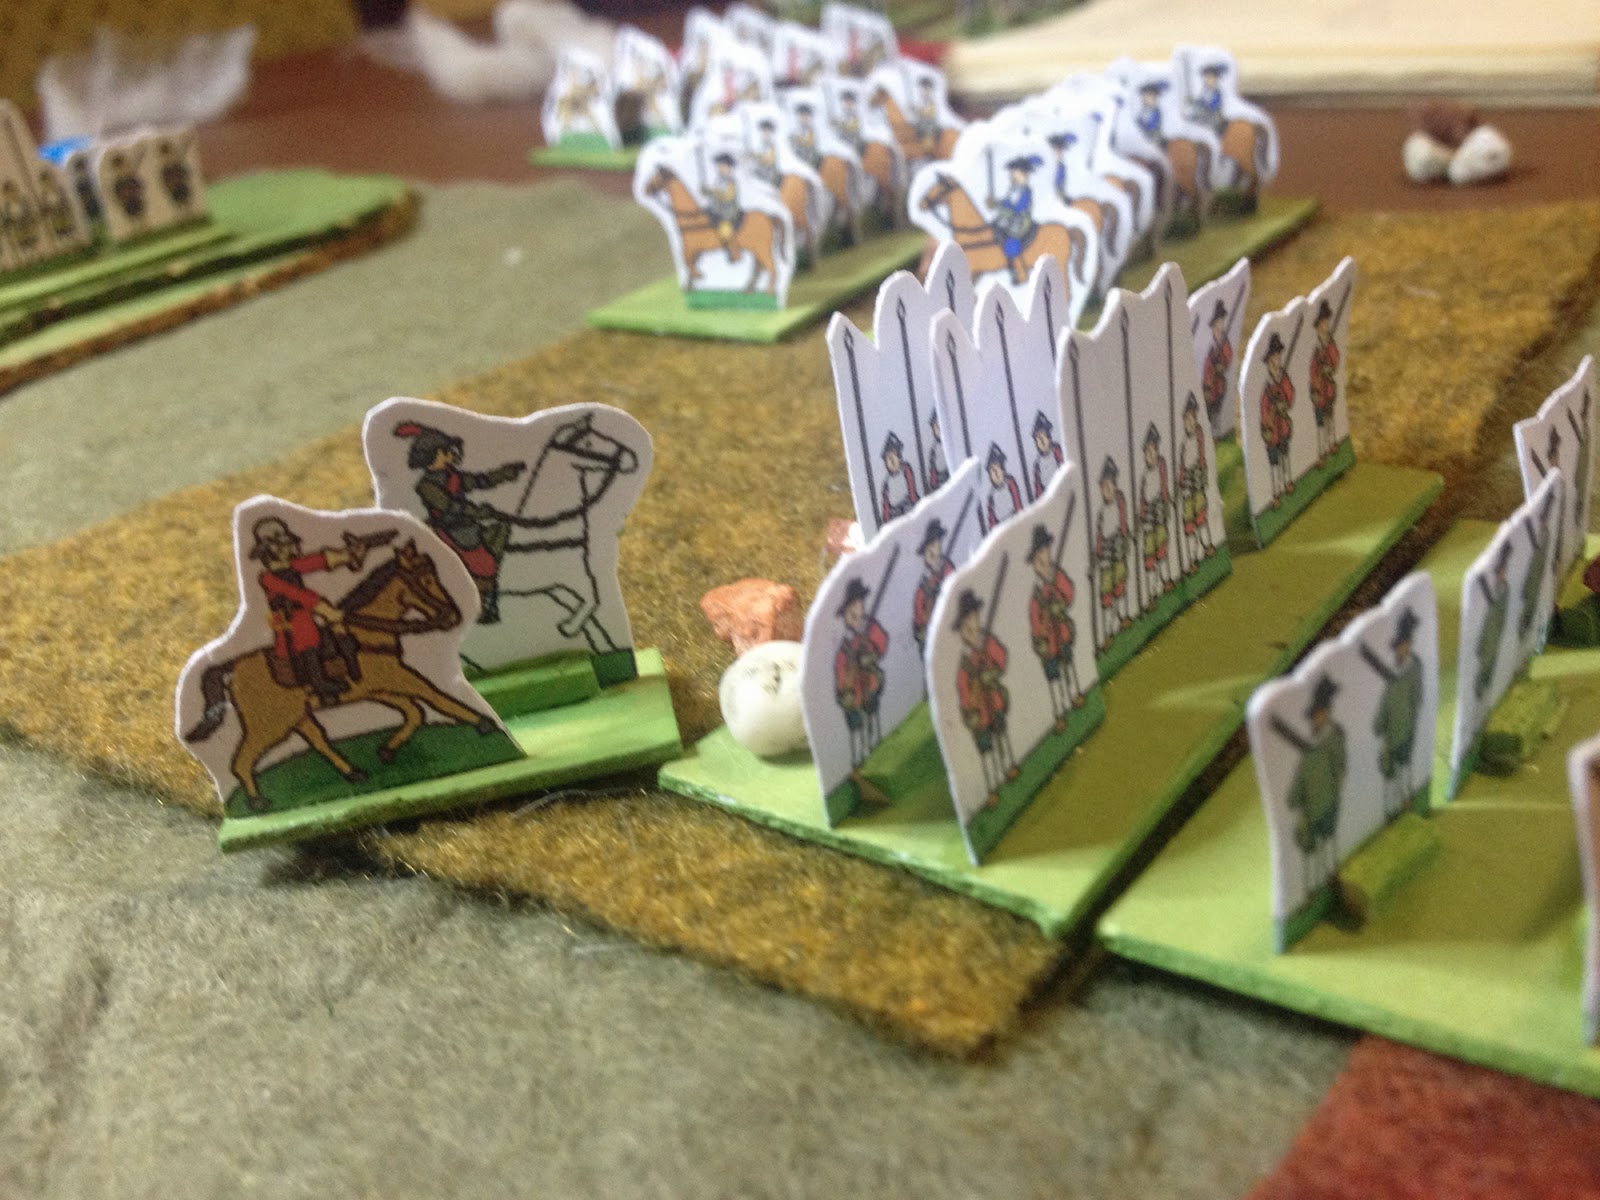
The Royalist forces - gallopers on each flank, with the raw units supporting the better ones, and the meagre assemblage of foot and artillery in the centre.

The Parliamentarian lines; trotters on the flanks, the better infantry to the fore and the poorer infantry told to stay out of trouble at the back. Where's Lord Brooke? Still missing.

Whilst the scenario dictates that victory is achieved by breaking the enemy force, it also comments that if the Royalists are still on the field at the end of the day (which I set at the traditional OHW 15 turns) they could claim a moral victory. Still leaderless, the Parliamentarians decided to soften up the Royalists a little with artillery fire.

Lord Brooke finally appeared, and wondered why no-one was advancing after four turns of relatively ineffective firing. It was obvious that the Royalists could afford to sit tight, so Brooke ordered an advance off the hill.

The Royalist horse advanced to meet their opposite numbers.

The battle develops.

Wilmot's and Carnarvon's Horse charged home into the Parliamentarian cavalry.

On the other flank Compton's and Northampton's Horse also charged home, but made heavy work of their opponents. Brooke shifted his two raw infantry regiments to cover his flanks. In the centre Colonel John Hampden's Foot advanced. A couple of early volleys had left them out of ammunition, so charging home was now their only option.

First blood to Lord Northampton's troops; the horse on the Parliamentarian right flank broke.

Both commanders inspired their troops in the centre, but Lord Northampton had the edge there, keeping his Foot regiment under tight control.

Lord Brooke's foot fired a volley at the victorious Royalist horse, and it scattered.

On the Royalist right their horse finally drove off their Parliamentarian opposite numbers

The Parliamentarian foot was struggling to overcome Sir William Saville's Dragoons. Lord Brooke rode over to inspire them, and was cut down by an enterprising marksman.
The artillery exchanged fire to little effect.

Meanwhile Saville's and Middleton's Horse wheeled into the flank of Colonel John Hampden's Foot. Things were looking bad for them

Only one hit was needed to rout the Parliamentarian foot. The horse got to roll three dice, doubled to six for the flank attack. A 4+ scored a hit ...

... but because the foot were pike-armed, they could save each hit on a 4+. And did!

On the Royalist right their horse charged Colonel Denzil Holles' Foot.

However Compton's and Northampton's Horse were still disordered from fighting the Parliamentarian cavalry, and scattered.

The Royalist dragoons also broke. The Royalists had now lost three units, to the Parliamentarians two. Four losses would see the army having to test its morale.

The Royalist artillery broke one unit of Parliamentarian foot ...

... whilst on the other flank another unit finally broke.

As the Royalist horse charged home on the hill ...

... The Parliamentarian force retreated, its morale broken

Parliament lost both cavalry units and two units of foot. The Royalists lost two horse and the dragoons.
This was a fun little scenario, and the rules for quality and leadership worked OK. I might tweak the leader rules a little; losing your commander for a whole turn is quite bad, so maybe just reducing their ability by one each time they fail the risk test is easier. I think Parliament has a tough job in this battle, although maybe forcing the Royalist horse to engage their foot first might be the answer, using the weaker Parliamentarian horse to cover it. Maybe a replay is in order ...
Thanks for the blog plug.
ReplyDeleteSay, do your modifications to OHW include rolling multiple dice with saving throws? That is not part of the original rules.
I don't often see gaming with paper miniatures. Nifty idea!
I like tinkering with rules, and started modifying the OHW ones pretty much from the word go. I've outlined my changes elsewhere, but I'm happy to repeat them here :)
DeleteInstead of 1D6-2, 1D6 and 1D6+2, I roll 1D6, 2D6 and 3D6 respectively. Each dice which scores 4 or more is a hit. Units take five hits. Anything which doubles hits merely doubles the number of dice you roll. Anything which halves hits allows the target a save - each hit is saved on a 4+.
So, in the example above, the horse would normally roll 1D6+2, doubling the score for performing a flank attack and then halving it because they are attacking pike-armed infantry, thus ensuring 3-8 hits. With my changes they roll 3D6, doubled to 6D6, allowing the possibility of 0-6 hits overall. The target could save some, none or all of them.
My changes make the combat less predictable whilst, on average, keeping the rate of attrition about the same. It still pays to gang up when shooting.
You'll play a scenario with the rules of OHW WW2? I would be curious to know what you think
ReplyDeleteIf I acquire some WWII stuff, then maybe.
Delete