
I was keen to try another game with my ECW paper figures today, so decided to move on to the next engagement in Midsomer between the Royalist forces of Lord Standing and his Parliamentarian opponent, Sir Thomas Barnaby.
Like a good gamer, I randomly rolled for a scenario in the One Hour Wargames book. And I got Number 14 which is, of course, the next scenario I need to play in my attempt to play through and report all of the scenarios in order. So I got to kill two birds with one stone.
Static Defence sees one side tasked with holding two objectives, a village and a hill. The other side must take one of them. Whilst both sides are roughly equal in strength, the defender is limited in that both objectives must be held; at least two units must be within a certain distance of each at all times. Thus they are prevented from shifting all of their strength from one objective in order to defend against an attack on the other. The attacker must decide whether to try and attack both objectives, or concentrate on one. A large wood in the centre of the playing area means that shifting the focus of the attack is not easy once the decision is made.
The Battle of Halford Hill
After the Royalist victory at Midsomer Barrow, both armies rested and regrouped for the winter. Causton declared for the Crown, so Sir Thomas Barnaby determined to take it under siege. To this end, in the closing weeks of January, he started to move up a siege train along the main road to the town. Lord Standing's forces were to the south of the town, and the Royalist commander determined that he could intercept and capture the siege train by a rapid move north, through the village of Halford. Parliamentary troops moved to block this advance, but Halford offered two means of threatening the road to Causton, one along the road through the village itself and the other by taking the dominant Halford Hill. Sir Thomas could not afford to lose either position, so was forced to split his forces.
For this game I adjusted the way horse was allocated to the armies. There were still two types - gallopers and trotters - but each is now considered the primary type for one of the armies. Parliament's primary type is trotters, whilst the Royalists tend towards gallopers. All units of gallopers or trotters now rolled are considered Horse. The first Horse unit the army takes must be its primary type. The player then rolls a D6 for each of the others; on a 1-4 it is the primary type, on a 5-6 the other type.
As you can tell from the 'historical background' above Parliament ended up as the defender, with the Royalists attacking. Sir Thomas got much the same army as before - three regiments of pike and shot, and two trotters. But instead of gallopers he got a unit of shot. Lord Standing had exactly the same army as in the previous engagement; four units of pike and shot, a unit of shot and some dashing gallopers.
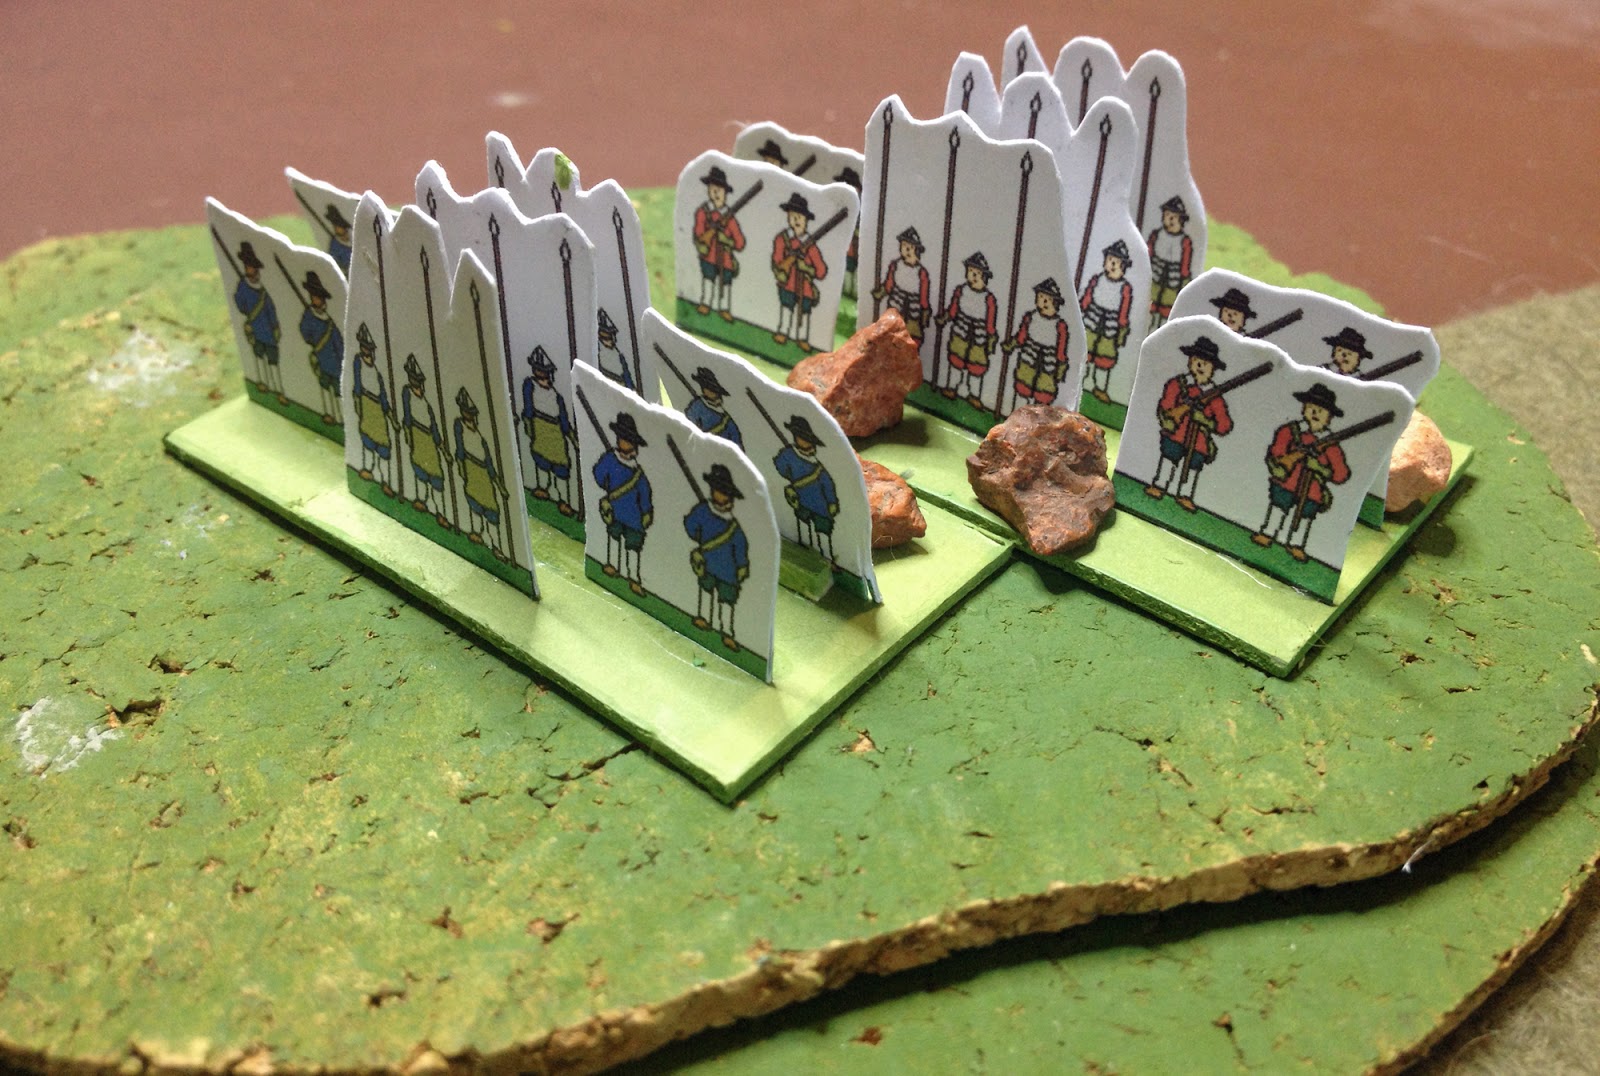
Here's an overview of the battlefield, with the village of Halford on the right and Halford hill to the left. The Parliamentarian defenders are split between both. Lord Standing had made his plans, and was looking to make a rapid assault on Halford Hill, ignoring the village.

The defenders of Halford - one regiment of pike and shot, supported by more shot, with cavalry in reserve.

On Halford Hill were two regiments of pike and shot, plus supporting cavalry.

Lord Standing had decided that the village offered too good a defence against both musketry and a simple charge, so it was worth going the extra distance and assaulting the more open hill, hoping to weaken the defenders with shooting before making the final attack. he massed his infantry in two columns, aimed straight at the hill. His shot was tasked with taking the woods so the flanks of the infantry were covered. The cavalry was ordered to cover the flanks, or try and work into the rear of the defenders if an opportunity presented itself.

The Parliamentarian shot moved into the wood as their Royalist counterparts advanced, and a firefight took place among the trees. Meanwhile the Royalist cavalry attempted a dash around the woods and past the village, hoping to survive the fire it would take and tie up the Sir Thomas's cavalry.

It was a bold move, but they took hits.

The Royalist columns marched steadily towards the hill.

The two sides' cavalry clashed on the outskirts of Halford. Weakened my musketry the Royalist horse failed to make much impression and quickly fled.

The infantry were now within range of each other.

One regiment mover to cover the flanks of the others as casualties started to mount on both sides. The Parliamentarian shot moved through the woods to provide support to its cavalry.

A push of pike ensued on the hill.

An overview of the battle. The Royalists were attacking strongly, but their lead infantry was beginning to look weak in places. Sir Thomas had withdrawn some weakened cavalry back towards the village, allowing him to bring up a fresher unit.

As casualties mounted, units fled - one of the Parliamentarian regiments on the hill, and the Royalist regiment covering against the cavalry.

The Royalist infantry formed a line on the ridge, whilst the push of pike continued.

In an attempt to break the stalemate on the hill the Parliamentarian horse charged the flank of a Royalist infantry regiment.

It broke.

The Royalists were in a strong attacking position though. Sir Thomas's horse now atacked the Royalist shot, but became bogged down in a fight they should have easily won. A regiment of pike and shot moved up in support. Meanwhile on Halford Hill ...

... another melee ensued, and the Parliamentarian infantry broke.
The Royalists now controlled the hill. Sir Thomas reorganised his defences, pulling back the shot from the woods to the village and bringing up both regiments of horse.

One regiment made a brave charge up the ridge into the Royalist infantry line. Against the odds it survived to attack again and again, weakening the infantry but unable to inflict the last hit needed to rout it.

The other regiment of horse routed the Royalist shot, and also attacked up the hill. But these were the last turns of the game. Night was falling and the Royalists were in a commanding position.

One more charge failed to break the Royalist line. The attacks petered out as darkness fell, and Sir Thomas withdrew his troops towards the village.

The village defenders had taken little part in the battle

Lord Standing now controlled the ridge and therefore the road to Causton, thus forcing Sir Thomas to reconsider his plans to besiege the town.
This was an exciting game, although the Royalists dominated it for most of the latter half. The final Parliamentarian cavalry charges could have left the hill contested, however, and forced a draw. But luck was not with Sir Thomas. The scenario offers an interesting challenge for the defender, as they are forced to shift troops back and forth between the objectives in order to keep both of them covered. One missed opportunity was maybe bringing the pike and shot out out of the village, whilst pulling back the shot and the weaker cavalry unit. However the slow movement of the infantry means that the need for this has to be anticipated a couple of moves in advance.
The next scenario in the book sees a fortified defence and will, I hope, feature the return of the GNW Risk figures and the debut of my redoubts.
Follow the rest of the scenario refights HERE
No comments:
Post a Comment