

One of these is Price's Missouri Raid of late 1864. This is probably the last major campaign of the war in the theatre, and came out of an attempt to fly the Confederate flag in Missouri, drumming up support from Confederate sympathisers there and generally making life difficult for the Union troops there, mostly garrison units.
I thought that it would be interesting to play out a linear campaign based around the raid and using scenarios from One Hour Wargames. This is what I came up with.
The Campaign
I would use my 'See The Elephant' rules on an 8 x 8 square-grid.
The campaign consists of the following areas - Arkansas Border, Missouri, Kansas Border, Kansas. The Confederates start in the Arkansas Border space. If they win a battle then they move into the next space along. If they lose one they move one space back, unless they are already in the Arkansas Border space in which case they stay where they are, but the loss is recorded.
The Confederates win if they either win the sixth battle (see below), or they make it to the Kansas space (this space assumes that they cross the border into Kansas creating a nasty political situation for the Union and achieving maximum support for their cause in Missouri).
The Union win if they win they win the final battle (see below) or the Confederates lose three battles (not necessarily consecutively) in the Arkansas Border space.
Both sides start with four advantages. I will probably detail these in a later post, but basically they are small bonuses to combat. movement or activation which a side can use in a battle. A side can play one advantage per battle, except in the final battle when they can play two. After the battle both sides roll to see if they recover the advantage they played, with the loser getting it back on a 1-2 and the winner on a 1-4. If you don't get the advantage back after the battle in which you played it, it's lost for good.
I chose six scenarios from 'One Hour Wargames' to be the main battles, and one scenario to be the final battle. The campaign consists of no more than six battles - if neither side had won after five battles had been fought, then the final battle would be played. The first five scenarios were chosen randomly as required from the list I selected and I opted not to repeat them. Having six meant that there was still a choice for the fifth battle.
Once a scenario is chosen, the Attacker chooses which of the two sides they will play. The Union then roll to see if the Confederates are facing a Garrison force, or The Army of the Border. Roll a D6, and add the current scenario number. On a roll of 7+ the Union get the Army of the Border, otherwise they get a Garrison force.
In any given campaign turn, one side is the Attacker. This Confederates start as the Attacker, but in subsequent turns the Attacker is the side which won the previous battle. In the event that the battle was a draw, dice for who becomes the Attacker.
I use the tables in 'One Hour Wargames' to generate the armies, but with a different mix of troops.
The Confederates have Cavalry as their main troop type, with the secondary types being Artillery, Veteran Cavalry and Green Infantry. However if they rolled a second Artillery unit, they got Cavalry instead.
The Union have two different armies as described above.
A Garrison has Green Infantry as its main type, with the secondary types being Artillery, Infantry and Cavalry
The Army of the Border gets Cavalry as its main type, with Artillery, Repeater-Armed cavalry and Green Infantry (representing Kansas Home Guard) as its secondary types.
All of this takes less time and effort to remember than it does to read.
On with a report of the campaign!
The Confederates start in the Arkansas Border space. The first scenario selected was '2 - Pitched Battle'.

The Battle of Yellowtown
Advancing on a key crossroads, the Price's force found local garrison units already moving to take possession.

He sent half of his force to seize the heights on his right, then attacked the crossroads.

His troops swept all before them, the green Union troops hardly standing to fight at all.
Taking the crossroads his cavalry rolled up the Union right and swept along their line.

The battle ended in a convincing Confederate victory, and they moved into the Missouri space.
The next scenario generated was '4 - Take The High Ground'. Once again the Union had a Garrison force, so the Confederates opted to attack, hoping to take the hill that was the objective before the Union could bring up their rather half-hearted reinforcements.
The Battle of Essex Vale
The Union commander in Missouri sought to hold the Confederate advance on a strategic hill at Essex Vale whilst he brought up local militia units in support. The Confederates attacked in strength.

The Union troops on the hill put up an heroic defence; these were regular troops rather than the wavering militia of the previous battle.

However the reinforcements were militia, and were easily held off and prevented from reaching the hill.

A final Confederate push took the heights.

Eventually the Union militia forced its way to the hill, but the Confederates easily held them off until nightfall.

The Confederates were now on the Kansas Border. One more victory like the previous two would see them in a commanding position strategically and politically.
The next scenario generated was '8 - Melee', which was similar to the previous one except that the reinforcements for both sides were more staggered in their arrival. This time the Confederates opted to defend. And, with the whole campaign at stake, the Union once again got Garrison units.
The Battle of Union Creek
With support in Missouri very much swinging their way after their string of victories, Price's cavalry looked at consolidating their position before crossing into Kansas. An advance force seized a key ridge at Union Creek, whilst the rest of the army brought up the supply trains and raw recruits that were flocking to their flags.

Union troops advanced along the road on the Confederate left.

As more and more troops arrived on both sides, a series of actions broke out along the length of the road. The Union positioned their artillery near a small farm, allowing them to cover not only the arrival of the Confederate reinforcements, but also any counter-attacks off the hill. Their cavalry pushed well to the fore, and for several turns stopped the advance of the Confederate reinforcements in their tracks.

In the meantime, enthusiastic but inexperienced Union infantry worked they way towards the ridge.

Numbers made up for inexperience.

Confederate recruits tried to come up in support, but were halted by artillery fire.

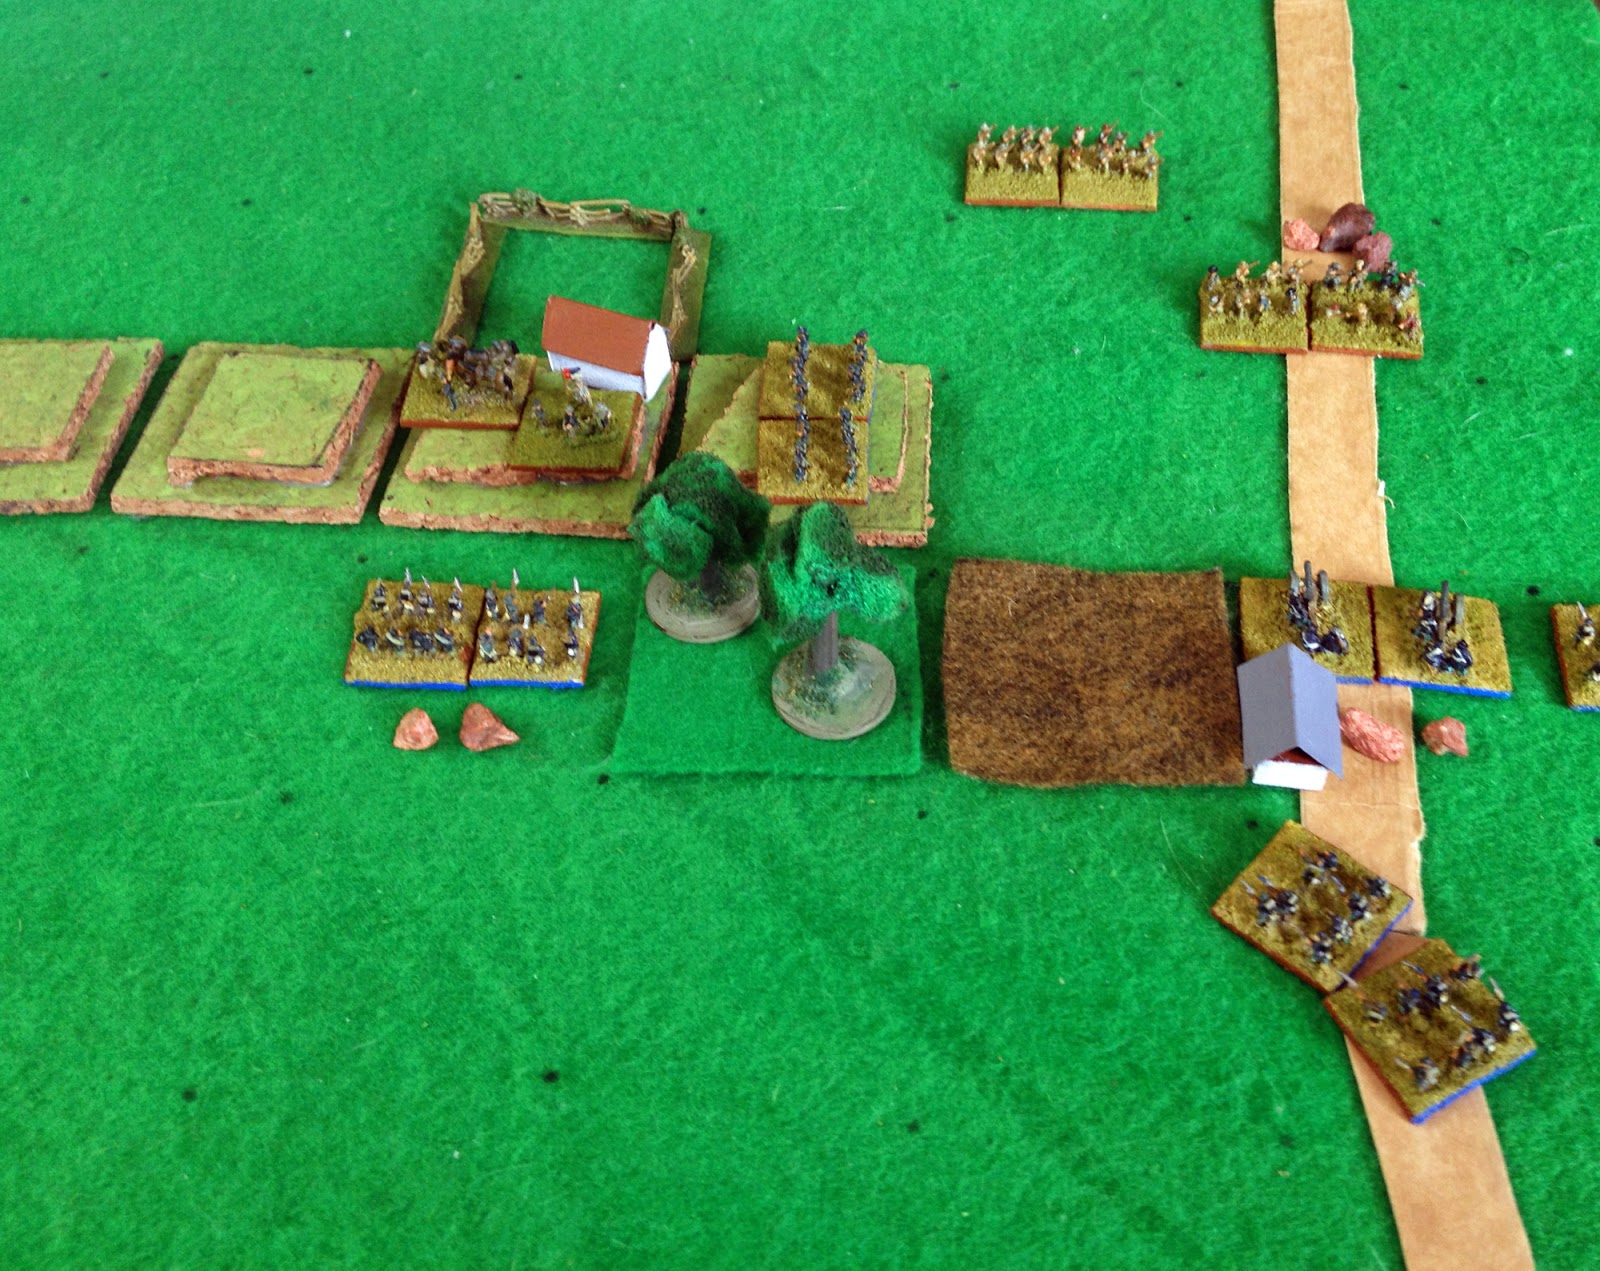
The Union troops drove along the ridge, and the Confederates were forced to withdraw.

The Confederates retreated to the Missouri space, and the Union were now the attacker. Unfortunately they once again got a Garrison force. The scenario was '16 - Advance Guard'.
The Battle of Liberty's Knob
The victorious Union army pressed on in pursuit of Price's retreating Confederates. But as their advanced guard approached the small settlement of Liberty's Knob they found that the Confederates were also back on the offensive, looking to loot the local area for supplies.
Union troops entered the town, to find Confederates forming up on the other side.

The Confederates formed a strong line, and the cover of the town was little use against their well-served artillery.

The Union troops pulled back from the town, covering it with their own cannon as well in order to prevent the Confederates from occupying it. Fighting broke out on both sides of the town as each side sought to outflank the other.

Confederate experience told, however, and the Union troops were routed. With supplies secured. the Confederates went back onto the offensive, moving back to the Kansas Border space.
Finally the Union got to use the better-quality Army of the Border, as General Blunt finally realised that Kansas was under threat. The scenario was '18 - Counterattack'.
The Battle of King's Church
Blunt's troops came upon a small Confederate force guarding a key river crossing at King's Church. Cautiously he sent his troops into the attack. What he hadn't realised, however, is that the main Confederate force was moving up on both of his flanks, ready to cross the river via fords that his troops weren't covering.
Blunt's troops launched a cautious attack on the main river crossing.

The Confederates appeared in strength on both of his flanks, advancing rapidly across the river.

Their advance was rapid, and the Union troops were completely wrong-footed. They put up as much of a fight as they could, but were forced back from the town, giving the Confederates another victory.

The Confederates advanced into Kansas to win the campaign.

To some extent they won because they were only once matched against troops that they didn't outclass, but the campaign gave five exciting battles, and took just under four hours to play to a finish.
The advantages each side had didn't really have much effect, but they are just something I included so that decisions taken in one battle have an effect on later ones. Do you risk using your advantages now, or save them for later battles, especially the sixth where you can use two of them? However the fact that you got to choose which side to play in a particular scenario seemed as useful a reward for winning a battle as any, so there was an small element of continuity and decision.
I think that this an excellent example of the sort of mini-campaign that can be fought out in a day. I like the way you have taken scenarios from 'One Hour Wargames', developed the book's army generation system, and added a linear campaign track. They seem to work very well together ... and I look forward to seeing further 'campaigns in a day'.
ReplyDeleteAll the best,
Bob
Great stuff. I have to come back for a full read but I live on these battlefields so I am really excited to finish reading these perhaps tomorrow...Cheers,
ReplyDeleteKen
Penny Whistle blogger
I made up my battlefields (and teh names), but I see from your other post that you actually work on one of the real battlefields. Which is pretty awesome.
DeleteOne of the things about moving to Australia from the UK is that I now longer have battlefields on my doorstep. Australia is singularly short on battlefields.
I have replayed the Battle of Boonville (a very early land battle in Missouri) in 54mm and toured that battlefield in Missouri. I love all of the Western theater stuff. That is usually how I judged an ACW history book on how they handle the far theaters of the war. If you look into my blog you will see the Battle of Wilson's Creek. I went to the reenactment for that and have toured that battlefield numerous times. Once a friend and I were invited to set up the Wilson's Creek battlefield game for the boy scouts on the actual battlefield at the park. That was a rush!
ReplyDeleteCheers,
Ken