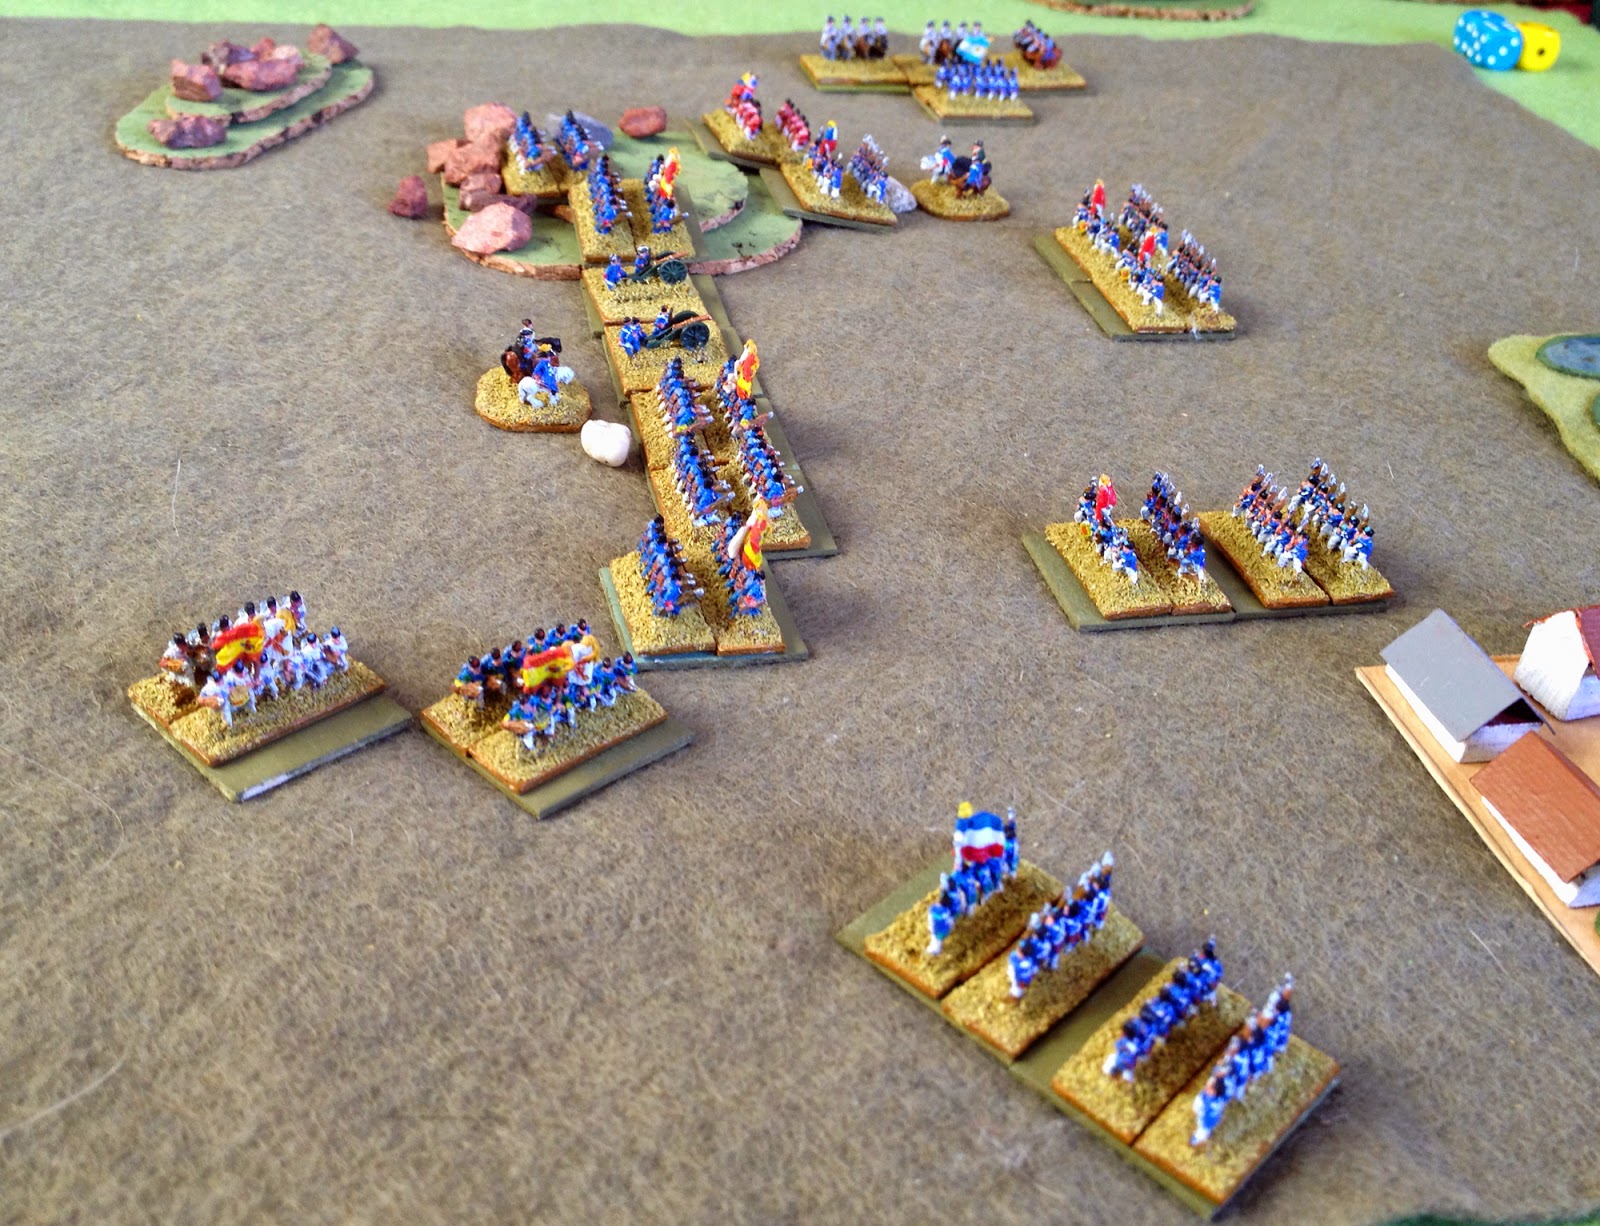
Last night we replayed Caesar's Oudenarde scenario for Maurice. When we did it last year the French were cut down by the Allied lethal volleys after a sluggish start. Caesar had tweaked the scenario such that the French could attack from the off, but the Allies had to hang on until reinforcements arrived. This gave the French an advantage in numbers but at the risk of enemy troops appearing in inconvenient places if they didn't win quickly.
Ralph and I took the Allies (with Dave standing in for Ralph after he left). Gary and John took the French. Caesar held the coats and read the rules that no-one else had bothered reading. Troops were a mix of WSS, GNW, SYW and ImagiNations 10mm, mostly from John's, Caesar's and my own collections. We have to club together for these bigger battles and use what we have.
Here's the deployment from behind the Allied lines. I had Malborough on the left. Ralph as Eugene was on the right.
Marlborough's force looked a little sparse compared to that of the French facing them. Still, we knew that our Lethal Volleys would deal with them
Ralph was faced by troops under the Duke of Burgundy, who was apparently a Dolphin.
This is Eyne. It was the objective. Ralph garrisoned it. They spent the battle reading the paper and drinking tea.
As seems to be the norm with our Maurice games these days, John swung infantry around my left flank. Elite infantry. Don't worry, I thought, my Lethal Volleys will deal with them.
They didn't. Marlborough's troops, who obviously weren't proper English ones, couldn't hit a barn door at two base-widths.
Gary set French troops around the other flank. Ralph garrisoned another town.
The infantry I sent to deal with John's flank march fled after being charged, but John's elite French infantry was looking shaky. So I sent i the cavalry. The cavalry didn't immediately die, so I can basically class that as a win. In fact after destroying one unit I was able to withdraw both units to safety; I had a stab at a second shaky unit, but John unsportingly played an event card to rally it before I could charge.
Gary was looking very strong on our right, with only a couple of Allied units facing them
An overview of the battle. Both Allied flanks are in trouble and troops are being moved to counter the threats.
On my part of the table I shifted most of my force over to counter the elite French infantry threatening my flank. I hoped I could eliminate them quickly before the rest of the army advanced, crossed the river and wiped me out.
I was wrong. Rubbish die-rolling on my part meant that my Lethal Volleys were less than lethal, and the French infantry wouldn't go away. By the time we called it a night the French were advancing everywhere, the Allied reinforcements still hadn't turned up and what troops we did have were scattered and looking a bit sorry for themselves.
A French victory. Now there's words you don't see very often. But, let's face it, as Eugene and Marlborough our tactics left a bit to be desired since we managed to get horribly outflanked in both directions. To be fair to Ralph he got less horribly outflanked than I did, but only because the French on his side of the table had further to march in order to do it and gave him more warning.
Thanks to Caesar for the scenario and Ralph for the early terrain setup.
Friday, 13 March 2015
Monday, 9 March 2015
Liberated Hordes 3.0
It's taken me while, but I've finally put together and tidied up the latest version of my 'Hordes of the Things' variant for the South American Wars of Liberation. To be honest there's less and less HOTT in there all the time, but you still need HOTT to play it
Liberated Hordes v3.0
You can also find a link to it under 'Variants' on the 'Free Stuff' page.
As before it uses its own troop types; I dropped the HOTT ones altogether rather than try to shoehorn historical troops into the categories. But I make a lot of use of modifying the losing die roll post combat, making it easier or harder to destroy elements in certain circumstances. Obviously there's more shooting than you normally get in HOTT, but in what seems to be keeping with a lot of 19th century warfare in Latin America the bayonet, lance and sabre are the weapons of decisive combat.
It gives a good, fun game which seems to generally fit with how I perceive the battles to have gone. And that's all you can ask for from a set of rules.
Liberated Hordes v3.0
You can also find a link to it under 'Variants' on the 'Free Stuff' page.
As before it uses its own troop types; I dropped the HOTT ones altogether rather than try to shoehorn historical troops into the categories. But I make a lot of use of modifying the losing die roll post combat, making it easier or harder to destroy elements in certain circumstances. Obviously there's more shooting than you normally get in HOTT, but in what seems to be keeping with a lot of 19th century warfare in Latin America the bayonet, lance and sabre are the weapons of decisive combat.
It gives a good, fun game which seems to generally fit with how I perceive the battles to have gone. And that's all you can ask for from a set of rules.
With Maximilian In Mexico
instance, can one man happen to be in hiding at just the right place to hear enemies discuss their plans or engage in expository dialogue? Not as many as Maximilian Freiherr von Alvensleben manages, that's for sure.
In terms of actual detail there's not much of direct use for the gamer here, but the book is useful for colour and embellishment, and maybe a couple of scenario ideas.
The book itself was a pleasure to read and handle; it's an 1867 original edition. Cheap and nasty, to be sure - there's a massive variation in the size of the pages, suggesting it was put together with whatever the publisher had to hand - but in very good nick for a book that's nearly 150 years old.
Sunday, 8 March 2015
The Quito Campaign
It being a quiet Sunday morning, and having got up early to watch a Boeing 747-400 land at our local airfield (where it will be going on public display as part of a museum there) I thought I'd play another mini-campaign using my Liberation figures. This was partially so that I could test out one final change to my 'Liberated Hordes' HOTT variant before I commit to posting it here. But I've been promising to post it for months ...
I decided to base the campaign around the campaign to take Quito and liberate Ecuador around 1821-22. I kept it very simple though - the Patriots had to win a battle in each of the Coastal Provinces, The Highlands and Quito itself. If they won they advanced from one province to the next. If they lost they stayed where they were, but they could only lose two battles in the first province, one in the Highlands and none at Quito. Any more than this and the Royalists won. This meant that (if my calculations were correct) the campaign had to last for three to six battles.
I used my usual method of generating armies, rolling for replacements and determining the abilities and competence of generals. Both sides had their armies based around a core of regular troops but, as ever, replacements would be militia. Troops could be upgraded during the campaign but I decided to not allow anything to upgrade to elite.
The Royalists maintained a good general throughout the campaign. The Patriots started with a Poor general, but one who was Brave, which meant that he gave extra combat benefits to the element he was with with a penalty that he could be killed.
The Royalists defended in the first battle, and chose a close battlefield, dominated by a steep hill and a marsh. The Patriots ended up emerging through the gap between these two features straight into the teeth of the Royalist line.
The Patriot general directs the advance of his troops. Their flags show the varied makeup of the army; troops from Chile, Argentina, Colombia and, of course, the British Legion.
I had each army roll for the possibility of tactical advantages at the start of each battle. The Royalists got a flank march and, as the Patriot advance stalled in the face of musketry, Royalist cavalry fell onto their rear.
The Royalist line was solid and unwavering, and the Patriots line wasn't.
On the Patriot right their locally recruited Peruvian militia tried to turn the Royalist left. They failed.
The Patriot general was cut down at the head of his troops, and the Patriots routed. Their losses were considerable - not a good start.
After replacing losses the Patriots found themselves attacking again. Their army was now mostly made up of Peruvian and Ecuadorian recruits, with a small core of more experienced regulars. The Royalists were up for a fight after their previous victory.
The Royalist left was anchored on some rocky hills. The Patriots sent their best troops against the hills, whilst using the militia to cover the centre and to try and turn the Royalist right.
It was the Patriot right which was turned, however, with a rapid cavalry attack
The Patriots pushed forward.
The Peruvians began to threaten the Royalist right. But in the centre the militia were breaking under steady artillery fire from the Royalist centre.
The Patriots reached the hill, but the rest of their army was already breaking, and once again the Royalists secured a victory.
The Patriots had to win the next battle to stay in the campaign. They defended, but it was the Royalists who held the hill-line which was the only significant terrain on the field.
With an army made up almost entirely of militia, the Patriots had no choice but to launch a frontal assault.
Their right wavered, but the left pushed onto the hill.
The Patriot left came under cavalry attack again.
Whilst enjoying some success in the centre, both Patriot flanks were under attack now.
The Royalist commander was killed as the Patriots finally took the hill.
Both sides were teetering on the brink of defeat, but it was the Patriot army which broke first, giving the Royalists the battle and the campaign.
The crushing defeat which the Patriots suffered in the first battle was the key to the Royalist victory. The Royalists lost nothing, so still had their core of regulars, plus the troops which got upgraded. This left them in a position of great strength. The Patriots were then unlucky in the second battle, losing three elements to deadly fire from the Royalist artillery, a setback from which they never recovered. In the third battle the Royalists were in a strong position, but the Patriots pushed into them by sheer bloody-mindedness and almost won the day, which would have evened the armies for any future battles.
In two games the Good Royalist general was able to use his ability to, once per game, roll two PIP dice and pick the best to advantage, something which never seems to happen in most games I play. In both cases there were bounds where being able to do lots of things at once would be good - and the general got lots of PIPs to do them with.
The change I tried out was one I'd worked with before, requiring elements to shoot at enemy elements directly in front of them rather than ones that were just in arc (which is how HOTT allows things to happen). This stops elements ganging up on others so easily and makes firing slightly less effective. encouraging more close assaults where overlaps can be used to gain an edge.
I decided to base the campaign around the campaign to take Quito and liberate Ecuador around 1821-22. I kept it very simple though - the Patriots had to win a battle in each of the Coastal Provinces, The Highlands and Quito itself. If they won they advanced from one province to the next. If they lost they stayed where they were, but they could only lose two battles in the first province, one in the Highlands and none at Quito. Any more than this and the Royalists won. This meant that (if my calculations were correct) the campaign had to last for three to six battles.
I used my usual method of generating armies, rolling for replacements and determining the abilities and competence of generals. Both sides had their armies based around a core of regular troops but, as ever, replacements would be militia. Troops could be upgraded during the campaign but I decided to not allow anything to upgrade to elite.
The Royalists maintained a good general throughout the campaign. The Patriots started with a Poor general, but one who was Brave, which meant that he gave extra combat benefits to the element he was with with a penalty that he could be killed.
The Royalists defended in the first battle, and chose a close battlefield, dominated by a steep hill and a marsh. The Patriots ended up emerging through the gap between these two features straight into the teeth of the Royalist line.
The Patriot general directs the advance of his troops. Their flags show the varied makeup of the army; troops from Chile, Argentina, Colombia and, of course, the British Legion.
I had each army roll for the possibility of tactical advantages at the start of each battle. The Royalists got a flank march and, as the Patriot advance stalled in the face of musketry, Royalist cavalry fell onto their rear.
The Royalist line was solid and unwavering, and the Patriots line wasn't.
On the Patriot right their locally recruited Peruvian militia tried to turn the Royalist left. They failed.
The Patriot general was cut down at the head of his troops, and the Patriots routed. Their losses were considerable - not a good start.
After replacing losses the Patriots found themselves attacking again. Their army was now mostly made up of Peruvian and Ecuadorian recruits, with a small core of more experienced regulars. The Royalists were up for a fight after their previous victory.
The Royalist left was anchored on some rocky hills. The Patriots sent their best troops against the hills, whilst using the militia to cover the centre and to try and turn the Royalist right.
It was the Patriot right which was turned, however, with a rapid cavalry attack
The Patriots pushed forward.
The Peruvians began to threaten the Royalist right. But in the centre the militia were breaking under steady artillery fire from the Royalist centre.
The Patriots reached the hill, but the rest of their army was already breaking, and once again the Royalists secured a victory.
The Patriots had to win the next battle to stay in the campaign. They defended, but it was the Royalists who held the hill-line which was the only significant terrain on the field.
With an army made up almost entirely of militia, the Patriots had no choice but to launch a frontal assault.
Their right wavered, but the left pushed onto the hill.
The Patriot left came under cavalry attack again.
Whilst enjoying some success in the centre, both Patriot flanks were under attack now.
The Royalist commander was killed as the Patriots finally took the hill.
Both sides were teetering on the brink of defeat, but it was the Patriot army which broke first, giving the Royalists the battle and the campaign.
The crushing defeat which the Patriots suffered in the first battle was the key to the Royalist victory. The Royalists lost nothing, so still had their core of regulars, plus the troops which got upgraded. This left them in a position of great strength. The Patriots were then unlucky in the second battle, losing three elements to deadly fire from the Royalist artillery, a setback from which they never recovered. In the third battle the Royalists were in a strong position, but the Patriots pushed into them by sheer bloody-mindedness and almost won the day, which would have evened the armies for any future battles.
In two games the Good Royalist general was able to use his ability to, once per game, roll two PIP dice and pick the best to advantage, something which never seems to happen in most games I play. In both cases there were bounds where being able to do lots of things at once would be good - and the general got lots of PIPs to do them with.
The change I tried out was one I'd worked with before, requiring elements to shoot at enemy elements directly in front of them rather than ones that were just in arc (which is how HOTT allows things to happen). This stops elements ganging up on others so easily and makes firing slightly less effective. encouraging more close assaults where overlaps can be used to gain an edge.
Friday, 6 March 2015
Quatre Bras
Last night I played my first game of Blucher since it was published. The group had had a go at it a couple of weeks ago, but I was away and missed it. However since the scenario chosen didn't work as well as it could have done it was repeated this week - Quatre Bras.
This was designed to be a fairly quick and easy game, starting as it does halfway through the day and with a low troop density in its initial stages. But really it was to allow us to get used to the rules; because we had playtested them we we've been used to different versions of things over the past months, and it was worth playing some basic games to instill the final, correct, way of doing things in us.
Here's a couple of pictures. Despite the gorgeous production values of the cards they don't really make for a photogenic game.
Gary and I took the French, trying to take a garrisoned crossroads, and control a whole road, with a force arriving over several turns. It's true we allowed ourselves to get bogged down by some advanced elements of the Allied force but really we probably couldn't have achieved what we were supposed to with the forces at hand. It also didn't help that when we did commit our troops to combat they behaved abominably - rolling 12 close-combat dice, each with a 50% chance of a hit and scoring two hits total was but one example.
However as an exercise in learning the rules and getting used to the mechanisms it was invaluable. It's a relatively simple game to pick up, with the actual management of the troops being the true skill.
We had a lot of discussion about basing and what scale of miniatures would be best. I can't see us coming to a consensus any time soon.
This was designed to be a fairly quick and easy game, starting as it does halfway through the day and with a low troop density in its initial stages. But really it was to allow us to get used to the rules; because we had playtested them we we've been used to different versions of things over the past months, and it was worth playing some basic games to instill the final, correct, way of doing things in us.
Here's a couple of pictures. Despite the gorgeous production values of the cards they don't really make for a photogenic game.
Gary and I took the French, trying to take a garrisoned crossroads, and control a whole road, with a force arriving over several turns. It's true we allowed ourselves to get bogged down by some advanced elements of the Allied force but really we probably couldn't have achieved what we were supposed to with the forces at hand. It also didn't help that when we did commit our troops to combat they behaved abominably - rolling 12 close-combat dice, each with a 50% chance of a hit and scoring two hits total was but one example.
However as an exercise in learning the rules and getting used to the mechanisms it was invaluable. It's a relatively simple game to pick up, with the actual management of the troops being the true skill.
We had a lot of discussion about basing and what scale of miniatures would be best. I can't see us coming to a consensus any time soon.
Subscribe to:
Posts (Atom)