Friday, 20 September 2013

HOTT On Ice

Kajutaijuq - Big stompy evil spirit
The HOTT competition at MOAB this year is for matched pair armies. Whilst this has caused much consternation with some people, who prefer competitions which test their ability to use one particular army, matched pair competitons offer a different challenge.

The idea is that when a game is drawn, the players use the pair provided by one of them. The other player chooses which of the two armies they will use. So you have to provide a pair where you are prepared to use either army, based on the choice of your opponent. Thus in half of your games you will be using one of your own armies against another of your own armies, based on your opponent's choice. And in the other half of your games you will be using someone else's army from a choice of two. In that way you are being tested not only on your ability to use an army of your own choice and construction, but potentially any army that's possible under the rules. You are being challenged to play HOTT, not just play HOTT with one particular army.

Anyway, whilst there were a range of interesting army possibilities that I wouldn't normally get to use in a tournament environment, such as my 6mm ancient armies, or Epic 40K forces, I have decided, for now, to use one of my more conventional 15mm pairs - the Inuit and their opponents, the mysterious Inland Dwellers of Etah.

The Arctic equivalent of a light chariot
Last night Caesar and I played a couple of games with them, so that I could check their viability as a balanced pair.

In the first game I took the Inland Dwellers, whilst Caesar played the Inuit. I defended. One of the nice things about a matched pair is that it's possible to create terrain and a board which suits both armies. I have a range of icy hills, glaciers, ice spires, rocks and ice-floes to give the battlefield that authentic story-book Arctic feel.

Caesar formed up in two columns to bypass the bad going he was forced to deploy in, whilst I tried to push my army forward to catch him before he could deploy. I even got my God on early.


And here he is. Long-term WH40K players should recognise the figure.


He zipped across and destroyed an Inuit sled. But then he got bored and went away. Not a good start.


A series of bad PIP rolls on my part saw Caesar get his archers into a line before my assorted arctic beasties could ride them down and defeat them in detail.


Here are the Inuit archers, looking every bit as effective as they were in the game.


I lost - my God ran away and my Beasts were shot down in droves.

We swapped sides for the next game, but the Inland Dwellers defended again.

Caesar brought on the God early in the game, and swept him in behind my army. At MOAB this year we are trying out a variant rule which allows Clerics to contact Gods. They are one of the three element types which can drive a God from the battlefield, but the only one which can't actually engage the God directly. This seemed a bit odd, and adding in the ability to contact doesn't seem to be a major game-breaker. On that basis I turned the Inuit Cleric (a powerful shaman) to face the God, and was engaged in combat. Sadly he lost.


The Inuit advanced slowly and steadily, despite an enemy God in their rear.


I didn't get any photos of the next stage, which involved teh Inland Dwellers' beasts charging my archers and sweeping through them. The God switched flanks and attacked the sleds, destroying them as well. Things were not looking good for the Inuit.

However there was a gap in the Inland Dwellers' line, so I slipped my Sneaker through.


Meanwhile the shape-shifting shaman (Behemoth) attacked Kajutaijuq (also a Behemoth).


The gap in the line was covered by a Lurker, and a 6 - 1 die roll saw my Sneaker killed, giving Caesar the game.


The evil sorcerer in charge of the Inland Dwellers barely moved from his position behind his hordes of minions.


So, I managed to use both components of my matched pair, and lose with them. Obviously they are correctly balanced.

Chickamauga - 150th Anniversary

Our regular gaming night fell on the 150th anniversary of the Battle of Chickamauga. Whilst we were scheduled to play some HOTT, Caesar and I broke out 'Battle Cry' and played the relevant scenario.

I brought my 6mm ACW figures, which are based for use with 'Battle Cry'. Then I forgot to use them.

Caesar played the Confederates.

General Longstreet? General Shortstreet, more like :)
The Union right advanced. It advanced a lot; I ended up with quite a few Right Flank cards. We even shot or captured Longstreet.


The Union centre - at Chickamauga it's a gaping hole, just waiting to be filled with Confederates. Caesar obliged.


The Union left - Thomas formed a solid defence.


The Union kept advancing on their right. You can see the casualties on the Confederate victory track beyond them.


A lone Confederate figure is finished off to give the Union the game, 6 flags to 4.


It was quite a fun scenario. The terrain isn't as dense as I would have expected, but the woods do break up lines of fire. The Union need to have good flank cards, as they are very weak in the centre. Fortunately I had those cards. The dice played fair for both of us, being exceptionally deadly.

We considered swapping sides, but ended up playing HOTT instead. But that's for another post.

Saturday, 14 September 2013

A Mighty Mexican Mean-Fowt Fight

Republican Infantry
The following is the report of a game I didn't intent to play.

With an idle Saturday spread before me, I thought that I might spend some of it on another Donald Featherstone tribute game. After the fun of Thursday's ACW game, I wanted to try out the ACW infantry/cavalry/artillery setup from 'Battles With Model Soldiers' using my own Mighty Mean-Fowt Fights rules, using a terrain that was as close to Featherstone's original as I could - a couple of small woods, and a wall in the middle. To get the right proportions for the original scenario, I settled on six units of infantry, two cavalry and one artillery.

The thing was, that I couldn't find my green gridded cloth. In looking for it I found my chessboard instead. OK, I thought, I'll run my ACW game in the west, Valverde-style. That'll be a bit different. But whilst sorting out the terrain I found my 6mm Mexican Adventure figures. And they looked so lonely and unloved I thought ... why not?

So it was that a planned ACW game became an encounter in Mexico between a force of Republicans and Imperial troops loyal to the French puppet-emperor Maximilian, sometime around 1865 or 1866.

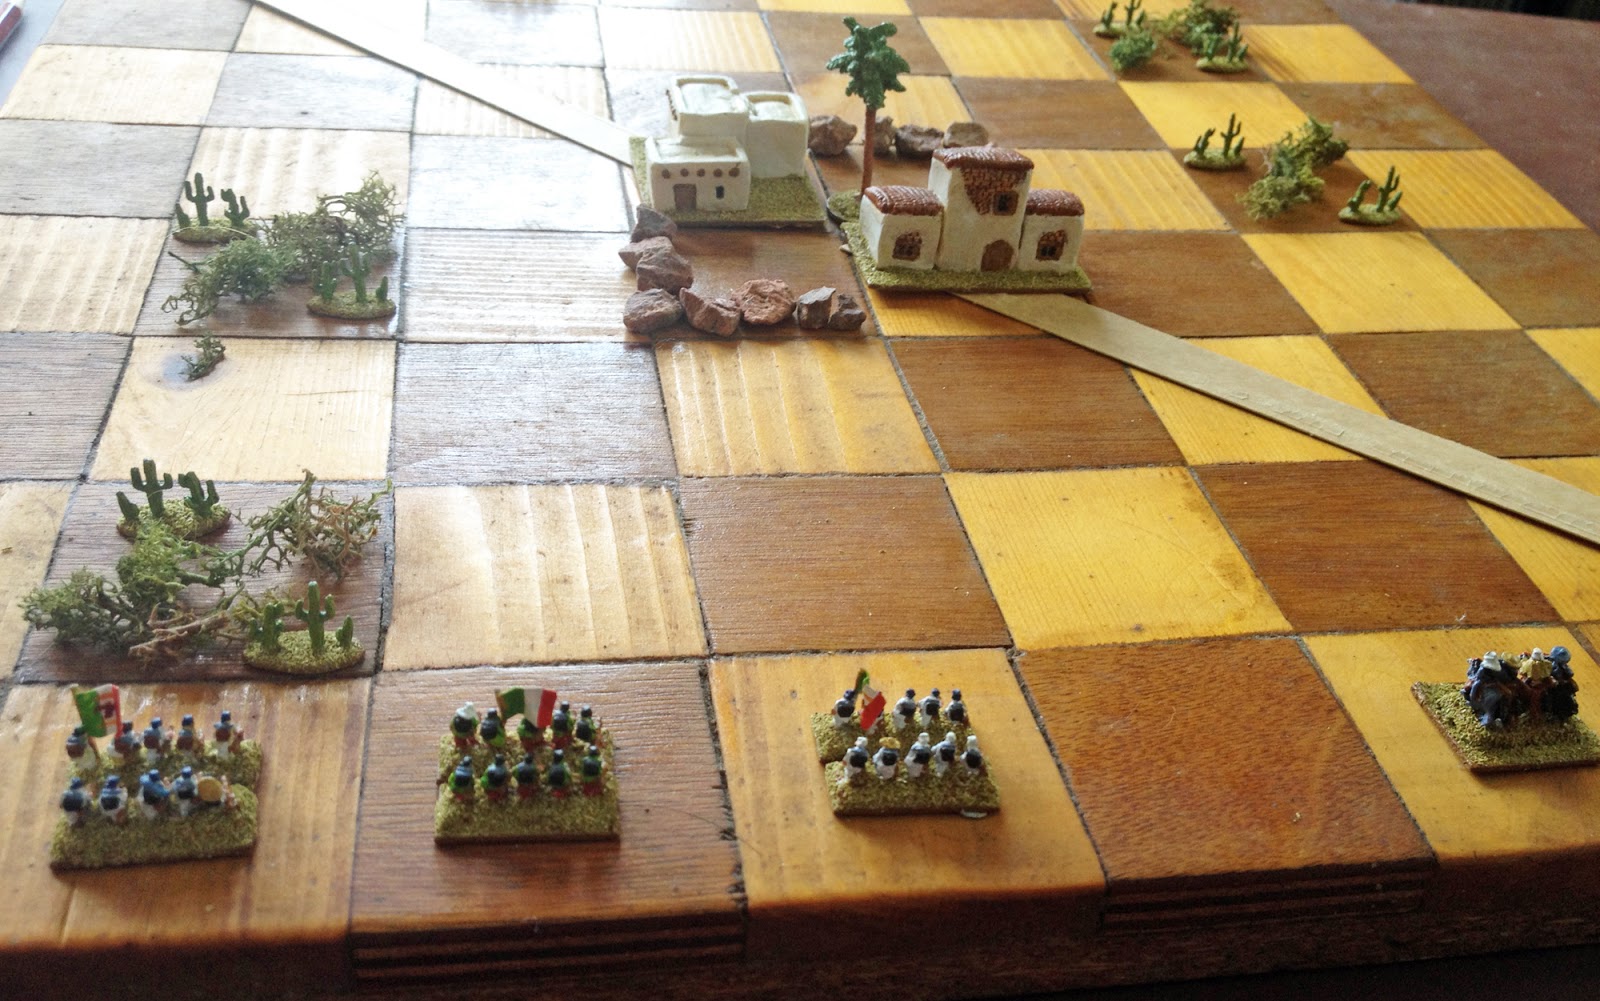
Even the terrain got adjusted. The woods became dense cactus tickets (same effect), and the wall became a complete farm. Albeit with walls. The walls, were just that - linear cover. The buildings blocked line of sight as well. The roads were just for show.


Here are the Republicans.


Here are the Imperial Mexicans. I decided to add in some troop quality, as it's a big thing in the Mexican Adventure, so each force has three poor militia infantry units, two regular and one elite. The cavalry and artillery were regular. In this army the elite infantry are troops from the Austrian Legion.


I also randomised the entry of the troops. Each turn I diced for each unit; it needed a 5-6 to enter that turn. I also diced for entry point, with the infantry and artillery entering on one of the six squares in the middle of their edge, and the cavalry tending to appear on the flanks.

The Imperials started badly, getting only one unit on the table on their first turn.


The initial Republican forces were more substantial.


After a few turns there were more troops on the board, and they were forming up and advancing towards the farm. The farm was an objective, of sorts; for each building a side occupied, they could ignore one of their lost units when it came to determining if their army had broke - essentially they gained a morale bonus.


The Imperial infantry all appeared on their right flank.


Most of the Republicans appeared opposite them. It was obvious that this was where the main battle would be fought.


The Republicans were better positioned to take the farm, however. This was the first exchange of musketry. I used shorter ranges for this game - two squares for infantry and four for artillery.


On the other flank there was a cavalry skirmish. Changes to the rules for cavalry saw them unable to dismount, but they were not penalised when fighting steady infantry to the front (a change I'm working on in the main ACW set).


The Republicans fell back disordered.


The other flank now saw the steady crackle of, mostly ineffective, musketry.


Whilst back on the Imperial left, the Republican cavalry routed.


The Imperial cavalry then moved to threaten the Republican artillery.


On the other flank things were hotting up. But there had still been no significant casualties.


The Republican artillery demoralised one unit of Imperial cavalry. It was to remain that way for the rest of the game.


More fighting on the other flank.


The Republicans had now occupied one of the farm-buildings, albeit with a militia unit. The Imperials massed for an assault.


And in they went ...


The pushed the Republicans out of the building, but only temporarily (a failing in the rules - victorious units do not pursue or take ground; I need to come up with something really, but I played the game as written for now).


The other Imperial cavalry unit charged the Republican artillery. But there was infantry coming up in suupport.


The cavalry retreated. Again, it would remain demoralised for the rest of the game, neutralising the Imperial cavalry threat to the Republican right.


An Imperial unit routed under sustained Republican fire.


The Austrians were now assaulting the farm, but the militia defenders held on.


A demoralised Republican unit quietly slipped away from the battle.


But an Imperial one routed after being charged by lancers.


The fighting continued.


And another Republican unit routed.


However the Republicans were firmly ensconced in the farm, and their cavalry was causing issues on the Imperial right. A round of musketry saw the Imperials fall back to regroup, looking very shaky.


From the Republican point of view, things were looking good.


Republican infantry was now driving the Imperial cavalry back.


But they couldn't quite finish it.


The Austrians renewed their attack on the farm, but were soundly beaten, and routed, which was enough to give the game to the Republicans.


This was an enjoyable fight, using figures I haven't had out since before we emigrated. The rules worked OK, but I'm still convinced that they can do with more tweaking. I'm still not happy with the close combat resolution (I carried on experimenting with a simultaneous roll variant), but will eventually come up with something, I'm sure. On the whole the rules worked well for the Mexican Adventure, and I may try some more games using them.

Related Posts Plugin for WordPress, Blogger...