Tuesday, 26 January 2021

Back In The Trenches

I had a bit of a yearning to get Trench Hammer out over the weekend, and even played a quick game on Sunday evening, which I failed to report here. But I played another one this evening, so that's what you get.

I thought I'd try some of the ideas from the Trench Hammer Expansion Pack, specifically the opposed die roll assault combat. I also tried the fixed damage effects which I know are likely to be imported into the second edition of Trench Hammer  from the more advanced WWII version, Hammer Of Democracy. 

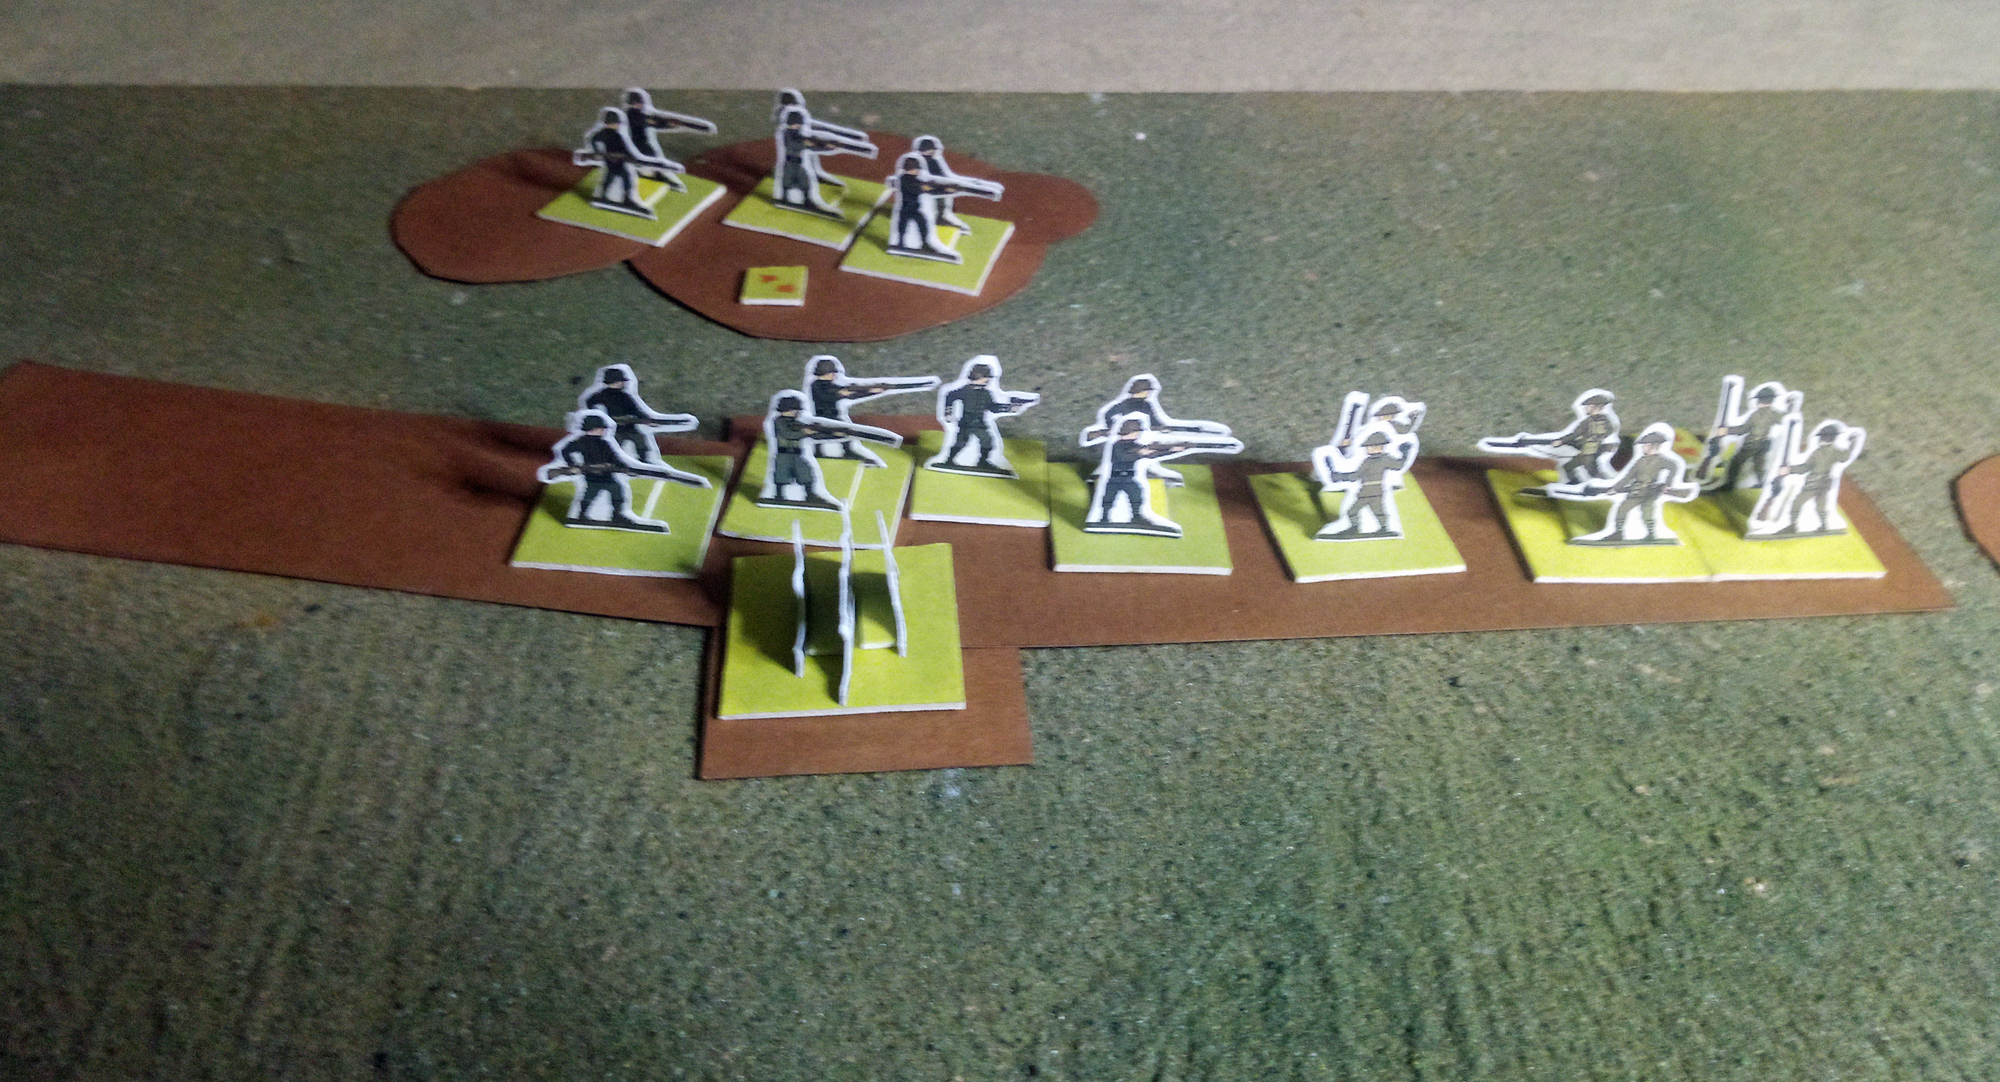
I played the basic strongpoint assault scenario - a British platoon attacking an MG position protected by two rifle squads. This is an easy game to set up and is always fun.


As a change I gave the British a Stokes mortar instead of the rifle-grenadiers.


The only covered approach to the German position was through the shell-holes on the British right. The Lewis section got into position to provide covering fire, but the Germans hit it hard as it deployed.


The British bombers rushed forward, with the rifle squad following close behind. The mortar kept up a steady, but ineffective, fire.


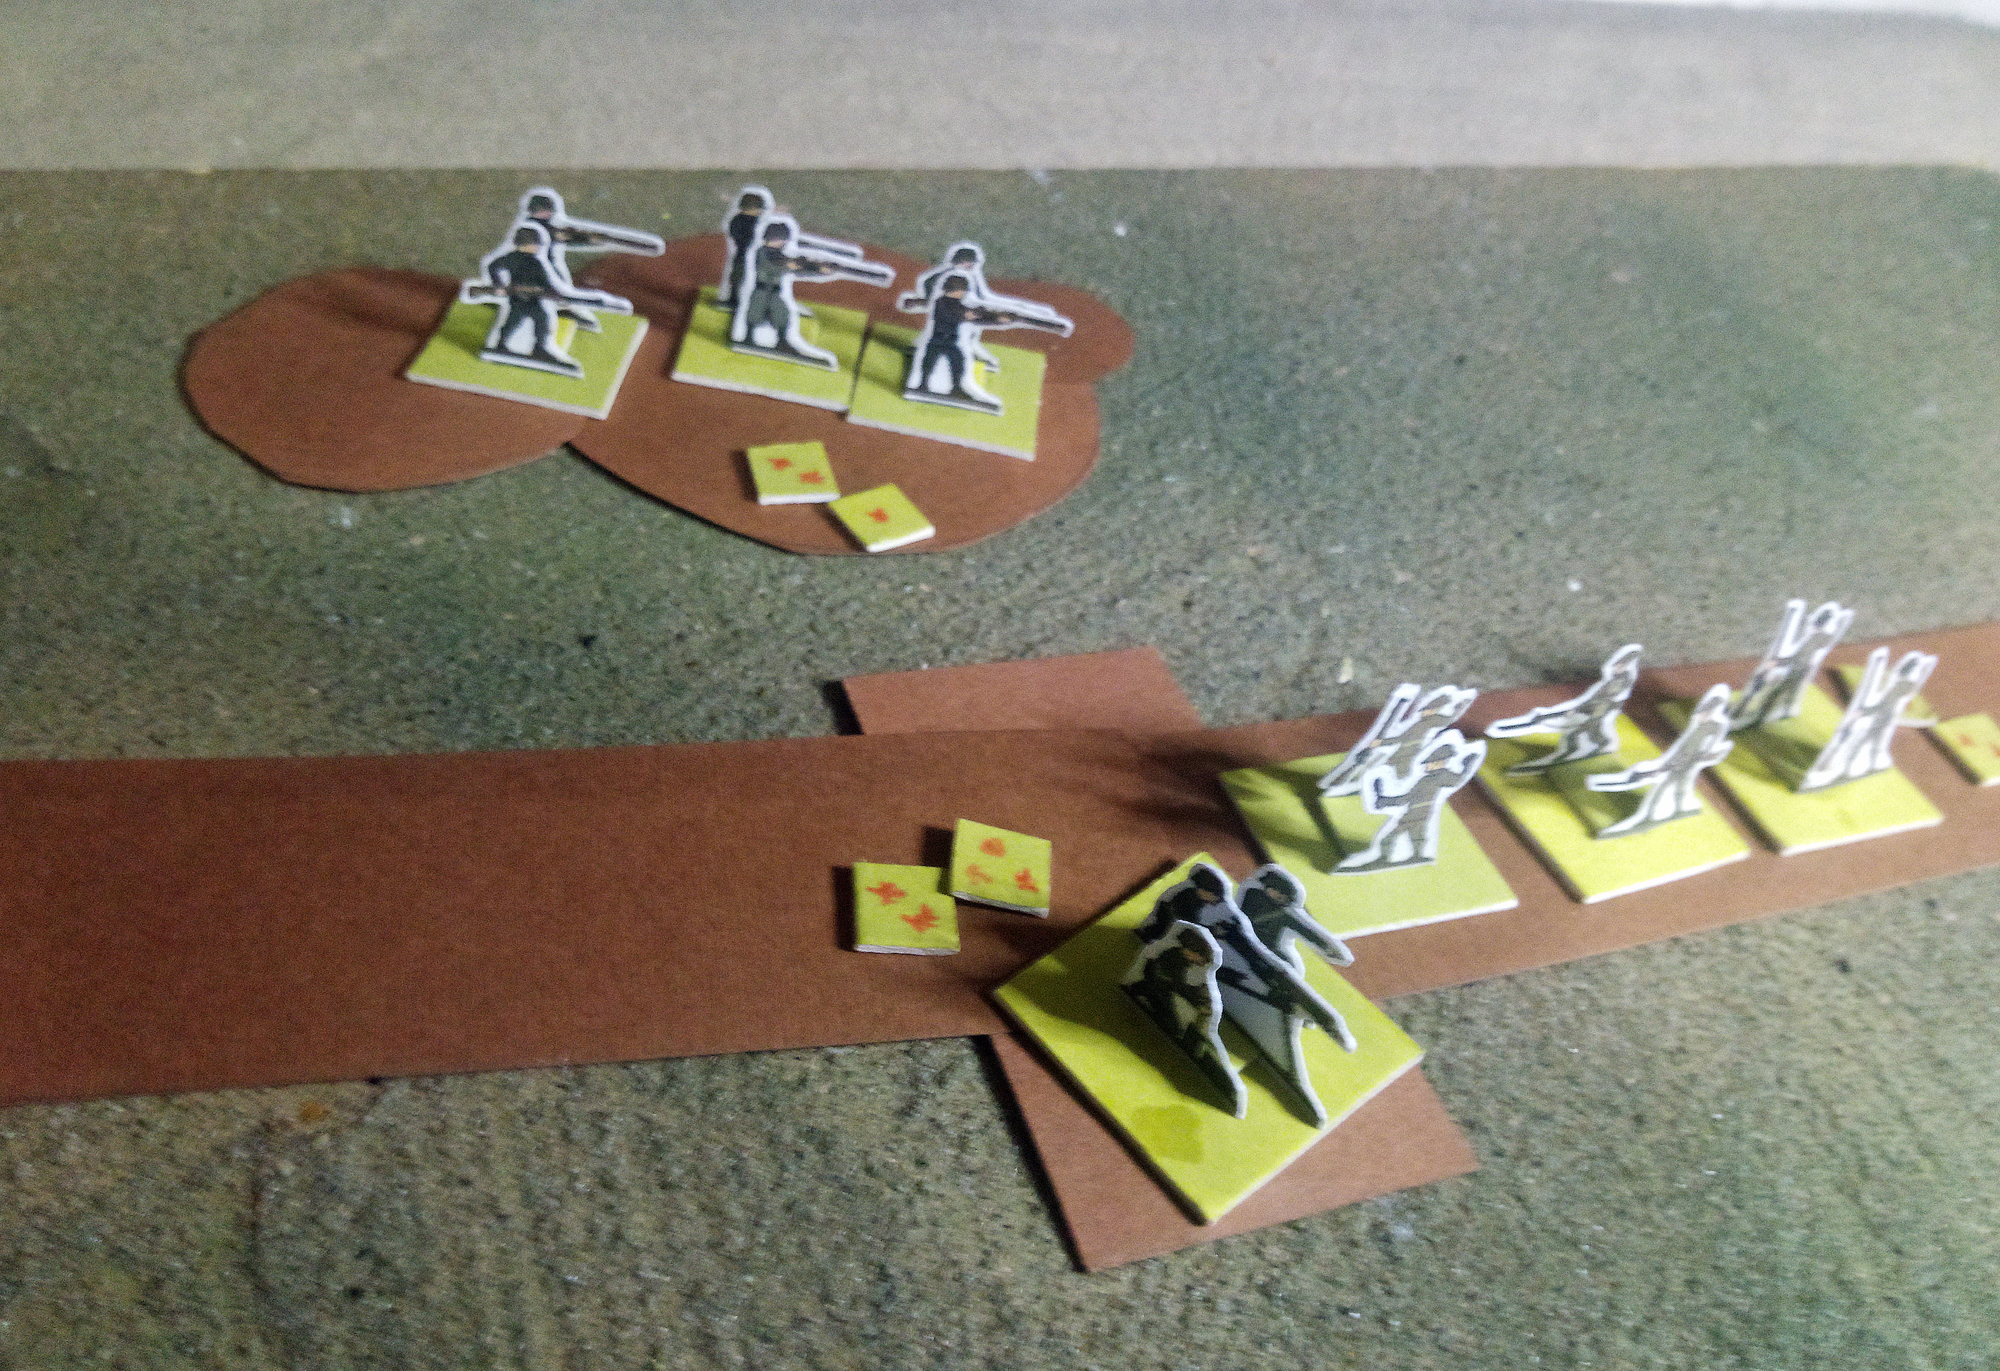
The Lewis squad fought as best they could, but were soon put out of action. The rifle squad move up with the bombers, who had already taken some casualties. 


The bombers assaulted the end of the German line. They were supposed to receive support from the rifle squad, but the British command rolls were terrible, and the attack went in half-cocked.


The bombers prevailed, though, and took the first section of trench. The German rifle squad retreated to some shell-holes, and reorganised.


The second German squad attacked down the trench in order to protect the MG.


The bombers drove them off  ...


... then assaulted the MG, forcing that to withdraw as well.


The British officer tried to get the rifle squad moving up in support, but was hit by enemy fire.


The first German rifle squad had recovered from the shock of the initial assault, and attacked back into the trench. The British bombers, unsupported and now fighting in their fourth assault, were quickly scattered.


Too late the British rifle squad entered the fight ...


... and in a fierce fight routed the first German squad.

The German officer led from the front and counter-attacked with the second squad, driving off the British rifles.


That ended the action. The Germans had lost a squad, but their MG was basically intact and they still controlled the strongpoint. 


The opposed die roll assault combat is interesting, and very brutal. There don't seem to be any modifiers for terrain, so assault is a way of taking on strong-points, although the casualties you take getting there do count against you. The fixed damage for firing is interesting as well - I did use the optional adjustment die roll, which reduces it by one on a '1' and increases it by one on a '6' (so a rifle squad inflicts 2-4 damage, but mostly 3). That created a small amount of uncertainty, and is the same as I use for the Regroup action (recover two hits with the same +/-1 adjustment roll).

I'm really rather looking forward to s second edition of this game - I know the Hammer system has moved on and matured since the original Trench Hammer was produced, and it would be nice to see it updated.

Monday, 25 January 2021

ECW Snakes And Ladders - Part 5

So here we are - the final battle of the ECW Snakes And Ladders campaign. The winner of this action would win the campaign, with Parliament (who initiated the battle) having a potential one unit advantage.

In fact what happened is that both sides ended up with six units, but Parliament could upgrade the quality of one of them.

So the forces were:

Parliament - Three foot (one veteran and two raw) and three horse (one veteran and two trained)

Royalists - Three foot (one trained and two raw) and three horse (two veteran and one raw)

The foot of both sides set up with a ridge between them. The Royalists set up first so had horse on both flanks just in case. Parliament responded by massing all of their horse on their left.


Parliament's horse swept forward, but the Royalists counter-attacked cleverly and ended up outflanking their advancing opponents.


Making use of some advantages in initiative they overwhelmed one of the Parliamentarian horse units, destroying it and negating the advantage of numbers Parliament enjoyed.


The horse of both sides was now in a head to head fight, and the quality advantage was with the Royalists.


Parliament advanced their foot in the centre, and pushed back the Royalists at one point.


The raw Royalist horse on their left flank engaged the advancing enemy foot, but was quickly routed.


Parliament's horse was also destroyed, however.


The foot battled it out on the ridge.


But with their horse gone, Parliament found itself at breaking-point, and failed their first morale test, conceding the battle and the campaign


The Royalists won a fairly easy victory thanks to a couple of decent initiative rolls early on which slowed Parliament's attack and gave the Royalists a change to exploit a flank advantage.

The campaign saw seven battles (I think) only one of which was won by the side initiating it. Which is against the odds since neither side really enjoyed an advantage in terms of setup. If I did this again I'd look at giving the side which initiated the final battle a touch more in the way of advantages, perhaps. I'd also like the results of the earlier battles to fed into the campaign a little more; being able to advance along the track is good, but I like the idea of both sides having a reward to play for.

Anyway, as an exercise in generating a series of battles, with a potential narrative, the system worked really well, and I might try this format for something else (Victor has already shown me a version of it for running a solo gladiator through his career). I hope you've enjoyed reading it as much as I enjoyed playing it.

Saturday, 23 January 2021

ECW Snakes And Ladders - Part 4

Here, at last, is the much-delayed fourth part of my ECW Snakes & Ladders campaign. When we left it Parliament had just initiated a battle towards the top of the board. 

The Royalists rolled three foot (one raw, one trained and one trained pike), two dragoons (one raw and one trained) and one artillery. 

The Royalists fielded  two foot (one raw shot and one trained), one trained horse, one trained dragoon and one artillery.

They met on a relatively open field. The Royalists are at the bottom of the picture.


Both sides rushed to control the woods on Parliament's left with dragoons. Meanwhile Parliament advanced their horse.


The Royalist dragoons (bottom left) attempted to move towards the village where they could control that flank. The Royalist dragoons were ejected from the woods after a brief fight.


Parliament's cavalry intercepted them, but the dragoons held them off.


The foot of both sides advanced to contact in the centre. The Royalists had the advantage of numbers.


Parliament's horse was now tied up fighting the Royalist dragoons between the village and the enclosures, leaving unable to easily pull back and support the foot.


The foot melee broke up and one of Parliament's regiments found itself in serious trouble.


It broke, allowing the Royalist pike to charge forward into the flank of the opposing shot.


That also broke, exposing the artillery.


The rout was complete and the Parliamentarian army broke.


I didn't photograph the campaign board for the next move, since it was the Royalists' turn and whatever they rolled they would initiate a battle.

This have five units per side and gave an interesting mix of troops.

The Royalists rolled two trained horse, two trained dragoons and some artillery.

Parliament had some veteran shot, three horse (two veteran and one trained) and some trained dragoons.

So lots of dragoons and horse on both sides, and not a pike to be seen.

A small village and a hill sat between the two armies.


Parliament rushed to take the hill.


Their dragoons also occupied the village. The Royalists fixed them in place with one group of their dragoons and used the other to work around the flank and take the shot on the hill under fire.


With a superiority of horse, Parliament attacked.


At first they were thrown back, but a second wave outflanked the Royalist line.


The Royalist horse on the end of the line put up a brave fight ...


... but were swiftly destroyed, leaving the Royalist force very vulnerable.


But their surviving horse struck back and in a brilliant counter-attack drove back their Parliamentarian opposite numbers, destroying one of the units ...


... and even capturing the opposing commander.


However Parliament advanced off the hill with their other horse and the shot, destroying other Royalist units.


Soon it was all over for the Royalists.


They'd put up a brave fight, coming close to breaking a superior enemy force, but it wasn't to be.

So it was back to the snakes and ladders board. Parliament rolled a safe '4' and advanced along the top row, with only a single 'snake' between them and the last battle space. The Royalist rolled a '6' and moved rapidly along their row. 


But Parliament then rolled a '3', zipping over the final hazard and landing, exactly, on the Final Battle space.


So the next part of this campaign write-up will be the final battle. Who will win?

Thursday, 21 January 2021

Blowing My Own Trumpet

I finally got my author's copy of 'The Portable Pike & Shot Wargame' today.  Now I don't need to keep printing off copies of my ECW rules from Google Drive.


Related Posts Plugin for WordPress, Blogger...