Sunday, 10 August 2014

The Battle of Huaqui

A couple of years ago I posted a Liberated Hordes scenario for this battle, and a few notes on some playthroughs. Today I thought I'd play it out again, with the latest version of Liberated Hordes and the paper figures (even though they depict armies from seven years later).

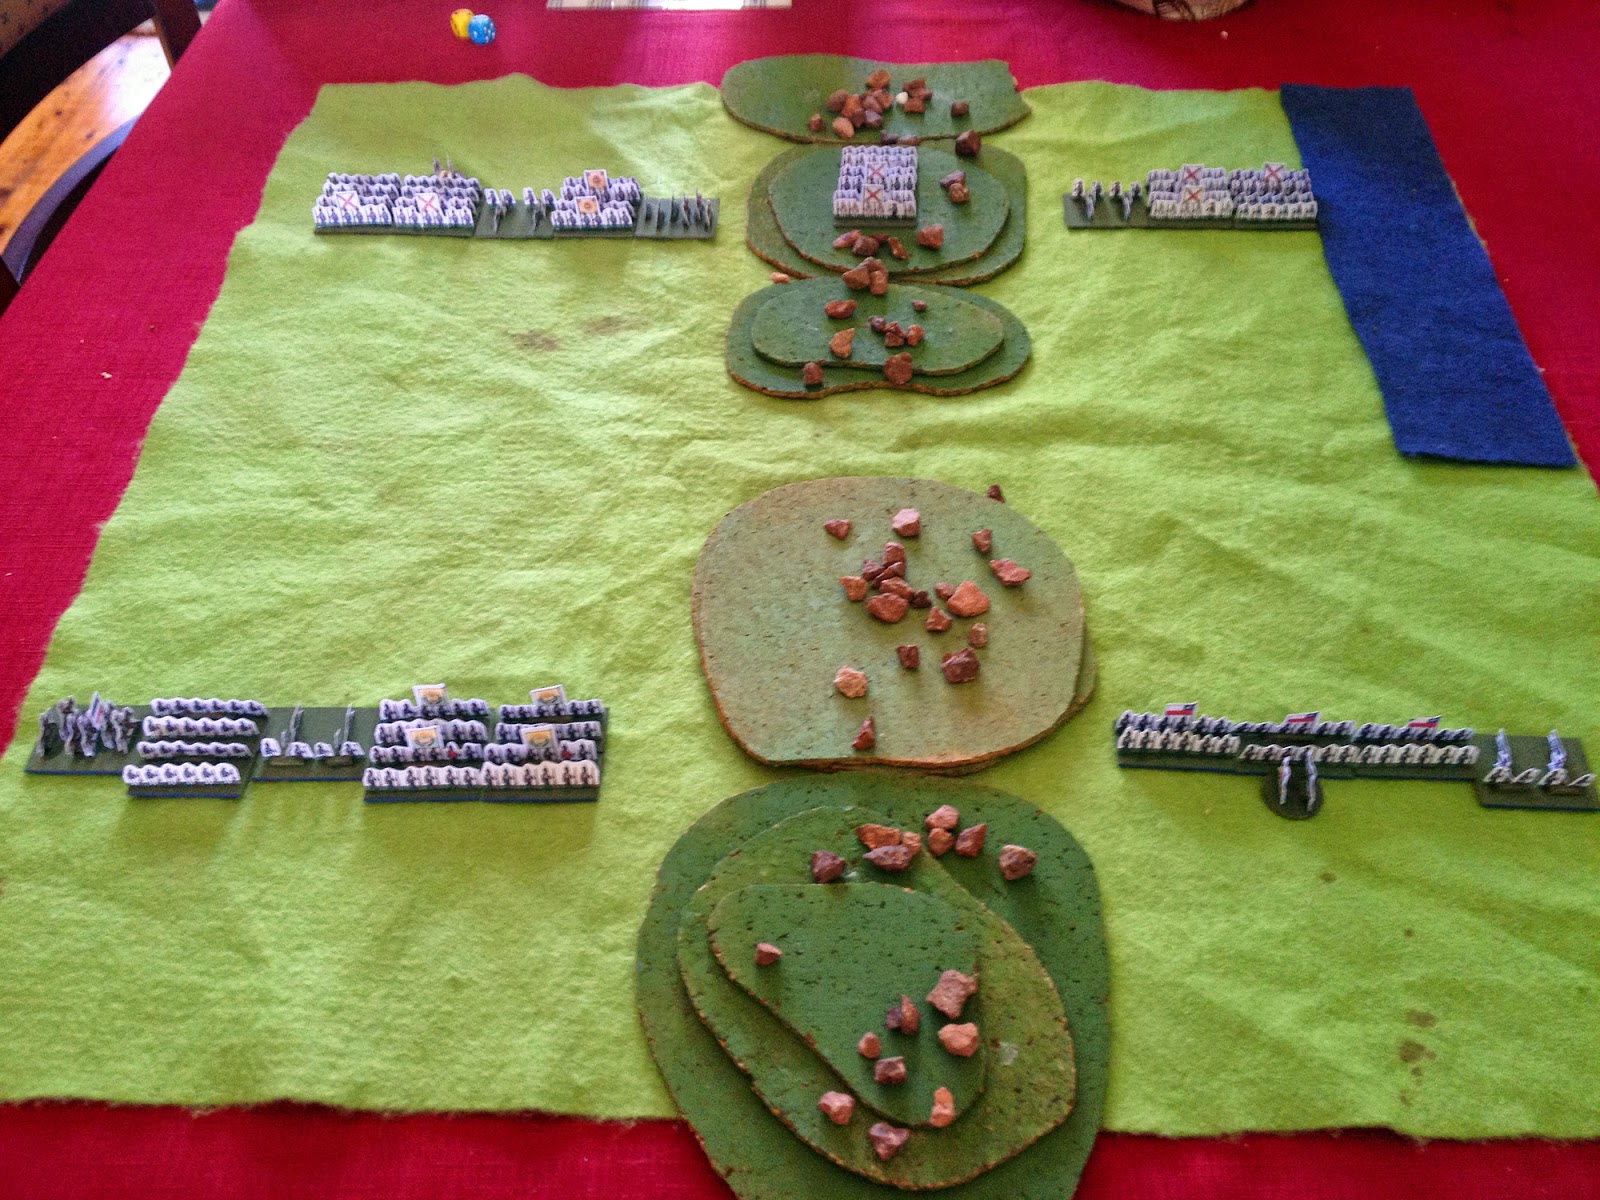
Here's a shot of the battlefield from behind the Patriot lines. The Patriots are outnumbered 16 elements to 12, and their general is stuck on the opposite side of a rocky hill from the bulk of his army. The Royalists have two groups opposing the Patriots, plus a third one marching along the hills towards the key pass between them. Their general is Good, that os the Patriots is Poor.


Initial approaches saw both sides push the larger parts of their armies forward. The Royalists rushed their cavalry forward to secure the pass.


On the other flank the Patriots edged their troops forward, and got their artillery into a commanding position on the shore of Lake Titicaca.


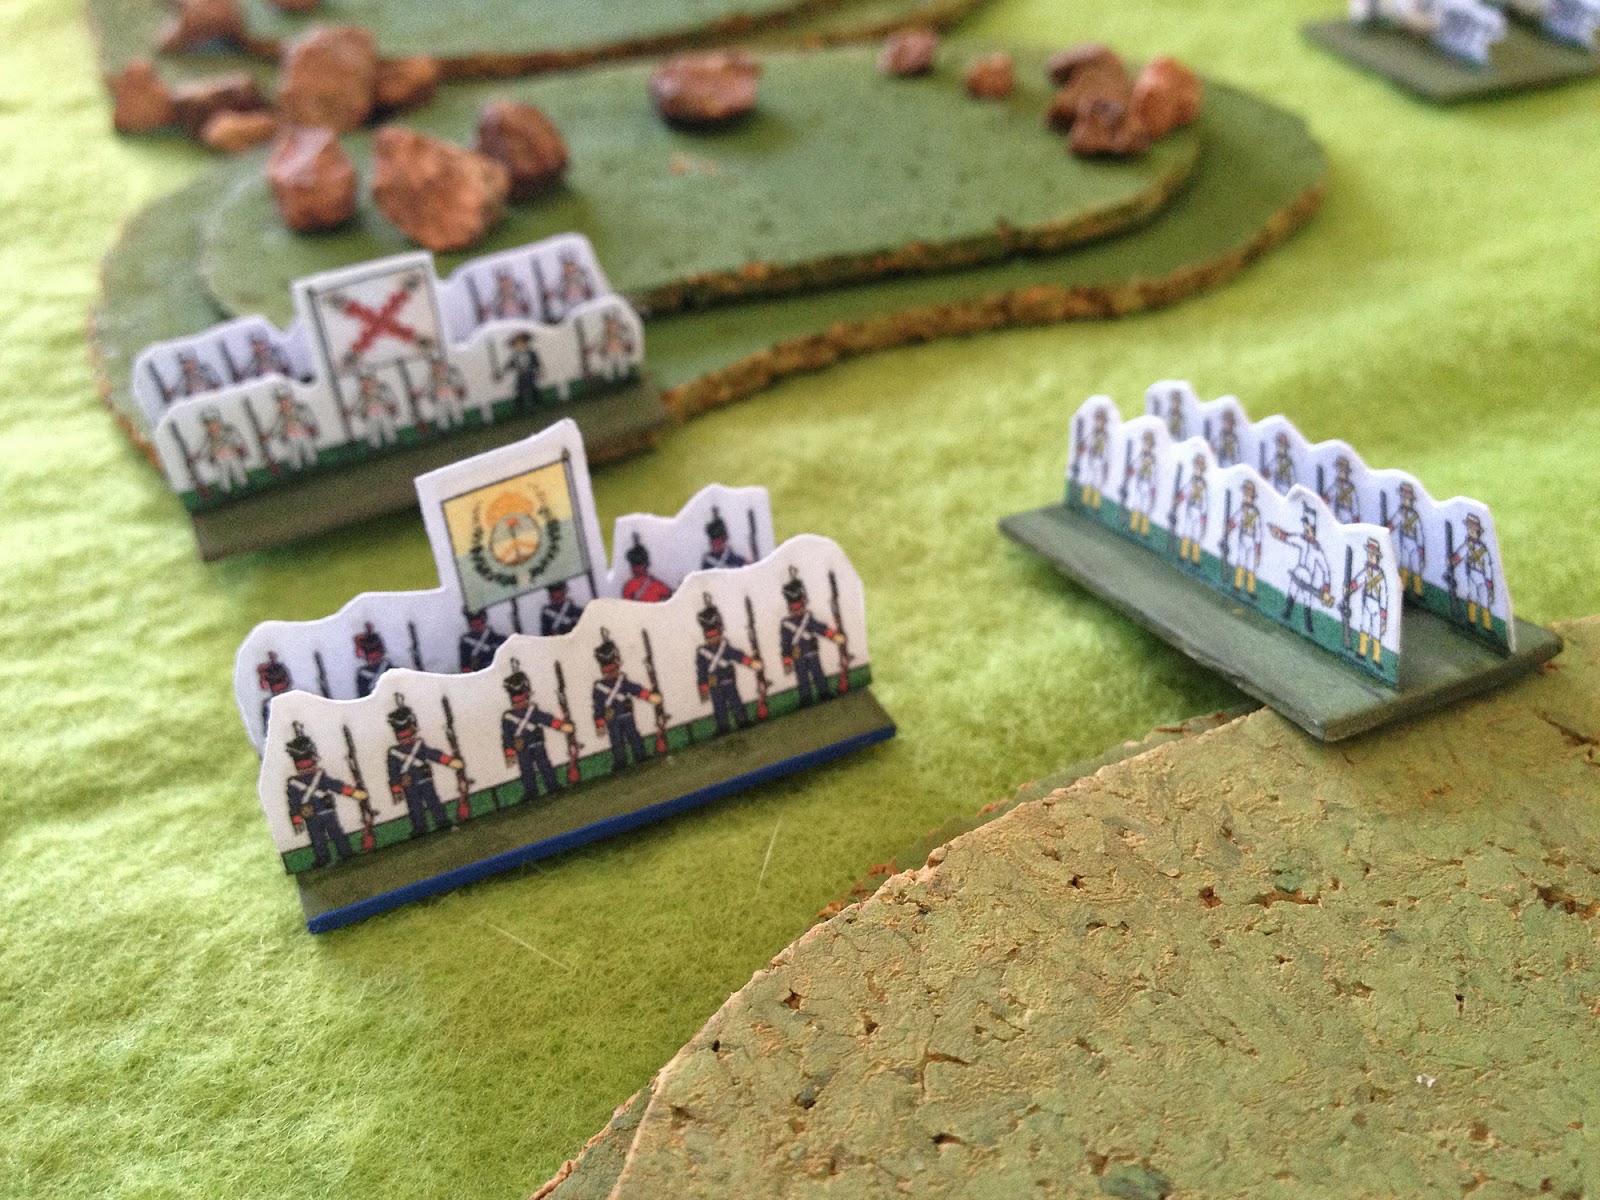
Royalist infantry marched to reinforce the cavalry in the pass.


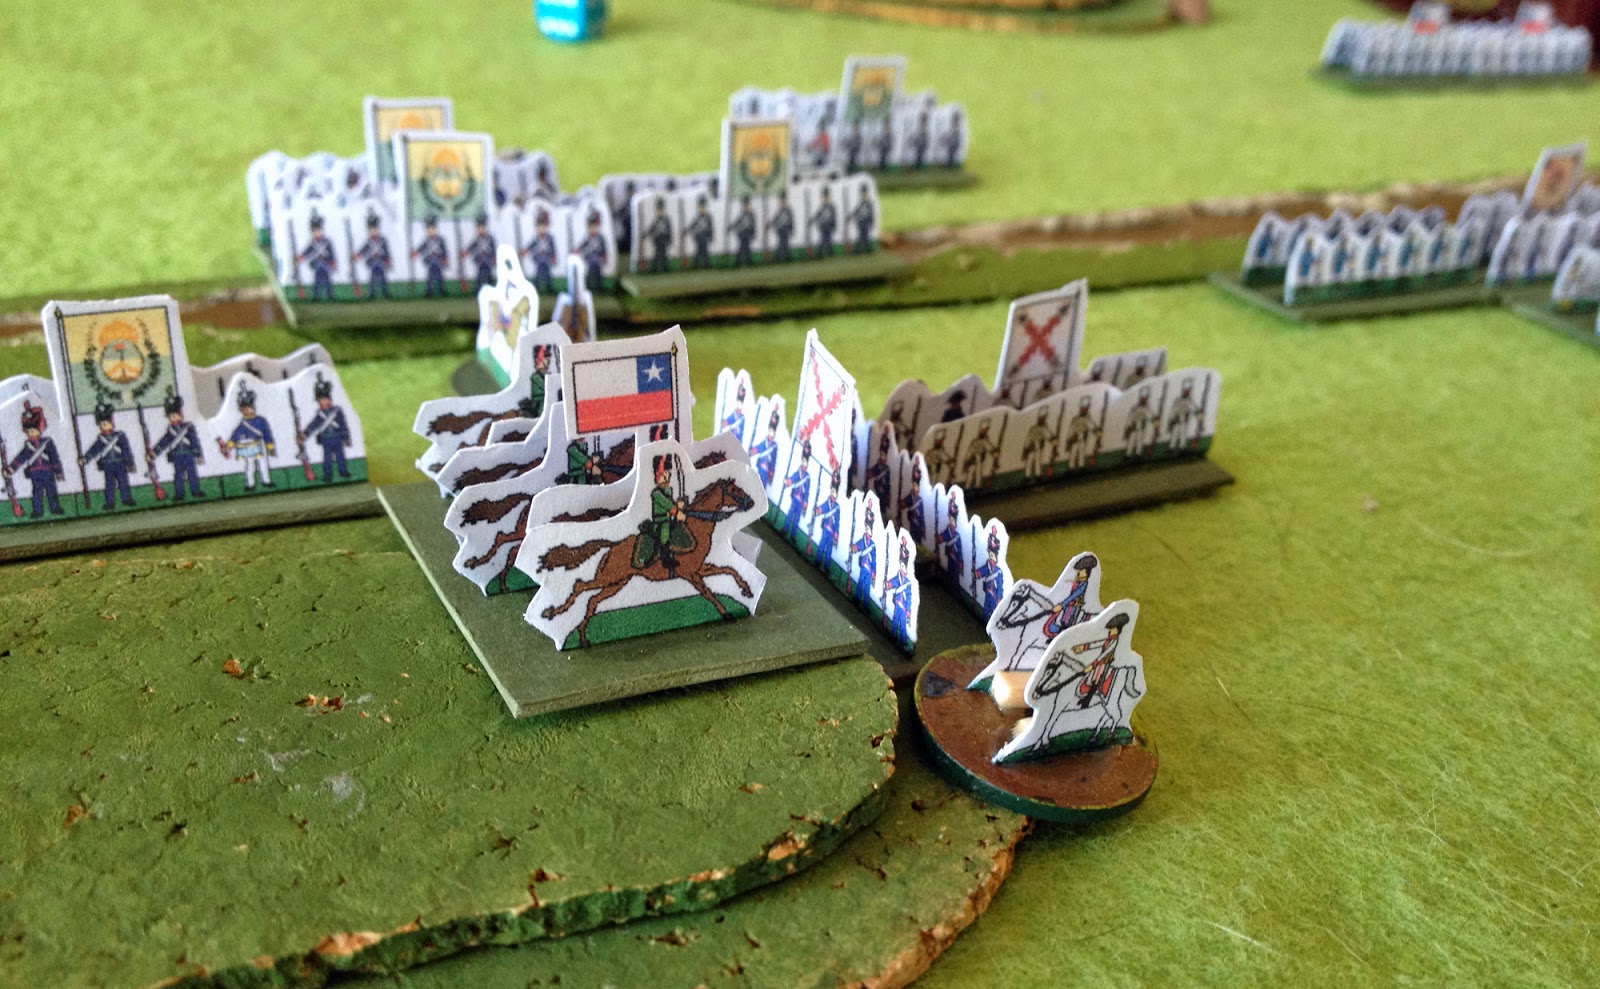
The Patriots switched one element of infantry to contest the pass. Their first volley routed the Royalist cavalry.


The Patriots charged ...


... and routed an element of Royalist infantry. The Royalist hold on the pass was now not so secure.


The Patriots charged with their cavalry, but the Royalist militia saw them off.


Both lines were now trading artillery fire, and casualties had been taken on both sides.


On the other flank, the Patriot general edged his troops forward. Musketry and artillery drove off some of their Royalist opposite numbers.


In the pass the Patriot infantry held off attack after attack.


An overview of the battle. On the left of the picture is the bulk of both armies. The Patriots are hampered by their general being so far away, whilst the Royalists couldn't get enough PIPs together to launch a decisive attack, as both lines were being broken up by artillery fire. On the right the Patriots were attacking.


The Patriot right went on the offensive, but a single element of Royalist militia kept holding them off.


The Royalists finally got an attack together on their right, destroying the Patriot artillery.


Both sides fed more infantry into the fight.


On their right the Patriots prevailed.


The Royalist general was captured when the unit he was leading routed.


On their far right the Royalists swept away two elements of Patriot infantry, but their army morale had now collapsed


A final shot of the battle. In the centre the Patriot infantry unit that had contested the pass had finally been destroyed, but its fight had delayed the Royalists long enough that they were unable to exploit the pass to their advantage.


The key to the Patriot victory were that they got good PIPs in the second half of the game, so were able to push in attacks where needed. The single infantry element in the centre contested the pass long enough for it to have no influence on the game; the Royalists were unable to use it to shift extra troops from one flank to the other, or bring their numbers to bear on the Patriot flanks. The Patriot general's Poor rating (which turns a second PIP roll of '6' to a '1') kicked in early in the game, whilst the armies were still in controllable groups, so didn't have a big influence on the battle, whilst the Good rating of the Royalist general (which allowed the choice of one of two PIP rolls) was used to push in attacks on the pass whilst reorganising troops elsewhere; good moves that were thwarted by the hard fight the Patriots gave them.

On paper the Royalists should win this every time, but as can be seen, sometimes the actions of a single element and a few lucky combat rolls can be significant. The battle was very close; both sides lost 50% of their elements, but the Royalists had lost more since their 50% point was higher.

Saturday, 9 August 2014

Venezuela Delayed

I was loaned a copy of Ben Hughes' book 'Conquer or Die!' last week, an eminently readable account of British Napoleonic wars veterans in Bolivar's South-American campaigns. I really enjoyed it, and it features a number of gameable battles I hadn't read about in any detail before, plus inspiration for a campaign using a variant of my Alto Peru campaign mechanisms.

So, over the last couple of evening I have been assembling a sheet of figures for Bolivar's army - in some cases the same Patriot figures I have used before but with a Venezuelan flag, but also including Rifle and British Legion elements, plus a figure for Bolivar himself. In addition it includes figures for Skirmisher elements, a troop type I have played around with in previous games, but which I think may be of more importance in this theatre.

Of course, having now assembled this lovely sheet of figures, I have discovered that our printer has not only run out of ink, but that we haven't got any replacement cartridges in the house. And I'm not making a trip into town just for a couple of ink cartridges, so Bolivar's army will have to wait. I'll print it off during the week, and aim to assemble it for a debut next weekend.

As a teaser, here they all are, ready to be printed. There are enough strips for twelve elements of Patriot infantry; I can add in some of my existing elements as well, because I don't do all of them with flags. There are also two elements of Skirmishers for both the Patriots and the Royalists, plus a couple of elements of Skirmishers depicted as local Indians, a feature of a couple of actions and a nice bit of colour. Oh, and Simon Bolivar is tucked away at the bottom.


Meanwhile, if I can't print and make figures this weekend, I guess that leaves me time to play with some of the ones I already have.

Saturday, 2 August 2014

Another Liberation Campaign

I had another go at my Alto Peru campaign for Liberated Hordes this morning. As before I randomly generated the armies and commanders, and away we went. Both armies had about a 50/50 mix of militia and regular infantry, but the Royalists had two elements each of cavalry and artillery to the Patriot's one. The Royalist commander was poor, but inspirational, whilst the Patriots had an average commander.

In the first battle the Royalists defended, and set up a dense terrain, anchoring their line on a town and a rocky hill. Their militia defended the hill, whilst the cavalry were in reserve. They were lucky enough to get a couple of random events, one of which upgraded one of their militia infantry to regular for this battle, and the other of which forced the Patriots to deploy in three dispersed groups.

The Patriots advanced in three groups along three parallel valleys. This wasn't a major hindrance, because the Royalist deployment was somewhat defensive anyway, so they were unlikely to be hindered whilst they advanced and deployed.


As it was, the Royalists did adopt an offensive posture on their left, throwing their militia infantry forward, supported by the cavalry reserve. The aim of this move was to hit the Patriot militia on that flank, and turn the Patriot right, whilst the main infantry line held the Patriots in place.


Unfortunately the attack fell apart in the face of deadly Patriot musketry.


On the other flank the artillery of both sides fought a duel across some fields. Despite their numbers, the Royalists lost an element of artillery to the better quality Patriot gunners.


But the other Royalist guns silenced their opposite number not long afterwards.


The Patriots advanced their right, and turned the Royalist left, taking the rocky hill.


Patriot cavalry worked around the other flank.


With both flanks in danger, the Royalist commander decided to preserve as many elements as possible for the next game, and withdrew enough from the table to lose the battle - elements which leave the table automatically return for the next game, whereas combat losses may not always return, being replaced by militia and not always by troops of the same type.


The Patriot victory was decisive, and they used it to take an uncontrolled political token.

After replacements the armies remained much as they were before, except that the Patriots now had no artillery. Neither general was replaced.

In the second game the Royalists defended again. With a huge advantage in artillery, they Royalist commander decided to go for a river-line defence, hoping to pound the Patriots as they advanced. The Patriots were unlucky in their choice of side, and the Royalists got the exact position they wanted. Their inspirational general meant that despite their previous defeat, the Royalist morale was high.


The Patriots advanced heir main infantry block towards the Royalist centre, aiming to punch through at one concentrated point. Their cavalry moved up in support, with the aim of distracting the Royalist commander's attention.

The Royalists committed their cavalry in opposition. but the Royalists' poor commander trait kicked in, and their advance stalled as they crossed the river, leaving them at a disadvantage versus their Patriot counterparts, who were able to move up before the Royalists were fully across.


In the centre the Patriots attempted to force the river.


The Patriot cavalry charged ...


... and routed the Royalists.


Some Patriot infantry managed to drive deep into the Royalist centre ...


... but without support they were cut down.


The patriot cavalry were across the river now, and the Royalist left was rolled up, as the artillery on the hill was charged.


The Patriot infantry now just resorted to musketry, aiming to keep the Royalist centre pinned whilst the cavalry did the main work.


As the Royalist left collapsed some Patriot troops crossed without opposition.


An element of Royalists tried to hold the cavalry charge, led by their general, but they were cut down to a man, the general with them. The Royalist army collapsed at this point.


The end of the battle. They key to the Royalist defeat was their command failure just as their counter-attack was crossing the river, followed by a couple of turns of poor PIPs.


The Patriots seized another political token, and having won another decisive victory (despite their own losses), were well positioned to make proclamation, declaring the area independent of Spain. They succeeded, to win the campaign.

Both battles were relatively even affairs on paper, and each hinged on a single key moment; the first when the Royalists infantry was driven off by Patriot musketry and the second when their cavalry counter-attack froze. Such is the nature of warfare.

Friday, 1 August 2014

Canadians in Caen

Last night we played Battlegroup: Overlord, with a scenario set during the Caen breakout involving a force of Canadians travelling along a road being hit in the flank by a somewhat overwhelming German counterattack.

Here are the Canadians, with carrier-borne infantry to the fore, and a pile of Shermans behind them. The German objective was the village the Canadians are passing through.


Some of the Germans. I seem to have not taken any more pictures of them, but they had Pz IVs, aome Panthers and these self-propelled guns, amongst other things. Oh, and infantry, whose real use was to occupy the village.


The tail-end of the on-table Canadians. There were more Shermans, and some Achilles tank-destroyers, off-table.


The air-support was singularly ineffective. They turned up but once, and failed to hit anything.


Mostly unrecorded by camera, our Shermans were soon burning, unable to make much impression in reply to teh German fire. We had Fireflies, of course, but they spent a lot of the time suppressed and unable to fire. One of them finally managed to knock out a Pz IV however. One of our finest moments of the game ...


Ah, here we are. Wall-to-wall German armour.


German infantry set up some machine-guns and took the target village under fire.


German Commander Caesar to his forces: "Take out that Sherman; it's our greatest threat!"

Canadian Commander: "WTF?"


Canadian reinforcements push onto the table past the smoking remains of other 'greatest threats'.


The germans win was inevitable, and was caused by Canadian morale breaking just as the RAF decided that they might put on another display of formation target-missing.

Geoff and Peter put on another game of DBM, which included a Byzantine flame-thrower. I managed to not get any pictures of it.

Meanwhile on another table we were treated to gorgeous jungle-terrain and a game of the 1970s TSR ruleset Tractics. The apparently complex computations were managed on a laptop, however.


The game involved Australians and Japanese, but I can't tell you much more about it that that.


Related Posts Plugin for WordPress, Blogger...