Saturday, 22 January 2022

With Pike And Musket


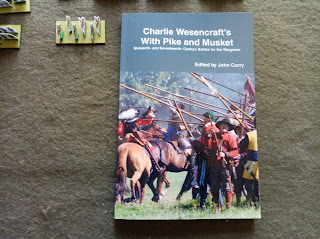
My book came! The 2009 reprint of Wesencraft's 'With Pike And Musket'. Given various postal issues, four weeks or so from the US to Australia was pretty good.

Anyway, this book was originally published in 1975, and, despite the title, is focused very much on warfare in the British Isles from 1550 to 1650, with a strong emphasis on the English Civil War. I have no objection to this.

It starts with a look at the weapons of the period, then covers the organisation of some of the armies - Elizabethan English, Irish, Scots and then those of the Civil War. It then dives into a series of chapters which build up a set of wargames rules for the period. Finally - and the bit I primarily bought it for - it has scenarios for 27 battles from the period, 20 of which are ECW actions.

The rules are kind of what you'd expect for the time, but are not without interest. They are centred around units having an effectiveness rating from 1-4, which can fluctuate temporarily or permanently during the game, and which affects firing, melee and what passes for morale tests in the game. The 'morale' tests are rolled when you want a unit to move, to charge or to receive a charge, and are a D6 roll with the effectiveness rating added to it. Read the result from a simple table to find out if the unit obeys order, stands its ground, falls back or simply flees for good. It's a prototype of the Fire & Fury system really. As a system I rather like it, although testing for every unit every time it moves could get tedious maybe.

The only gap I found in the rules was what happens after a melee. The rules cover how casualties are inflicted, but there didn't seem to be an assessment of winner and loser or any kind of morale test, implying that units simply fight until one is wiped out. And yet the rules do assume that one unit can force another to rout. But maybe I missed it in my first read-through.

The scenarios look pretty good, and cover a range of battles throughout the conflict; all the big classics are there, and some smaller one too. Unit details are deliberately kept a bit vague, and deployments, within certain limits, are up to the players. I like the simple terrain maps too; almost One Hour Wargames in their minimalism.

This is a fun book to read as well. I'm sure I read some of Wesencraft's stuff back in the day, but as a spotty teenager scouring his local library for any wargames books he could find. As a discerning adult I found the author's style as entertaining as the ideas an information he presented. I especially loved his section of why he adopts alternate moves rather than simultaneous ones.

I'm going to finish with my favourite quote:

"The secret of rule-writing lies in the ability to be able to take a detail of movement. fire effect, etc. study it, stretch it to its ultimate in an effort to cover all possibilities and then to simplify it until a playable rule emerges. So often that simplification is ignored."

Friday, 21 January 2022

Another ECW Encounter

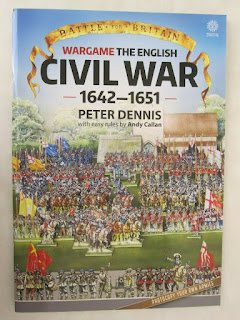
I have a new ECW book coming soon (maybe today if my emails are to be believed) and I'm very excited about it. This is partially why I've been dabbling a little in my ECW rules these past couple of weeks. Anyway, last night I tried another new (to me) set. A few months ago I bought 'Wargame The English Civil War 1642-1651' by Peter Dennis, which is basically a lovely book full of paper figures you can copy and assemble. At this stage I haven't rushed to make the armies, but the book also contains two sets of rules by the prolific Andy Callan. The first is a 'proper' set, and they look serviceable, although they seem to be reliant on units based around individual stands. The other set is designed as a 'beginner' set, and are ruthlessly simple. Naturally I gravitated towards the latter set.

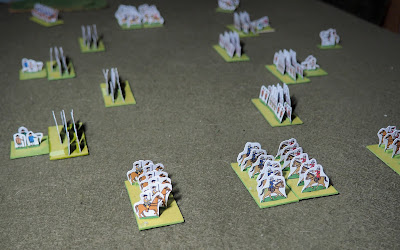
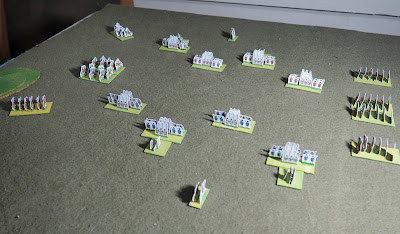
They are two pages long and, as such, have a few gaps, but I read through them and felt they looked playable, and I liked a couple of the ideas in them. So I got out the recommended forces - four foot regiments, four horse regiments and two guns a side - set up the figures and gave them a go

The rules use three-base units, but that's nominal since no bases are removed. So you can use single-base units and infer the individual bases very easily.

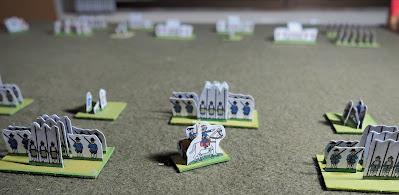
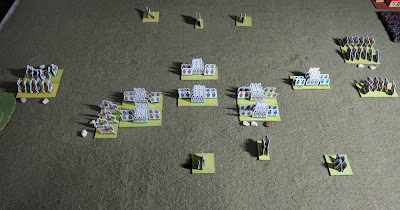
The Royalist commander sees to his dispositions


The rules have a Fire/Move/Fight/Fear Test sequence. In the first two phases you dice to see which side goes first. Units which fire can't move. And movement is fairly restricted if you deviate from going forward.

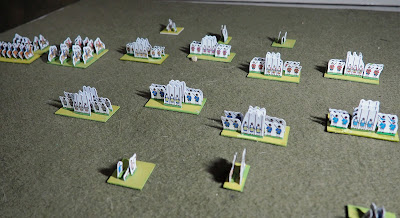
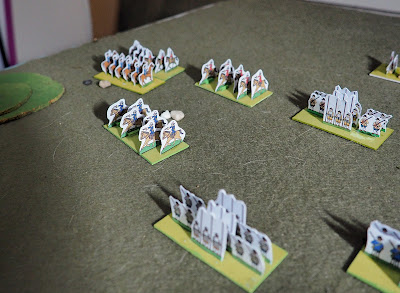
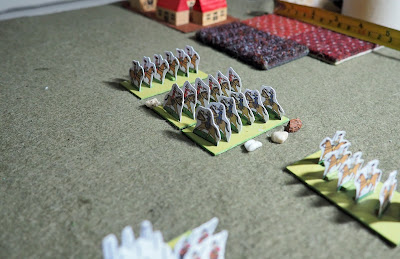
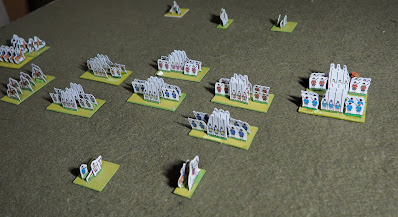
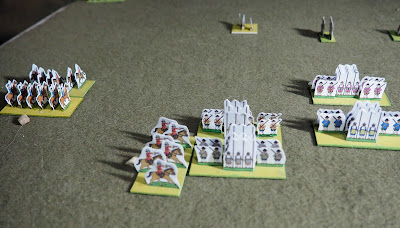
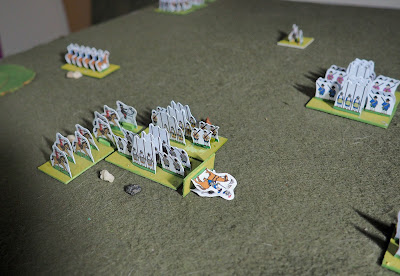
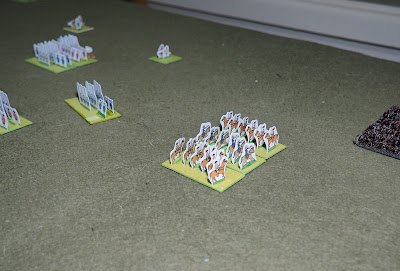
Here we see some initial cavalry attacks on the flanks. They got stuck in on the very first turn.


The foot regiments advanced in the centre and some fire exchanged. Both firing and fighting (close combat) have each unit roll a number of D6 (usually two or three) looking for sixes to score a hit on the opposing unit. When firing at anything other than close range you have to roll to confirm the hit, so firing is relatively ineffective. In this game the artillery exchanged a few shots, but the foot quickly advanced to mask it. Artillery is immobile and pretty useless.


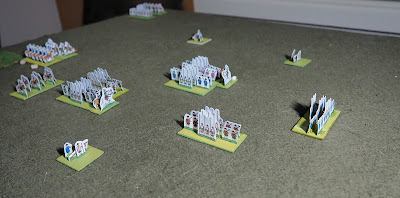
The Royalists adopted a static posture, whilst Parliament continues to advance. I used a die roll to 'decide' the strategy for each side - stand and shoot, a partial advance or an all-out attack.


First blood - a Royalist horse regiment routed. If a unit takes hits during the turn then it must take a Fear Test at the end of the turn. This is a D6 roll, and you subtract the number of hits the unit has taken from it. a 1 or 2 means the unit is disordered, which severely restricts its actions in the next turn. On a 0 or less the unit routs and is removed. In close combat, only the side that lost (by taking the most hits) takes the test - winning a melee means that you don't test even if you took casualties. 


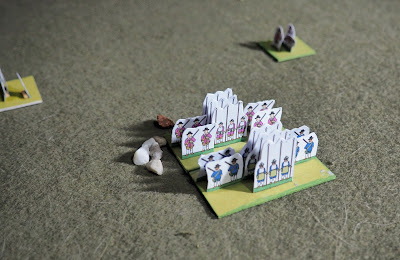
On the other flank a Parliamentarian horse regiment also routed. The white markers show hits and the red marker shows disorder. Fighting has one extra quirk; units normally roll 3D6, but you get a bonus D6 for each hit your opponent has more than you have. So if you start inflicting damage on your opponent there's a bit of a death-spiral effect. Oddly that didn't apply in this case - the Royalist unit had two hits and was disordered, but still managed to score one hit on its Roundhead foe, and took none in reply. The Roundhead then failed its test. Lucky.


The foot continued to close in the centre and on the Royalist right the first melee takes place. A couple of Parliamentarian units had taken hits from firing, which would disadvantage them in the forthcoming melees. However on their right some horse was turning onto the Royalist left flank.


The foot engaged, and a Royalist unit found itself attacked to the front and flank. The rules don't cover how to resolve this; I ran each fight separately, but the flanked unit had to divide its dice.


The height of the battle. Parliament had now lost a foot regiment as well as some horse, but most units were now closely engaged.


The generals now joined the battle. I'd forgotten that they could do this until halfway through the game. They can remove hits from units they join, and also allow a unit to reroll dice. But they risk being killed if a unit take hits, and count as a full regiment lost if they are.


And that's exactly what happened to the Royalist general. They'd also lost a foot regiment by this stage, putting them three units down. An army breaks when it loses four regiments.


And on their right a Royalist horse unit broke, pushing the Royalists to four regiments lost. However Parliament were on three units lost now as well, and there were still Fear Tests to take.


A Parliamentarian foot regiment was on five hits, giving a -5 to their Fear Test roll. 0 or less would be a rout. They rolled a six. They were disordered, but didn't rout. And that gave Parliament the win


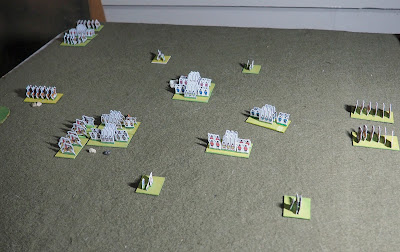
A final overview of the battle. There was still fight left in both sides, and some of Parliament's troops were close to collapse, but the loss of their general cost the Royalists dearly.

They rules felt pretty good, all things considered. I like the melee modifier for the difference in hits, and the Fear Test is a ruthless, but simple, morale test mechanism. If I played them again I'd start tweaking a few things - clarify movement a little bit, for example, and the wording on how generals operate (do they remove a hit each turn, or only the turn they attach to a unit?) Troop quality could be added by simply applying a +1/0/-1 modifier to the Fear Test, making raw troops prone to sudden rout or disorder and veteran troops a little steadier. I think the aim would be to lift or adapt bits from the 'proper' rules in the book. 

52 Games - Game 10

Thursday, 20 January 2022

More Azul


Our household is finding itself a bit directionless as a lot of our regular social activities are still suspended due to Covid, and we're still wary of going out and mixing with other people too much anyway.  It's thrown out a lot of routines, and our family thrives on a certain level of routine. Chuck in some work-related stress and it's  left us a bit drifting and aimless a lot of the time. It's dampened down a lot of my enthusiasm for gaming projects, for sure. So we're looking to establish new routines, albeit temporary ones, to try and kickstart our somewhat dulled brains.

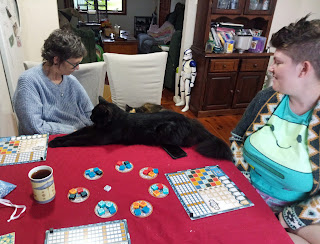
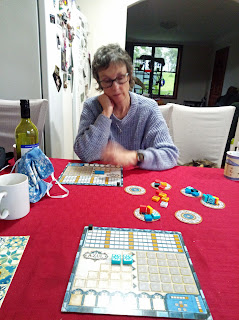
One of these is to try and play a boardgame after tea on a Wednesday evening. We're one of those families that eat our evening meal in front of the TV normally (to be fair, one of the only times we watch TV), but a few months ago we started having a meal at the table once a week, on a Wednesday, and this builds on it. After all, if we're all already sat around a table, we might as well play something.

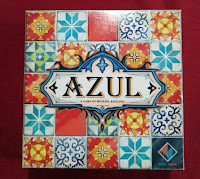
Last night we opted for Azul, since we hadn't had it out in a while.

As you can see, Mr Wednesday thought he might like to play, but we persuaded him otherwise and stuck to just three players.


I've blogged about this game before HERE so won't repeat myself with the basics. 

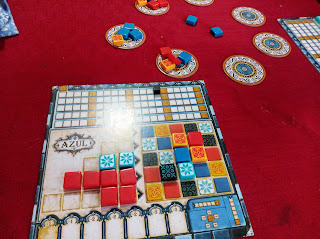
Here's my position early on; I got a nice tight high-scoring block of tiles in the middle of my board, giving me a good lead.


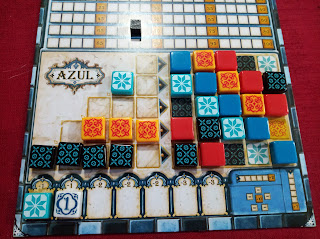
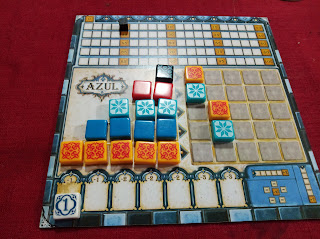
My position at the end - two rows, a complete column and two complete sets of tiles. This gave me a nice bonus score and left me a runaway winner.


Maya dropped out at that point, but Catherine and I continued. We played the variant board, where the tile positions aren't pre-designated. This turned out to be quite interesting, although there was extra effort involved keeping track of the fact that a colour can only appear in each row and each column once.


This was something I hadn't done before; at the end of a round I had all five rows ready to score, with one each of the five colours. I'd placed all bar two of the yellow tiles in the same round.


Any way, I won the second game, and Catherine and I played a third. I started badly in that (one round saw me lose my entire score to penalties), but came back and just clinched a third victory (by two points). I don't think anyone wants to play Azul with me any more.

Anyway, Maya's choice of game also added another entry to my 52 Games project, so that was nice.

Monday, 17 January 2022

Raid On St. Nazaire

One of the things with embarking on a project to play 52 different games during the course of a year is that it has me thinking about games in my collection if not played for a very long time. And this post is about one of them. 

Last week I was idly glancing along the bookshelves for something to read one evening and I happened upon 'The Greatest Raid Of All' by C.E. Lucas Philips. I bought and read it years ago because I'd enjoyed the game this post covers, and started reading it again. Naturally I was less than halfway through when I realised that I was going to have to get the game out again.

'Raid on St. Nazaire' is a solitaire game from Avalon Hill published in 1987 and covers the British commando raid on the German-held French port aimed at destroying the massive dry-dock there. It's a perfect subject for a solitaire game; you get to run run a a meticulously planned mission whilst your enemy simply tries to stop you and pops up in locations you're never entirely expecting.

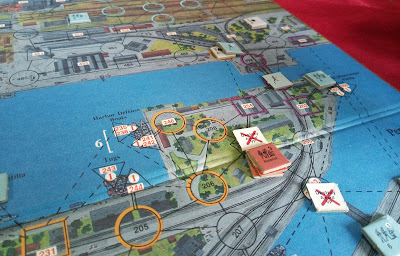
The game itself has a beautiful mapboard, with an aerial view of the port and its facilities overlaid by a series of areas and connecting lines. The shape of the area determines its types (Open, Building, Ship, U-Boat Pen), whilst different lines show the movement costs of moving along them. The areas are numbered, which is used in a few game mechanics, and some colour is used to show the arcs of fire of certain weapons.

Here's the game set up ready to go. The Germans have all of their shore-batteries and flak guns in position, but no troops. Those appear bit by bit through the game as the alert level of the defenders increases.


And here are the attackers - a flotilla of boats and one destroyer - heading up the Loire Estuary.

The game starts at the point where the Germans realise that something is up and open fire..


And open fire they do. This is the result of first round of firing from the Germans. The British have to endure two fire phases; one representing various long-range guns around the port, and then another from the guns actually positioned on the board. Each round of firing lasts until the Germans either miss (and they hit on a 5 or less a lot of the time) or they've taken twelve shots. Those twelve shots can do a lot of damage. They get bonus shots at ships on fire and one free shot at the HMS Campbeltown as well.

Anyway, one of my vessels was sunk, another on fire and several were forced to evade, delaying their approach to the target.


I did have one stroke of luck on the first turn. In the first harbour zone sits  Sperrbrecher 137, a moored ship with two nasty guns on it. Nock's torpedo boat zipped in and sank it on the first turn, depriving the Germans of the two guns that provide a lot of the firepower in that zone, and giving me my first victory point.


The vessels forged onwards. You have to move the Campbeltown as fast as you can towards the dry-dock; the game pretty much hinges on you ramming it and landing the ship's complement of commandoes. Amazingly the destroyer took very few hits.


The same couldn't be said for the smaller vessels. I took an absolute pasting.

The naval phase of this game is similar to 'B17: Queen of the Skies' in that you basically take damage and can do very little to mitigate against it Essentially it's an involved way of randomising which commandoes you will actually get to land, and where.


The Campbelltown rams the Southern Caisson. Whether the attack is successful or not is determined at the end of the game. All you can do is ram it as fast as possible, hope to survive long enough to scuttle the ship and hope that the dice are kind to you - doing those things give you good positive modifiers though.


The first commandoes disembark - six teams from the Campbeltown, and two from a couple of boats at the Old Mole. The latter commandoes had to immediately deal with a German gun in their landing zone, although fire from the ships had fortunately disrupted it, so it was a simple demolition task.


An overview of the game. There are at least three vessels on fire in this shot. The sea was a mess.


In desperation I sent one of the torpedo boats that wasn't carrying any commandoes into the Avant Port. If it survived the gunfire directed at it then it could launch a torpedo at the lock-gates there, removing the need for the commando team assigned to them to attack there and leaving them open to other targets. And even if it didn't survive then it would draw the fire of a lot of German guns and give the boats in the Outer Harbour a better chance of getting through and unloading their troops.

It was sunk pretty quickly.


The commandoes from the Campbelltown moved towards their targets - the winding gears for the caissons, the Northern Caisson itself and pump house. Destroying all of these, plus the Southern Caisson nets you 40 of the 80 points you need for victory. The southern Winding House was destroyed quickly and efficiently. The Pump House is harder though, as two German guns are sited on or around it.


A torpedo boat took out one of the sets of lock-gates. Meanwhile two commando teams landed near the Old Entrance, with their target being the other set of lock-gates.


The Campbeltown's commandoes dealt with the Pump House. Fire from the flotilla suppressed one of the guns, making it an easy target for one commando team, whilst another team used grenades to take out the second gun. The commandoes pushed forward to the northern end of the dry-dock.

There are two types of commando team in this game - Assault and Demolition. The latter carry explosive charges and can blow things up, but they all have a pre-designated target, and must take that out first before taking on targets of opportunity. They get a penalty in combat. Assault teams get a combat bonus, and carry grenades, and are there to protect the Demolition teams from the Germans, either by drawing fire, or going on the offensive.

The Germans appear as counters of varying strengths in random places, and the strengths get higher as the game progresses. They then move towards the nearest commandoes, although how much movement they can make on a given turn is dependent on a die roll, and smaller units will ten to be less active than larger ones. In this picture a number of decent 4-strehgth units are converging on the commandoes trying to set charges on the Northern Caisson


In theory the ships should sit around to evacuate the commandoes. But it's unlikely any would last long enough, so I pulled out the survivors. This would leave the commandoes to surrender, escape the board and hope to make it to Spain or simply die. There are VPs for bringing survivors home, but they're not massive.

Anyway, the four vessels still afloat made a run for it.


The commandoes from the Old Mole were having a tricky time. Their targets are the series of swing-bridges and lock-gates that link the Avant Port to the main St. Nazaire Basin. Destroy them and the Basin becomes tidal, restricting U-Boat operations from the port. But the Germans were active in this part of the board, and the commandoes had their work cut out simply fighting them off. They kept eliminating units, but more would appear before they could get into position and plant explosives.


A team of commandoes from the Campbeltown arrived to reinforce them.


The situation got more desperate, but charges were eventually planted on the two swing-bridges.


The bridges were destroyed, but the commandoes were now in a bad way and fell back. They did manage to take out the power station as well, though.


At the dry-dock the commandoes there were in a lot of trouble with mounting casualties. They had set charges but there had been issues, and it took several turns before the two targets were finally destroyed. In the time a steady flow of Germans had whittled the teams down. I called the game at this point; there were no commandoes with viable VP targets they could reach and destroy before being overwhelmed by the German defenders.


Next morning the Campbeltown blew up and destroyed the Southern Caisson.


Two boats got home, one carrying some survivors from one of the others.


For the loss of almost the entire force I scored 57 VPs of demolitions, plus a couple more for the survivors who got home - 59VP in total. The game's target is 80VP. Historically the real raid scored 53VP.

I achieved the primary objective, though; the Normandie Dock was totally destroyed, so there'd be no Atlantic holiday for the Tirpitz.

Like a lot of solo games this one involves a lot of die rolls. However it's surprisingly light on charts; a few of the key ones can even be memorised and all of them are on the board itself. The younger me who bought this game would rattle through it, but my brain has slowed down now, so whilst I enjoyed playing this game, I don't think it felt as magical as those plays 30 or so years ago. It is an excellent solitaire game, though, and the land part leaves you making lots of important small decisions about how to respond to a rapidly changing situation whilst staying focused on your goals. It's a shame that the ship part is a long die-roll lottery, although to be fair I imagine it mimics the real situation quite well. 

Worth buying if you find it for sale though, if only for the beautiful map.

Saturday, 15 January 2022

Codes And Clues

This week we have mostly been deducing things.

For starters we've been playing a bit of Codenames. 

In it players form two teams. One person in each team (the spymaster) has to guide the others to a group of friendly secret agents hidden in a grid of words (the Codenames) whilst avoiding revealing the enemy agents, the innocent bystanders or, worse, the deadly assassin. It's a simple game that you should be able to get most people to play, but the large number of word and different grid layouts give it a lot of replay value.

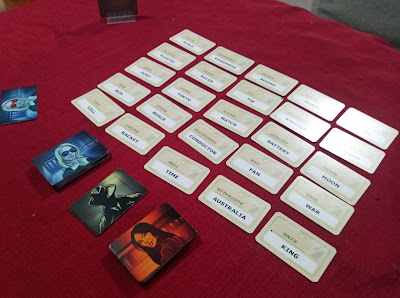
Here's the grid laid out. 


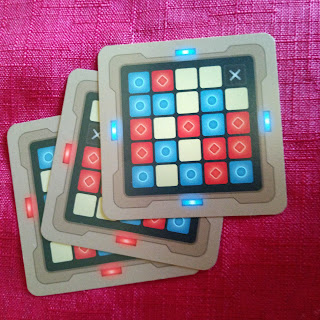
Two of the team-members have access to a card like this; they can see it at all times. This 'maps' the agents onto the grid of words. The colour on the outside of the grid tells you which colour goes first.

(If you applied this card in this orientation to the grid above, for example, 'Scale' would be a Blue agent, 'Kangaroo' a Red one, 'Round' an innocent bystander and the card at the very top right that's got too much glare to read the Assassin.)


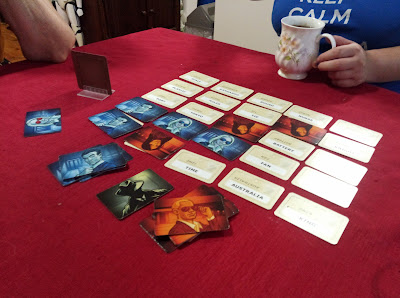
Here's a game on the go (not using the grid card above). Currently Red and Blue are evenly matched, having found four agents apiece. The spymasters guide the other players by giving a single word clue and a number of cards to which it applies; for example if both 'Kangaroo' and 'Australia' are Blue then the spymaster could say 'Antipodes-2'. The agent(s) then tap the card(s) they think the clue relates to, and they are covered up by a card relevant to their true nature. Your turn ends if you find an enemy agent or a bystander. If you choose the Assassin's card then the game ends and your team has lost.


In fact we've been playing it with three players, which is interesting. In the three-player game, you have two spymasters who can see the board and who give clues, but the third person in the field agent for both; they play in both turns trying to interpret the clues. So the field-agent will always be on the winning side. They are encouraged to do their best for both spymasters. So essentially in a given game the two spymasters are competing against each other and the third person is 'neutral'. Obviously we rotated the roles around the table, and all picked up wins.

After spending the week finding secret agents, today we headed into town to play an interesting detective game - CSI Wollongong, run by a company called CluedUpp. Basically it's a scavenger hunt run across the city-centre, and managed by an app we all installed on our phones. Teams of up to six people set out to solve a number of murders. We did this last year, and had a good time, so thought we'd give it another go.

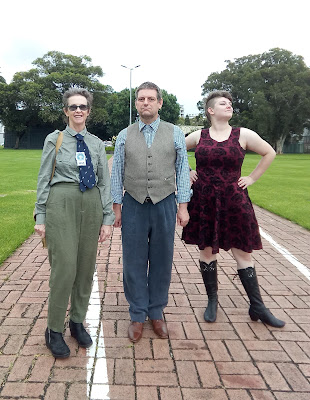
Teams are encouraged to dress up. So we did. We've started working our way through 'Elementary', so we allowed our costumes to be inspired by Holmes, Watson and Gregson.


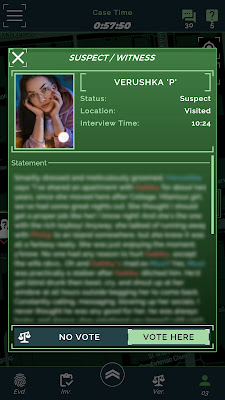
The app running the game shows us various points on a map of Wollongong where we'd could find witnesses or useful locations. When you got within a certain distance of the point it would show the character's details and you could pick up a statement and maybe interrogate them using a limited supply of questions. Sometimes, though, you'd have to solve a puzzle first and sometimes one would give you an object which you could take to a forensics lab to gain more information. Some points awarded penalties (usually time penalties) and some offered rewards (a time bonus or extra questions).

Here's the clues laid out on the streets of Wollongong at the start. Some clues open up new ones, which may require you to rethink your route.


Here's a sample witness, although I have blurred out their statement (in case one of you ends up playing the game).


Once you have interviewed a few witnesses you could guess the killer at any time, but there was a massive time penalty if you got it wrong.

At the end of the day the winning team would be the one that solved it in the shortest possible time, but there was also prizes for best costumes, best team name and a few other things as well.

Last year we worked out the case very early on, but were too cautious and then spent ages verifying our solution before submitting it. This year's mystery was harder, and took us a couple of hours. In fact we'd ended up getting tired, it was raining and one of our team wasn't feeling well, so we opted to call it based on the evidence we had so far, and just call it a day if we got it wrong. We were lucky - our guess was, in fact, correct. So at least we went home with a win.

Both Codenames and CluedUpp count towards my 52 Games project as well.


Related Posts Plugin for WordPress, Blogger...