Tuesday 25 November 2014

Void and Stars - An Alternative Activation System

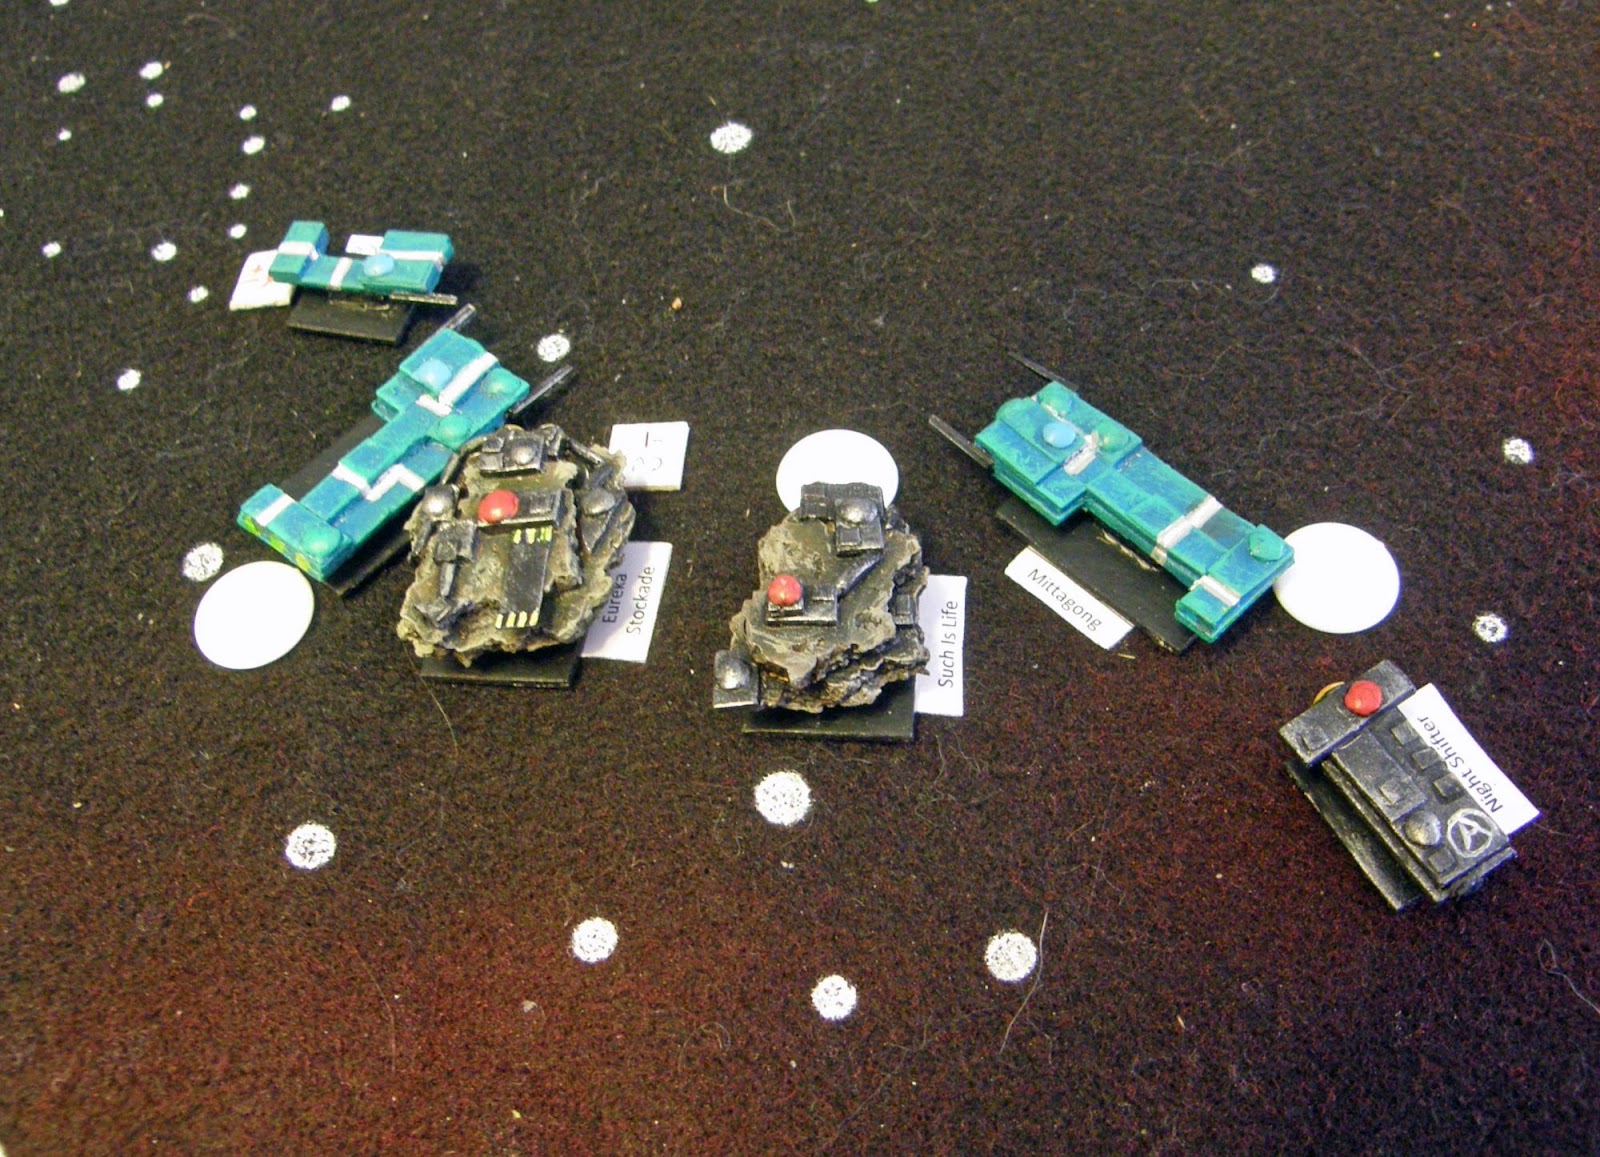
'Void and Stars' was a playtest game of starship combat which used a version of the 'Ganesha Games' 'Songs of Blades and Heroes' system. Development activity on it fizzled out a couple of years ago, but from time to time I give it some thought, wondering if there's still a viable game to be teased out of it. After all, this is the size of starship game I want - five to eight ships a side - but with a low level of bookkeeping and technical detail, and no pre-plotted moves.

One of the problems with it was the activation system. Whilst the idea of some of your figures not doing anything during a turn kind of works for individual beings in a skirmish setting, it didn't sit quite right to an environment where your playing pieces - spaceships - are in constant motion. The problem Void and Stars had was that an entire fleet could spend a lot of the game flying around in straight lines not shooting because of a few unlucky activation rolls. Add in terrain and you had ships flying headlong into planets because one of their fellows had a bad roll when activating.

The principle was sound, but a number of games showed that it didn't quite work so well in practice.

For a while I've been mulling over a variation in the activation system, which allows all ships to act in some form of controlled manner, whilst still rewarding those ships with quality - or luck. I'm certain there's holes in it a mile wide, and I haven't crafted the wording into something consistent and logical, but for what it's worth, here it is - untried and untested.


Alternative Void and Stars Activation System

Both sides roll for initiative. The highest roll decides who activates first. In the event of a tie, reroll.

The player with initiative chooses a ship that has not attempted to activate this turn, and may attempt to activate it with 1, 2 or 3 dice. Each successful roll against Quality gives an action. A ship automatically has one action, plus however many it rolls. However at least one action must be spent to move the ship (including a turn)

If a ship fails to activate with two or more dice, the initiative passes to the other player.

Otherwise the player with initiative chooses another ship to activate.

If a player has attempted to activate all of their ship, initiative automatically passes to the other player. They may attempt to activate each of their remaining ships one after the other, with 1,2, or 3 dice as normal. However if a ship fails to activate with 2 or more dice, then subsequent ships cannot activate with more than 2 dice. If a subsequent ship fails to activate with 2 dice, then all further ships may only attempt to activate with 1 dice.

Once every ship has attempted to activate, a new turn begins.

Indirect fire markers move twice during the turn, immediately after a player activates their final ship.

Example. The Red Player and the Blue Player each have three ships, Red One to Red Three against Blue One to Blue Three.

The players roll initiative and Red wins. He chooses to go first.

He activates Red One with 3 dice, but fails two activations. Red One gets two actions, one of which must be a move.

Because Red failed two or more activations, initiative passes to Blue.

Blue actives Blue One with two dice, and both rolls succeed. Blue One gets three actions – one compulsory move and two other actions. Blue can now attempt to activate another ship, and attempts to activate Blue Two with one dice. The roll fails, so Blue Two merely gets one action, which must be a move. However because it was only a single activation roll which failed, Blue keeps the initiative. Blue has one ship left; Blue Three. He activates it with three dice, because there is no reason not to.

Blue has now attempted to activate all of his ships, so all indirect fire markers move and resolve attacks. The initiative passes to Red. Red has already attempted to activate Red One, so just has Red Two and Red Three this turn. He attempts to activate Red Two with two dice, and fails with both of them, just getting the compulsory movement action. Red Three is the only ship that has yet to activate in this turn. But because on his previous activation Red failed with two or more rolls, Red Three cannot attempt to activate with more than two dice. Once Red Three has been activated the indirect fire markers move again, and then the turn ends.


I hope that makes some sense. Comments and criticism welcome.

The other major effort I think is needed is on the damage system which, whilst workable, needs a little streamlining in my view. But I'm not sure where to start on that.

Sunday 23 November 2014

Sophie and the Algerine

I am currently rereading Patrick O'Brian's 'Aubrey and Maturin' series, having realised that I hadn't reread some of the later books in the series since they were first published. Or, at least, I couldn't remember what happened in them. With a couple of the later books dealt with, I decided to go back to the beginning, and am most of the way through 'Master and Commander', the first in the series.

I thought that it would be quite fun to refight one of the actions from the book - indeed the first action described. This means that, whilst it is not Aubrey's first fight by any stretch of the imagination, it is his first in command of his own vessel.

So, it's 1800, and Captain Aubrey is in command of the 14-gun brig Sophie, operating out of Port Mahon in Minorca. He has been tasked with escorting a convoy and, whilst exercising the crew at their guns, it is noticed that Algerine galley has slipped in and taken one of the merchant vessels, the Norwegian Dorthe Englebrechtsdottir. Sophie speeds off to the rescue.

As a scenario this uses a few rules I'm not that familiar with - merchant vessels, chasers and oared vessels.

The Sophie is an unrated vessel, Hull/Broadside 5, Gun-class E (but with only a +2 at point-blank range, as she is armed with guns). Her crew are Experienced; it is obviousl from the book that they are competent, but not a finely-honed fighting machine. I gave her one crew party to make the scenario more interesting; in a larger game a vessel her size wouldn't rate one. In addition I gave her 1 Bow Chaser, but given that it's a single small gun I decided that it wouldn't inflict any ratings hits. However if its shot scored a 'hit' and it was also a critical, then the critical would count. She has two masts.

The galley was rated as Hull/Broadside 4, although the Broadside factor is virtual and for damage/striking purposes only. I gave it 3 Bow Chaser factors and 2 Stern; the book seems to suggest that it was well-armed with 24- and 18-pounders. I gave it a Gun-class of B, meaning that it could easily out-range the Sophie's 4-pounders. The galley rated 6 Oar Factors, and I made its crew Experienced as well with 3 Parties. The rules don't seem to cover switching between oars and sail, which I thought was odd, so I assumed that the vessel would declare in its Command and Repair phase. Under sail the galley uses a single lateen (fore-and-aft) sail.

The Dorthe Englebrechtsdottir is simply a merchant - 4 Hull, no broadside, or indeed any guns at all. She has a Poor crew with No Crew Parties. I decided that she couldn't set full-sail. Unlike the other two vessels she was Ship Class 1.

The setup. I used a 3' x 3' area, with the a light wind coming from the north. The Algerine could set up anywhere on the south edge. The Dorthe Englebrechtsdottir was placed heading east about a third of the way in from the west edge. The Sophie started off-table. In each British action phase after that in which the galley fired or declared a boarding attempt, roll a dice. On a '6' the Sophie appears at the centre of the north edge and moved normally from then onwards.

I left the striking conditions as in the rules; technically Algerines fight to the bitter end, but I just wanted to see how the scenario played out at a basic level. Victory is really about control of the Dorthe Englebrechtsdottir; if the Algerines can sail her off the south edge then they win. If the British can sink or drive off the galley then they win. If the Algerines sink or capture the Sophie as well as the Dorthe Englebrechtsdottir then they can be considered to have won a major victory.

And away we go!

Here's the hapless Dorthe Englebrechtsdottir


The Algerine rows into sight. That galley needs a bit of a repaint.


The galley attempts a long-range shot at the merchant. A lucky shot; it hits the Norwegian, who hauls down its colours and heaves to.


Unfortunately the long-range shot was a bad idea; before the galley can take possession of its prize, the Sophie comes into sight, alerted by the firing.


The Algerines lower boats to take possession of the merchant, whilst the galley prepares to engage the British vessel.


The galley fires, inflicting no damage. Corsairs board the Dorthe Englebrechtsdottir.


The Sophie yaws, and fires a broadside down the length of the galley. A lucky roll sees the galley devastated - most of its guns dismounted and the bows wrecked.


Ignoring the galley for now the Sophie moves towards the captured Dorthe Englebrechtsdottir, and lowers boats in order to recapture it.


The crew of the Sophie board the Norwegian and in a brisk fight they retake it. Meanwhile the Sophie entertains the galley with another broadside


As the Sophies sail the merchant out of reach of the galley, the Sophie brings her broadside to bear again, and another devastating broadside sees the galley strike.


A decisive victory for Jack Aubrey! The Algerine firing so early was a mistake, as it brought the Sophie into the action before the Dorthe Englebrechtsdottir could be captured. Ideally, and as in the book, the Sophie should appear and be left with the choice of recapturing the merchant or taking the galley.

A second run-through saw the Algerine not make the same mistake. It closed on the merchant, then lowered a boat with a boarding party whilst it rowed to windward to guard against interference from the Sophie. This would have been a good plan, as it left the galley in a good position - between the Sophie and the prize - had the crew of the Dorthe Englebrechtsdottir not driven off the corsair boarding party. However a shot from the stern-chasers caused the merchant to strike, albeit at the cost of its foremast, fouled over the side. The galley sent a second crew party to board it and clear the fallen mast. At this point the Sophie arrived. It sailed swiftly past the galley, hitting it with a couple of shots, before heading for the Dorthe Englebrechtsdottir in order to recapture it before it cleared the fallen mast. However the prize-crew held on for shot after shot, cleared the mast and attempted to sail their sluggish, crippled prize to safety. The Sophie matched course, and fired a few more shots, but still the prize wouldn't strike. The galley had worked in behind the Sophie now, and was causing damage - at which point the light breeze died entirely, leaving the Sophie becalmed. It also left the prize in the same state, and another shot saw it strike, but the Sophie was now at the mercy of the galley - and it had none.


Aubrey made a gallant attempt to bring his ship back into the fight by towing with boats, but the galley was able to out-manuever him and keep up a constant, wearing fire. With no hope of relief, and no chance of escape, the Sophie struck.

Aztecs at the Australian Museum

Yesterday I went up to Sydney to see the Aztec exhibition at the Australian Museum. This has a couple of hundred artifacts loaned from various museums, plus some special displays of its own.

The exhibition is in two parts. The first looks at the origins of the Aztecs, their life and their culture. The second part covers the Spanish conquest, how parts of their culture have been preserved and a few bits abut how their words and culture survive today, mostly through foods, and the words for foods, such as tomatoes, chocolate and chili.

For this blog I took a few pictures of things that might be of interest to gamers.

One of the centrepiece displays in the first gallery is this life-size reconstruction of an Eagle warrior.

He's carrying a club and a sling.


Slung on his back is a mean-looking macuahuitl.


I think these were labeled as Tarascan warriors. I'm not sure, and I forgot to photograph the label.


Statue of an Eagle warrior. I think the smaller one is a Jaguar warrior.


This is a scale-model reconstruction of the temple at Tenochtitlan, just in case you didn't realise how big it actually was. That's a man halfway up the steps. Those are steep steps for a society that hadn't seemed to have invented the hand-rail. Also no disabled access.


There were some weapon reconstructions, but they weren't anything more than were on the warrior reconstruction.

There was also an amazing 17th century painting showing key scenes of the Spanish conquest. Heaps of detail of both Spanish and Aztec armour and weapons, plus boats, architecture - the lot. And spotlights on it so that when you got close enough to see detail the reflections hid it. Annoying.

This final picture isn't from the exhibition. Just outside it is a display on armour in the animal kingdom and in human society. This is armour from Kiribati (an island in the Pacific) made from coconut fibre. Next to it are shark-tooth swords, and those stringy objects on each side are gauntlets with sharks' teeth embedded in the back. Sorry about the dodgy exposure.


Thursday 20 November 2014

The Battle of Boonville - 17th June 1861

We payed a small Longstreet scenario this evening - the Battle of Boonville (fought in Missouri, and not to be confused with the Battle of Booneville, fought a couple of weeks later in Mississippi). Although small, this was one of the first significant land actions of the war.

We played it through twice. In the first game I took the defending Confederates, whilst Ralph took the Union.


The Union columns march into battle.


The Confederates await the attack. Virtually all units were Recruits, with the Union troops being rated Seasoned and the Confederates Cautious.


As the Union stumble into an unmapped patch of rocky ground, the Confederates fire their first volley. Caesar (umpiring) forgot the cotton-wool, so we used torn-up tissues as smoke.


The Union continue to push forward under fire, and a second unit comes up in support.


Charge!


The Confederates held and the casualties they had inflicted on the Union force (including a firefight on the other flank) were sufficient to cause the Union commander to order a retreat.

In the second game Ralph took the Union again, and Caesar the Confederates. A confused Confederate unit left the cover of a fence to engage the advancing Union army more directly.


The Union attacked.


The Confederates retreated.


Confederate cavalry. Didn't do anything.


The Union attacked again and the Confederates retreated again.


A Confederate unit broke, and with it the morale of the army. The second game was a Union victory.


This was a fun and very quick, scenario, although the balance was suspect, with the Confederates ensconced behind a network of fences that gave them a bit of an edge when it came to close combat, plus in position of a deck that favoured them in terms of cards that could totally bugger up the opponent's plans. Great to see Ralph playing a battle set in the Trans-Mississippi theatre though.

Dave, Peter and Geoff played DBA - Greeks vs Sea Peoples.


It featured Goliath, seen here taking on some Greek light horse.


Wednesday 19 November 2014

A Big Day

Another non-wargaming post. But an important one for my family and for me.

We emigrated to Australia from the UK just over six years ago. Today my wife Catherine, my daughter Maya and I became Australian citizens*.


My son Cei took the pictures. He became a citizen earlier this year.


Same mayor. Same choir. Same room.

Some statistics. In this ceremony, one of four or five held each year in Wollongong, fifty people became citizens. We came from sixteen different countries. The UK was well-represented, but there were people from China, Myanmar, Canada, the USA, Lebanon, Congo, Italy, Thailand, New Zealand, The Philippines, Iran, South Korea and even Azerbaijan.

It means that I can, indeed must, vote, can apply for government jobs, get an Australian passport and serve on a jury. And I can say that I'm Australian, which is really quite cool.

*Actually we all four have dual UK/Aussie nationality, as we have retained out UK passports. Handy, although it prevents us from becoming members of parliament here, were any of us so inclined to become one.

Saturday 15 November 2014

The Return of Rainbow and Avon

Last week I blogged a couple of refights of a Napoleonic naval action between a French 40-gun frigate, La Nereide and two smaller British ships, the 22-gun Rainbow and the 16-gun Avon. After I wrote them I actually came up with, and played, a finalised version of the scenario, based on a closer reading of the action. Basically La Nereide and Rainbow fought first, with Avon coming up later. So I have spaced the entry of the British ships.

Here it is.

The ships are:

French

La Nereide (44) - Superior 5th Rate, Experienced crew, Hull/Guns 8, Gun Class A

British

Rainbow (22) - Inferior 6th Rate, Veteran crew, Hull/Guns 7, Gun Class A
Avon (16) - Unrated, Carronade-armed, Veteran Crew, Hull/Guns 5, Gun Class E*

Setup

This can be fought on a 3' x 3' area. The wind is coming from the south. La Nereide is in the SE corner heading NW. Rainbow is in the SW corner heading NE. Both ships start 6D6cm from their respective corners. Avon is not on the table at the start of the battle.

Special Rules

At the start of each British Action phase roll a D6. On a '6' Avon is placed in the SW corner, heading NE, and moves normally that turn.

On the whole this heavily weights the scenario in favour of the French, who have a chance to take out the smaller British ships one at a time. A game-orientated British player will obviously avoid combat with the Rainbow until the Avon comes up, but where's the fun in that?

And the replay? La Nereide gave Rainbow a right royal battering. Avon took a long time to appear, piled on full sail to get into the fight and was defeated very rapidly, leaving La Nereide to then finish off Rainbow. Much of the battle was fought in a strong wind, which made accurate maneuver difficult.

Friday 14 November 2014

36AP Epic HOTT

I tried a couple of games of Epic 40K HOTT last night, using 36AP on a 2' x 2'  board. They were both excellent games, showing that 36AP is a very viable alternative to the (admittedly quicker) 24AP version.

I only had two armies with me - Squats and Khorne (Chaos). In both games I played the Squats.


Caesar took the forces of Chaos in the first game.


We both had a couple of Behemoths, of course.


I tried to flank Caesar's army with my bikes and trikes.


Meanwhile the Squat warriors (Blades) got stuck into everything that was in front of them, with varying degrees of success.


A Tower of Skulls broke through the Squat lines and put the Squat general under serious pressure.


Another Chaos war-machine joined the fight; this one housed the army's general. Unfortunately it got backed up against the Tower of Skulls, failed to recoil and was destroyed, breaking the Chaos army and giving the Squats the victory.


Dave played the Chaos army in the second game


The armies got stuck into each other pretty quickly.


Fierce fighting saw both sides' armies thinned out.


On the Squat right some artillery held off the advancing Chaos hordes, although it couldn't get a clear shot at the Chaos Champion himself.


On the other flank Squat Beserkers swept all before them.


Both armies were really taking  lot of casualties in the centre.


The Squat general came under attack from war-machines again, and this time he was destroyed.


The chaos army had lost more points though, so the battle continued. Continued, that is, until they brought back a pile of Hordes, reducing their losses to below those of the Squats. A victory for Chaos.


Not much else left.


Despite having 50% more troops on the board, neither game felt overly cramped. With 1D6 worth of PIPs, there were some tricky decisions to be made as to what to move each turn, especially after the armies broke up. And reserve lines became a feature. I can highly recommend a 36AP game of HOTT.
Related Posts Plugin for WordPress, Blogger...